Wedding Gift Fail Has Happy Couple Cursing Your Name

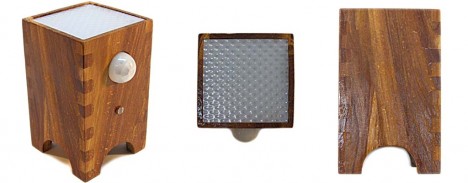
[Superluminal] received an invite to his friend’s wedding. He got together with some mutual acquaintances to take up a collection as a wedding gift. But as things go, a suitable present couldn’t be found. The pooled money itself ended up being the gift, but apparently a greeting card with a money pocket inside of it wasn’t good enough. The group decided to encase the coinage in a block of sugar that doubles as a lamp.

Now as with many well-meaning projects this started out with a rendering of what the final product would look like. That image came out great, with a high-gloss dark amber cube lit from the bottom with the coins suspended throughout catching a bit of a glint. They bought 43kg (almost 100 pounds) of refined sugar, and made a base/mold combination out of sheet metal. A lot of induction cooking went into producing thick syrup that could be poured into the mold. The problem is the final product is basically opaque. Not a sign of the 300 Euros within.

But don’t feel too bad for the groom and his bride. The image above shows him trying to get at the prize. He must do some hacking himself because he has a pressure washer, jack hammer (or is that big drill?), humongous cold chisel, and sizable hatch already at his disposal.

We can’t help but wonder if a heat gun could have polished the sides of the cube and helped add translucence?

How To Grow Your Own EL Wire DNA Helix Lamp

el-wire-helix-lamp

[LucidMovement] was looking for some crystal-based artwork and just couldn’t seem to find anything that fit the bill, so he decided to build something himself.

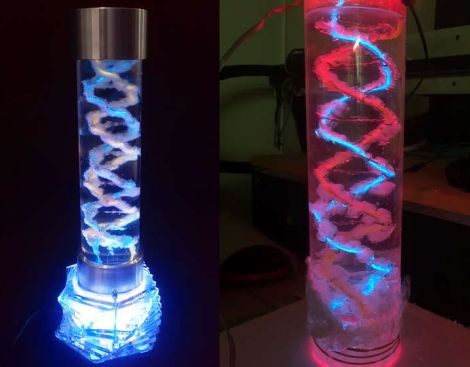
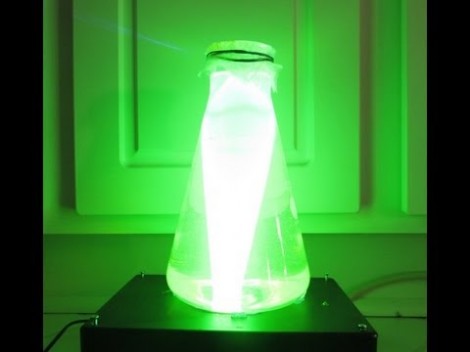
The inspiration for his desk lamp came from something we’re all familiar with, a DNA double-helix. To grow the crystals he built a helix-shaped growing substrate out of nichrome and EL wires, submerging them in a warm alum solution. Once he had a nice set of crystals, he mounted it in an acrylic tube, filling the air space with clear silicone to seal off the display. He then mounted the silicone-filled tube on top of a rotating acrylic stand that he had cut for the project. The stand is made from several sheets of acrylic and contains both the gearing for movement as well as RGB LEDs to light the display from the bottom.

The lamp looks great when sitting idle, but when he powers it on it really shines (no pun intended). [LucidMovement] put a ton of work into the lamp, and offers up all sorts of tips, tricks, and considerations for anyone looking to build their own. Be sure to check out his writeup for plenty more details, and stick around to see a short video of the lamp in action.

Continue reading “How To Grow Your Own EL Wire DNA Helix Lamp”

Impromptu Lamp Runs Linux

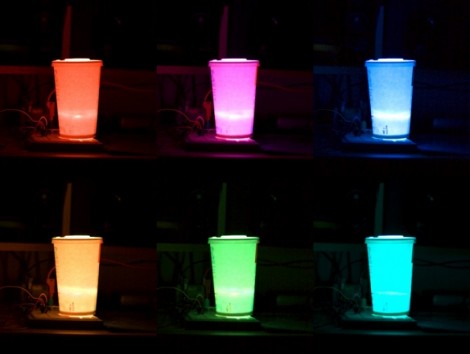
This LED lamp, which uses a soda cup as a lampshade, is Internet enabled thanks to a Linux board (translated). To say the system is overpowered would be a gross understatement. But at least there’s plenty of room for growth.

The lamp is really just a hardware extension for the Linux board. A half-dozen colored LEDs are driven by an ATmega8 and a few transistors. A Fox LX832 board pushes color instructions to the microcontroller via the i2c protocol. [Gibus] chose this board because it has a built-in Ethernet port which makes it perfect for communicating via a smart phone browser. This is where the majority of the work on the project happened. He coded a Flash application that lets you select color, hue, and saturation data from any device that doesn’t run iOS. These commands are processed by a C application running on the Linux board. See a demo of the web app, and the resulting color changes in the clip after the break.

Continue reading “Impromptu Lamp Runs Linux”

Color Sensing With An RGB LED And Photoresistor

[Fjord Carver] brings together an RGB LED and CdS Photoresistor to make a color sensor. Those Cadmium Sulfide lights sensors usually have a very wide swing of resistance when exposed to varying levels of light sensitivity. That makes for great resolution when reading them using the ADC of a microcontroller. The LED comes into play by shining known wavelengths of light on the surface being measured. Three separate readings are taken with each of the LED’s different colors, then used to extrapolate the RGB value of the test material. We saw the very same method used a couple of years back. This time around it’s an Arduino doing the measuring instead of a PIC.

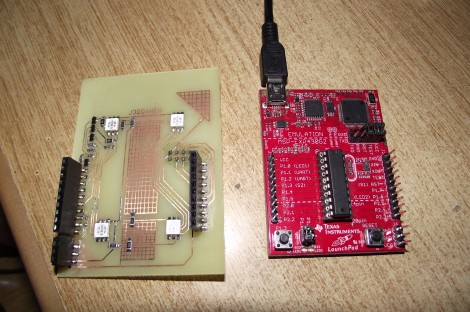
So why isn’t that sensor shown in this picture? It’s because we appreciate the application which [Fjord] is using for this sensor. He built a lamp that shines the same color as the surface on which it is placed.

RGB Upgrade For Ikea Single Color Fiber Optic Lamp

Five bucks will buy you a STRÅLA lamp from Ikea. It’s a battery operated hanging lamp that pipes the light out through multiple branches of fiber optic bundles. But you’ll only get white out of this, which is pretty boring. [Boris] decided to swap out the stock LED for an RGB unit and drive it with an Arduino.

The lamp nucleus is just a couple of pieces of plastic which can be popped apart to reveal the shard of PCB hosting one LED. The body of that diode is flat on the top, and [Boris] filed down his replacement to match the form factor. There are only two conductors in the wire that runs between that PCB and the battery pack, so he replaced them with four conductors (R,G,B, and GND). His prototype uses the Arduino’s PWM capabilities to control the colors, but [Boris] recommends transitioning to a simple chip like a PIC 12F675 or one of the smaller ATtiny microcontrollers after you’ve got the bugs worked out.

See how this turned out in the clip after the break.

Continue reading “RGB Upgrade For Ikea Single Color Fiber Optic Lamp”

Camping Light Retrofitted As A Solar Recharging Station

With grand plans of tenting out for several days at a music festival [Josh] needed a way recharge his portable devices. In the past he’s lugged around a 12V battery with him, but this year he wanted to make things easier. He ended retrofitting a camping light to do the job with the help of the summer sun.

The first step of the project was to source some rechargeable batteries. He toyed with the idea of Li-Ion cells but ended up going with NiMH because the charging is more forgiving and he got them at a great price. Because of the lower operating voltage (1.2V versus Alkaline’s 1.5V) he needed to squeeze two more into the lamp housing. Here you can see that he just managed to get them to fit in the wire-run area down the middle of the case.

Next comes the recharging circuit. He based his design around an ATmega44, using a voltage divider and the ADC to detect when the batteries are topped off. During the day this is connected to an external solar panel and it’s ready to charge his phone when he gets back at night.

Sustainability Hacks: Thin Client Server

It’s not environmentally friendly, but most of us run a small home server 24 hours a day. A small server is a useful tool to have that unfortunately wastes a lot of energy. [kekszumquadrat]’s thin client home server is actually a passable LAMP box that doesn’t draw a ton of power.

[kekszumquadrat] started looking at the SheevaPlug when beginning his quest but was a little concerned about the power supply failing. Looking for alternatives, he ran across a lot of cheap thin clients on eBay. The price was right and everything runs Linux, so a few days later he had an HP t5710 thin client on his doorstep.

This little computer came a copy of an embedded version of XP on a flash drive connected to the IDE port. Ditching that “operating system”, [kekszumquadrat] connected a USB hard drive and installed Arch Linux. After a few updates and package installations, he had a useful machine connected to the Internet.

Compared to the 7 Watts the SheevaPlug draws, the 15 W thin client is an energy hog. Compared to our improvised servers, [kekszumquadrat] is doing a remarkable job. Recycling old hardware never hurt anyone, either.