Cardboard Lampshade Makes Ordinary Recycling A Centerpiece Of Your Room

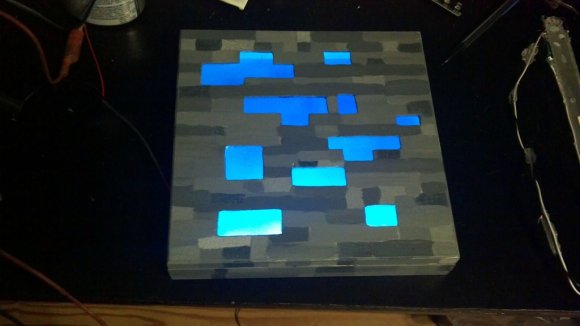
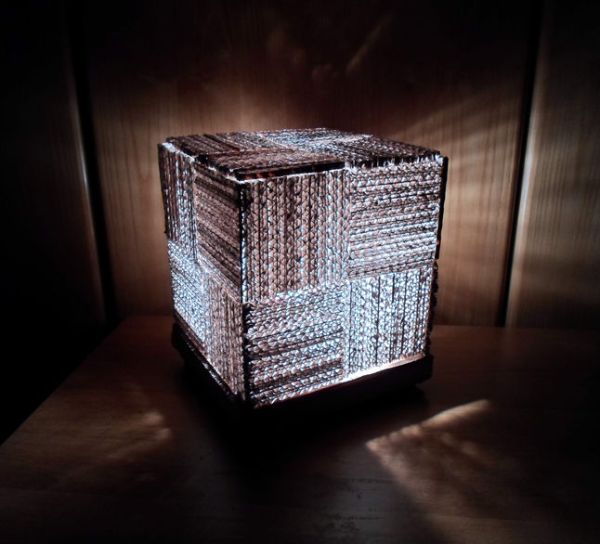
This cube lamp was assembled using common cardboard. Not only does it look interesting, but it’s basically free with every Ikea purchase since all you need is a source of cardboard, cutting implements, and glue.

[Lindarose92] fabricated the shade out of narrow strips of corrugated cardboard. This particular lamp also has a cardboard base but we’re sure you could use it for just about any light source with doesn’t generate enough heat to cause problems. The build starts out with the tedious process of cutting 5mm by 8cm strips, and you’re going to need a lot of them. Each strip is cut perpendicular to the corrugation, which allows the light to shine through the wave pattern. The strips are then glued into 8cm x 8cm squares, which are in turn glued together into the four by four panels that make up each side of the cube.

Boom, you’re done. And if you get tired of it, just toss the thing in your recycling bin.

[via Hacked Gadgets]

Diamond Ore Wall Lamp Brings Minecraft Into Your Home

diamond-ore-lamp

We were surprised to see all of the Christmas gifts that revolved around Minecraft. Seems like there’s a lot of stuff for sale, but we still like the DIY spirit that comes with making your own. [Thacrudd] recently finished this project. It’s a wall lamp that looks like Minecraft’s diamond ore.

The enclosure is a wood box that used to contain chocolates. After studying the pixel art texture for the game’s diamond ore blocks he marked out the pattern and headed over to the scroll to rough them out before finishing with files and a rasp. Next came paint, which was sourced as a sample from the home store. This left him with one shade of gray, but the variations were easy to add by mixing it with white or black.

A strip of white LEDs gives the lamp its inner glow. The openings have been covered with blue acrylic which keep the dust out while providing the appropriate hue.

[via Reddit]

Glass Delay Line Slide Used In An RGB Lamp

glass-delay-lines-lamp

The spire used in this lamp is a part from an old television. It’s a glass delay line slide which pipes the light up from the Bluetooth controlled RGB lamp (translated) in the base.

We have looked at delay lines previously when [Dave Jones] tore down a camcorder to get at one. But we must have missed the EEVblog follow-up episode which explains how the glass slides work. The device uses physical distance to form a delay. Waves directed into the edge of the glass slide bounce around at an angle before being sensed at the collection point. [Lukas] liked the visual appearance of the part and decided to use it to add visual interest to his lamp project. The nature of the glass makes it perfect for directing the light up and away from the PCB.

The lamp consists of one RGB LED module controlled by an ATtiny2313 microcontroller. Also on board is a HC-05 Bluetooth module. This along with an app he wrote lets the user change lamp color and behavior wirelessly. You can see the lamp in action in the video after the break, but we think the camera shot probably doesn’t do it the justice it deserves.

Continue reading “Glass Delay Line Slide Used In An RGB Lamp”

Adding A Timer Feature To This Desk Lamp

timer-lamp

[Steven Mackaay] added a simple user interface that implements a shutoff timer for his desk lamp. His project log comes in two parts, the breadboarding and the actual implementation.

He wanted a few things out of the build. The first is an LED that would help him find the lamp in the dark. The second feature is a shutoff timer with different delay options. To get everything working he used a PIC microcontroller to drive a mechanical relay. That relay switches the mains power to the lamps. Now he uses one button to switch the lamp on and off. The other selects a shutoff timer of one, five, or thirty minutes. Power for the control circuitry is provided by the green wall wart PCB seen in the photo of the electronic guts.

This is a pretty general setup that could be applied to a lot of other mains switching applications. Just connect the logic hardware to some type of relay.

Pixar-style Lamp Project Is A Huge Animatronics Win

pixar-lamp-animated-procedurally

Even with the added hardware that lamp still looks relatively normal. But its behavior is more than remarkable. The lamp interacts with people in an incredibly lifelike way. This is of course inspired by the lamp from Pixar’s Luxo Jr. short film. But there’s a little bit of most useless machine added just for fun. If you try to shut it off the lamp shade is used to flip that switch on the base back on.

[Shanshan Zhou], [Adam Ben-Dror], and [Joss Doggett] developed the little robot as a class project at the Victoria University of Wellington. It uses six servo motors driven by an Arduino to give the inanimate object the ability to move as if it’s alive. There is no light in the lamp as the bulb has been replaced by a webcam. The image is monitored using OpenCV to include face tracking as one of the behaviors. All of the animations are procedural, making use of Processing to convey movement instructions to the Arduino board.

Do not miss seeing the video embedded after the break.

Continue reading “Pixar-style Lamp Project Is A Huge Animatronics Win”

Hands Free Hot Air Station

In an effort to ease the process of soldering Ball Grid Array (BGA) chips at home [Roger] rigged up a hands-free solution for his hot air equipment.

The main component in the build is an Aoyue hot air rework station that he already had in his workshop. He wanted an adjustable mount that would hold it steady when reflowing parts so he hit Amazon and bought a $14 articulated lamp. After ditching the funnel-shaped shade he bolted a cable clamp to the socket housing. This can be tightened on the hot air wand, with the spring tension of the lamp making it easy and quick to reposition the nozzle. [Roger] sent this project directly to our tips line and we’ve embedded the rest of the project images after the break.

If you’re looking for a more DIY rework solution you should checkout this hot air pencil hack. It uses a desoldering iron, a fish pump, and some metal mesh as a heat sink to put out a stream of very hot air.

Continue reading “Hands Free Hot Air Station”

Toothbrush Timer

This toothbrush holder will make sure you’re brushing your pearly whites for an appropriate length of time. The three cups serves as tootbrush storage, and detect when one has been removed. Once you start brushing your teeth the lights on the front and bell in the back count down the process automatically.

The counting sequence starts when a weight sensor in the base detects a change caused by picking up a toothbrush. The ATmega328 — which is programmed with Arduino-style code — then turns on all of the incandescent lamps mounted on the front portion of the base. Each of these are switched with a 2N3904 transistor in order to sink enough current for the bulb. As a two-minute timer decrements, the bulbs are extinguished one by one. But there is also an auditory feedback mechanism. On the back of the base is a small bell. A hammer on a servo strikes the bell every 30 seconds to let you know how you’re doing. The entire thing is driven by an internal Li-ion battery which lasts about three weeks between charges. Don’t miss the demo video found after the break.

Continue reading “Toothbrush Timer”