Copper Vapor Laser Is Amazing

What better way to spend a few months in the workshop than by heating Copper chloride to 400° C, building rotary spark gaps and 30kV capacitors, playing with high vacuums and building a very powerful laser? It’s just a day in [Jon]’s life as he builds a DIY Copper vapor laser.

Copper vapor lasers require temperatures of about 1500° C, but this is only when using pure Copper. Compounds such as Copper chloride are able to bring the required temperatures for lasing down to about 400° C, a reasonable temperature for [Jon]’s home built laser tube furnace. The only problem with this setup is the requirement for two electrical pulses, one to disassociate the Copper and a second to make the Copper lase.

The professional way of creating these electrical pulses would be a Thyratron, but it seems [Jon] wanted something cooler. He built a rotary spark gap out of two 2 inch thick blocks of acrylic that allow him to perfectly time the frequency and separation of the electrical pulses needed for his laser.

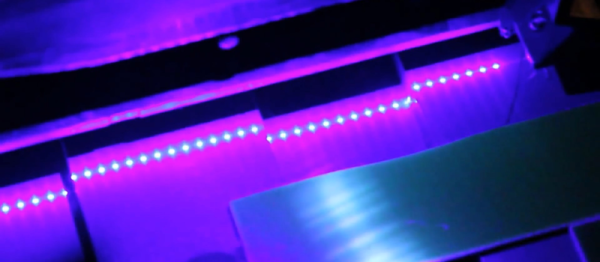
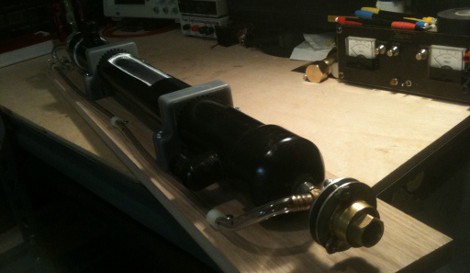
There is no word on exactly how much power [Jon]’s Copper vapor laser will put out when it’s complete, but [Jon]’s build log is already an amazing display of awesome. You can check out a short video showing off [Jon]’s laser, spark gap, and huge home-made capacitor after the break.

Continue reading “Copper Vapor Laser Is Amazing”

Exposing PCBs With A Home Made Laser Printer

Making your own printed circuit boards – as useful as it is – is a pain. Using the very popular toner transfer method requires a dozen steps that have to go perfectly the first time, and milling boards on a CNC machine creates a lot of mess. The most industrious hackers are able to bodge up a direct-to-board printer from an old inkjet printer, but these builds are usually a little kludgy. [Tixiv]’s LaserExposer board printer is one of the first builds we’ve seen that does away with all the negatives of the other techniques of PCB manufacturing and turns making your own boards into a very, very simple process.

The LaserExposer uses photosensitive copper board, like many of the other PCB printers we’ve seen. Instead of printing out the board artwork to a transparency or mask, [Tixiv] used a 1 Watt 445nm blue laser with a hexagonal mirror to directly expose the artwork onto the board, line by line.

The entire device is built around an old flatbed scanner that slowly crawls over the PCB, exposing the traces of copper to be etched away. This required reverse engineering the mirror motor control board from an 90s-era laser printer and building a circuit to precisely control the timing of the laser. [Tixiv] eventually got everything working and after etching had some of the most professional looking home-brew boards we’ve ever seen.

[Tixiv] put up a demo video of his build (after the break, German audio, YouTube has captions…). Anyone have an old flatbed scanner lying around?

Continue reading “Exposing PCBs With A Home Made Laser Printer”

Displaying Tweets With A Laser Pointer And Speakers


This year at Toorcamp, [Rich] will be showing off his laser-based vector display, capable of projecting tweets using only a laser pointer, a pair of mirrors, speakers, and an Arduino. Steady hand and curses from lack of an optical bench not included.


[Rich]’s Instructable goes over the finer points of the build; a Python script runs on his computer fetching all recent tweets with a certain hashtag. These tweets are sent over to a ‘duino where a bit of code translates the text into a scrolling vector display. The code for the project is based on one of [Rich]’s previous builds to draw shapes with the same speaker/laser setup.

In theory, using a pair of speakers to draw text on a wall isn’t much different from drawing pictures on an oscilloscope. Of course, [Rich] always has the option of turning his LaserTweet into an oscilloscope when Toorcamp is over.

Relevant videos after the break.

Continue reading “Displaying Tweets With A Laser Pointer And Speakers”

Laser-charged Glow In The Dark Message Board

This entry in the Red Bull Creation contest uses a laser to charge up a glow-in-the-dark message board. The concept is something we’ve seen several times before. Since light can excite a phosphorescent surface, moving pixels of light over that surface leaves a fading trail. Most recently we saw a spinning ring message board. This contest entry is different in that the board is stationary and the print head moves.

It’s basically a two-wheeled robot with a laser diode which can swivel perpendicular to the direction of travel. In this way, the laser prints the rows, and the motion of the robot takes care of advancing the columns. Since laser light has incredible intensity it is able to excite the phosphors much more thoroughly than LEDs. So the message will last longer than that spinning ring project or this awesome turntable hack. Don’t miss the video after the break that shows off the hack along with a bag full of theatrics.

Continue reading “Laser-charged Glow In The Dark Message Board”

Incredible Home Made Low Cost CO2 Laser

[LokisMischief] wrote in to the tip line to let us know about this incredible home made CO2 laser. This thing is a complete DIY beauty, from the PVC cooling jacket to the toolbox based controller.  The whole thing is essentially built from DIY parts,  hand blown glass for the laser tube, plumbing store mirror mounts,  a PVC cooling jacket with a caulked glass viewing window, and a neon sign transformer with a variac to control output. Even the optics are completely DIY, a hand drilled gold mirror and a NaCL window made from a polished chunk of  icecream salt! [ThunderSqueak] says the control box only cost 60 bucks, and the rest of the parts don’t look too terribly expensive.

We could only find one video of the setup in the variac section of the site, and it was just a test the amp meter in the controller (no lasing anything at all).  [ThunderSqueak] does make a note on the to do list about doing a good laser-y demonstration video, which we are looking forward to.

If you want more DIY CO2 laser action check out this other one or some plans for one.

Blu-ray CNC Looks Great For Branding And Engraving

[Nav] got the bug for a tiny little laser cutter. He pulled off the build, and has just finished the second rendition which makes some nice improvements. He’s was hoping for a laser cutter, but we think this really shines when it comes to branding objects like the scrap wood seen above.

This joins a long line of optical drive parts builds. For instance, we saw this plotter that used the lens sleds from some CD-ROM drives. You may think that [Nav] doesn’t need to worry about the Z axis since this is a laser but you’d be wrong. The focal point of the light needs to hit at the right place to cut efficiently, and this is often the trouble with laser cutters. As material is burned away the laser becomes less efficient if you don’t adjust the lens for vertical position. That’s why we think it’s best as an engraver, but the original build writeup for his cutter does show some success cutting letters in dark paper.

Check out a clip of this design being burnt into the wood after the break.

Continue reading “Blu-ray CNC Looks Great For Branding And Engraving”

Visualizing Sound Without A Computer

[Emre] sent in a cool art piece he’s been working on that visualizes your voice without the use of a microcontroller.

The project is called Visible Voice only consists of a laser, mirror, audio speaker and a phosphorescent disk. The laser shines onto a mirror mounted on the speaker and is reflected onto the disk. When an audio signal is played through the speaker, the light bounces off the mirror and produces a waveform on the disk. Think of it as the lowest tech way of building a model of a CRT; the laser is the electron gun and the speaker is a deflection coil.

Right now, [Emre]’s project displays a waveform along a circular path on the slowly rotating phosphorescent disk. Anyone wanting to copy this project could use a moving belt of the same material giving a much more linear (and straighter) waveform trace.

After the break you can see [Emre]’s friend [Ivan] testing out the glowing laser waveform visualizer.

Continue reading “Visualizing Sound Without A Computer”