72 Tranducers For Acoustic Levitation

Levitation has a way of arousing curiousity and wonder wherever it appears. There’s a multitude of ways to do it, each with their own strengths and weaknesses and ideal use cases. [Julius Kramer] tried his hand at acoustic levitation, and decided to share his build.

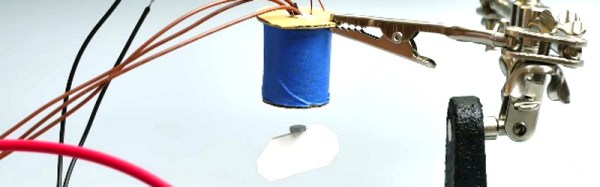
The build relies on an astounding number of ultrasonic transducers – 72, in fact. The device operates at 40 kHz to be well above the human range of hearing. 36 each are placed in the top and bottom shells of the device’s 3D printed chassis. Through careful construction, the transducers are placed an integer multiple of half the wavelength apart. This allows the device to create a standing wave, with several low-energy nodes in which small objects can be levitated. In this case, [Julius] uses small scraps of styrofoam, but notes that water droplets can also be used if one is careful to avoid spilling any on the electronics.

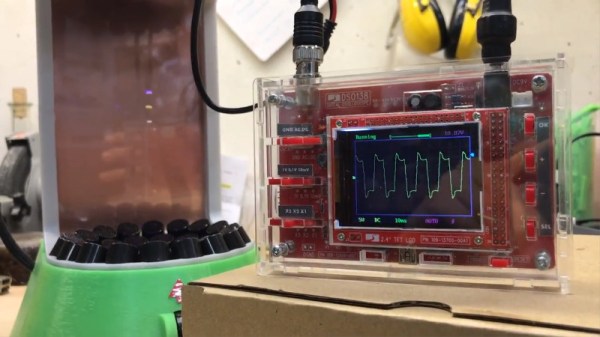
The transducers are energised with a square wave generated by an Arduino Nano. This allows the possibility of the frequency and phase of the wave to be altered, which can help tune the device and allow some movement in the vertical axis. Unfortunately, movement in the other axes isn’t possible as the transducers appear to be connected in parallel. However, this could be a good upgrade in a later revision.

This project shows that a device relying on incredibly precise measurement and control can now be constructed at home with a 3D printer and some off the shelf electronics.

Now that you’ve whet your whistle, perhaps you’d like to tackle laser levitation?

[Thanks to Baldpower for the tip!]


Ultra Simple Magnetic Levitator

Want to build a magnetic levitator in under two hours? With a total of 7 parts, including the coil, it just cannot get simpler than what [How-ToDo] shows here! It is not only an extremely simple circuit, it also has the advantage of using only discrete components: a MOSFET, hall effect sensor, diode and two resistors, that’s it.

The circuit works by sensing the position of the levitating magnet, using the hall effect sensor , then turns the coil on and off in response via the MOSFET. The magnet moves upwards when the coil is energized and falls down when it is not. This adjustment is made hundreds of times a second, and the result is that the magnets stays floating in mid air.

This is the kind of project that can make a kid get interested in science: it combines easy construction with visually amazing behavior, and can teach you basic concepts (electromagnetism and basic electronics in this case). Excellent for a school project.

For the more advanced enthusiast, more sophisticated levitator design based on an Atmega8 micro-controller will be of interest.

Continue reading “Ultra Simple Magnetic Levitator”

Build Your Own Magnetic Levitator

Here’s a great magnetic levitator build. [Scott Harden] dug up the link after seeing that awesome rotating globe this morning. This version hangs objects below an electromagnet but it has a sensor system to provide a constant distance between magnet and object even if the payloads are a different weight. This is done with a couple of infrared sensors. One acts as a reference detector, always viewing an IR LED in order to get a baseline measurement. That measurement is compared to a second detector mounted slightly lower. The circuit adjusts the electromagnetic field, making sure the object is always breaking the lower beam but never interrupting the reference beam. No microcontroller needed, this is handled with a couple of OpAmps. See it in action after the break.

Continue reading “Build Your Own Magnetic Levitator”