Building An ESP32 Smart Power Strip From Scratch

Surely the most straightforward way of creating a smart power strip would be to take an existing model and hack in some relays that you could fire with a WiFi-enabled microcontroller. But where’s the fun in that? Instead of repurposing a commercial power strip for his recent project, [Md Raz] decided to just build the whole thing himself.

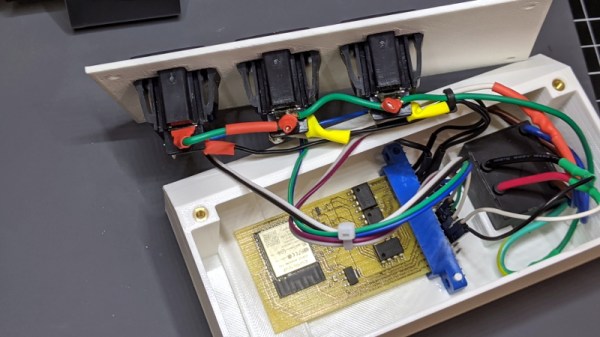
The project started with a 3D printed enclosure that could hold the electronics and three panel mount sockets. The use of heat-set inserts makes it a bit more robust for future upgrade work, but otherwise it’s a fairly simple rectangular design. Nobody ever said a power strip had to be pretty, right? In addition to the panel mount sockets, there’s also a AC-DC converter to step mains voltage down to 5 VDC for the ESP32.

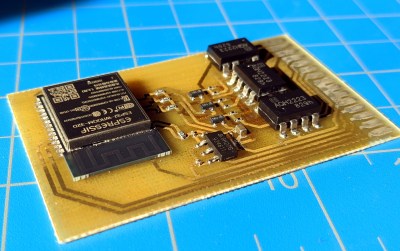
In addition to the microcontroller, the custom PCB in the power strip holds a trio of MOSFETs connected to AQH2223 solid state relay (SSR) chips. Once the ESP32 toggles the line attached to each MOSFET, the indicator LED above the outlet goes on and the appropriate SSR is thrown to turn on the power. With a simple web interface running on the microcontroller, all three outlets can be independently controlled from any device with a web browser.

If you’d like to limit your interaction with mains voltages, then we’ve seen some projects that commandeer the low-voltage side of a commercial smart power strip. But remember, putting a Raspberry Pi inside of a power strip might seem suspicious to some folks.

Lethal LED Lantern Leaks Lotsa ‘Leccy

When you take an item with you on a camping trip and it fails, you are not normally in a position to replace it immediately, thus you have the choice of fixing it there and then, or doing without it. When his LED camping lantern failed, [Mark Smith] was in the lucky position of camping at a friend’s compound equipped with all the tools, so of course he set about fixing it. What he found shocked him metaphorically, but anyone who handles it while it is charging can expect the more literal variation.

The lamp was an LED lantern with built-in mains and solar chargers for its Ni-Cd battery pack, and a USB charger circuit that provided a 5 volt output for charging phones and the like. The problem [Mark] discovered was that the mains charger circuit did not have any mains isolation, being a simple capacitive voltage dropper feeding a rectifier. These circuits are very common because they are extremely cheap, and are perfectly safe when concealed within insulated mains-powered products with no external connections. In the case of [Mark]’s lantern though the USB charging socket provided that external connection, and thus access to a potential 120 VAC shock for anyone touching it while charging.

Plainly this lamp doesn’t conform to any of the required safety standards for mains-powered equipment, and we’re guessing that its design might have come about by an existing safe lamp being manufactured with an upgrade in the form of the USB charger. The write-up gives it a full examination, and includes a modification to safely charge it from a wall-wart or similar safe power supply. Definitely one to watch out for!

If you were wondering what the fault was with Mark’s lamp, it was those cheap NiCd batteries failing. He replaced them, but there are plenty of techniques to rejuvenate old NiCds, both backyard, and refined.