DrLCD Is Here To Give Your MSLA Printer A Checkup

Over the last couple years, we’ve seen an absolute explosion of masked stereolithography (MSLA) 3D printers that use an LCD screen to selectively block UV light coming from a powerful LED array. Combined with a stepper motor that gradually lifts the build plate away from the screen, this arrangement can be used to produce high-resolution 3D prints out of photosensitive resins. The machines are cheap, relatively simple, and the end results can be phenomenal.

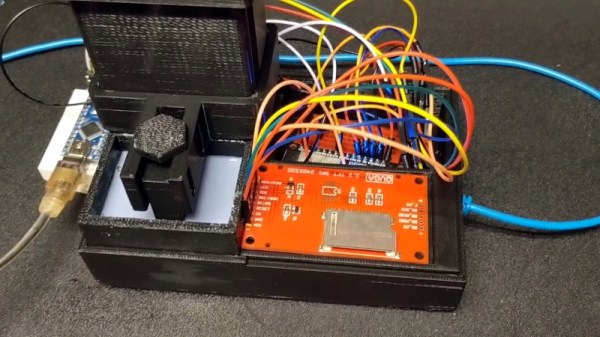
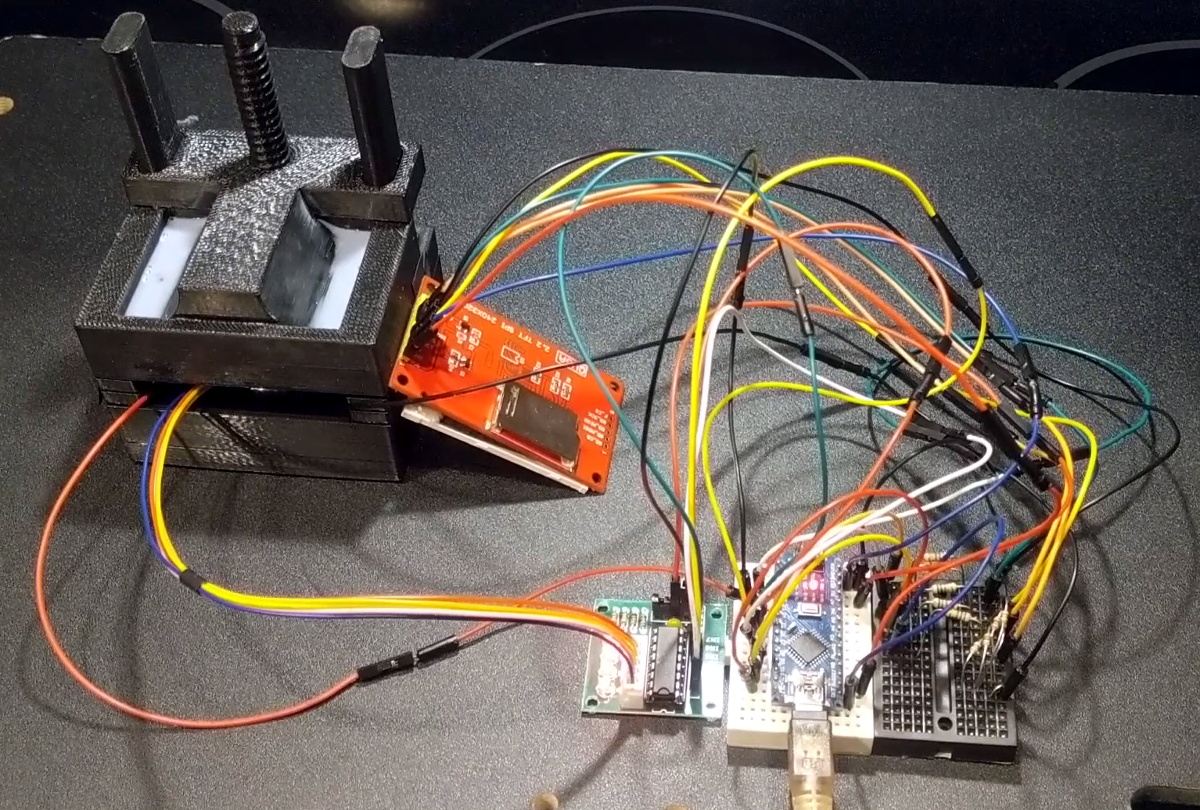
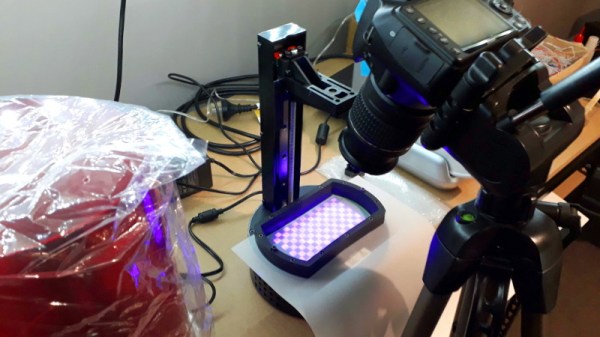
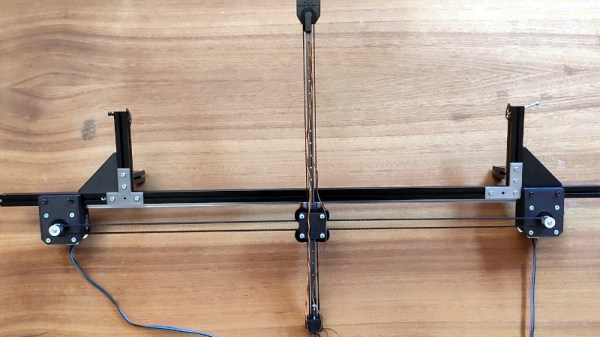
But they aren’t foolproof. As [Jan Mrázek] explains, these printers are only as good as their optical setup — if they don’t have a consistent UV light source, or the masking LCD isn’t working properly, the final printed part will suffer. In an effort to better understand how these factors impact print quality, he designed the DrLCD: a TSL2561 luminosity sensor mounted to a robotic arm with associated software to map out the printer’s light source.

The individual LED assemblies are clearly visible.

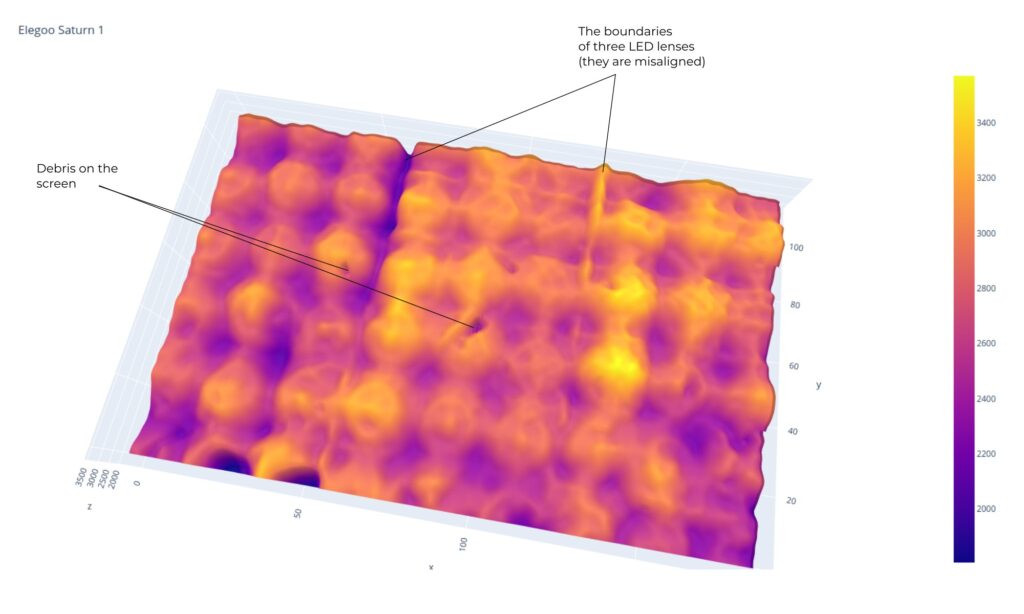
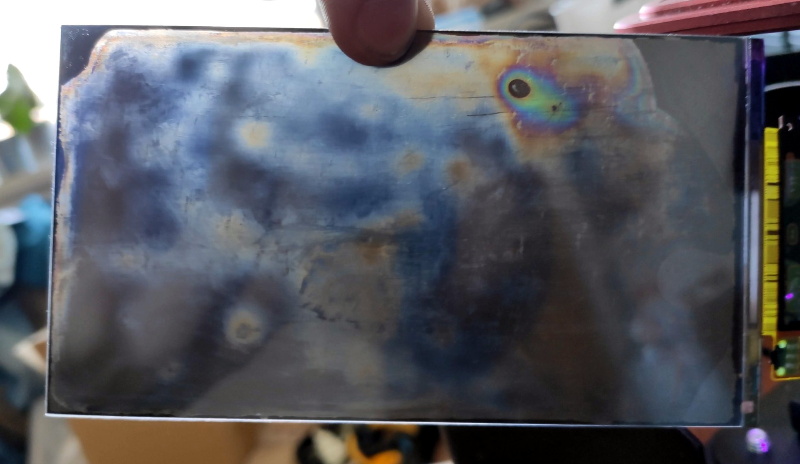
The results when running DrLCD against a few different types of printers is fascinating. [Jan] was clearly able to make out the type of lenses used, and in one case, was even able to detect that a darker spot in the scan was due to a bit of resin having leaked into the light source and clouded up the optics.

But DrLCD can do more than just tell you where you’ve got a dark spot. Using the data collected from the scan, it’s possible to create a “compensation map” that can be combined with the sliced model you wish to print. As the slicer assumes an idealistic light source, this map can help by adding additional masking where bright spots in the display have been detected.

[Jan] goes on to compare the dimensional accuracy of printed parts before and after the compensation map has been applied to the model, and was able to identify a small but distinctive improvement. Not everyone is going to be concerned about the 157 µm deviation observed without the backlight compensation, but we certainly aren’t going to complain about 3D printers getting even more dimensionally accurate.

A couple years back we covered a similar technique that used a DSLR to capture high-resolution images of the bed. While arguably much easier to pull off, we can’t help but fall in love with the glorious overengineering that went into the DrLCD system, and we can’t wait until it starts making house calls.

Super Tough Resin Is Literally As Tough As Nails

Resin printing still seems to polarize opinions amongst hacker types, with some considering such machines a good tool for the right tasks, and some just plain rejecting them outright. There are many arguments for and against, but like fused deposition modeling (FDM) machines, resin printers are improving in leaps and bounds — and so is the liquid resin itself. Nowadays low-odor resins are common, colors and finishes are varied, and now thanks to some dedicated development work, the brittleness that often characterizes such prints it being addressed. [Mayer Makes] has designed a super tough “engineering resin” that he demonstrates is so tough, you can print a nail and hammer it into a block of wood! (Video, embedded below, if you don’t believe it.)

This particular resin is destined for mixing, given its natural cured shade is a kind of greenish-grey, but it does 
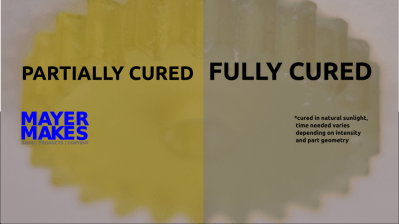
have a neat trick of presenting a definite yellowish hue when not fully cured, which is very helpful. This is particularly useful when removing support structures as you can use the color change during the curing process to judge the right moment to snap off the thicker sections, minimizing the risk of damaging the print. The resulting printed part is also tough enough to withstand subsequent traditional post-processing, such as milling, giving greater final finishing tolerances. Try doing that with an FDM print.

One of the neat things about resin chemistry is that you can simply mix them in their liquid form to tune the resin properties yourself and they can also be colored with specially formulated dyes without affecting the other properties too much, so this new super-tough resin gives prototypers yet another tool in their resin armory.

Thinking of taking the plunge and giving resin printing a try? Checkout our handy guide which may give you a leg up! If that doesn’t swing it for you, you could always use resin to help smooth out your FDM prints. It’ll probably still smell funny, mind.

Continue reading “Super Tough Resin Is Literally As Tough As Nails”

3D Printer Showdown: $350 Consumer Vs $73,000 Pro Machine

The quality of consumer-grade 3D printing has gone way up in recent years. Resin printers, in particular, can produce amazing results and they get less expensive every day. [Squidmar] took a miniature design and printed it (or had it printed) on some cheap resin printers and a 65,000 Euro DWS029. How much difference could there be? You can see for yourself in the video below.

We were surprised at the specs for the more expensive machine. It does use a solid-state laser, but for that cost, the build volume is relatively small — around 15 x 15 x 10 cm. There were actually five prints created on four printers. Three were on what we think of as normal printers, one was on the 65,000 Euro machine, and the fifth print was on a 10,000 Euro printer that didn’t look much different from the less expensive ones.

Of course, there is more to the process than just the printer. The resin you use also impacts the final object. The printers tested included a Phrozen 4K Mini, a Phrozen 8K Mini,  a Solos Pro, and the DWS 029D. The exact resins or materials used was hard to tell in each case, so that may have something to do with the comparisons, too.

Do you get what you pay for? Hard to say. The 8K and Solos were neck-and-neck with some features better on one printer and some better on the other. The DWS029D did perform better, but was it really worth the increase in price? Guess it depends on your sensitivity. The 8K printer did a very credible job for a fraction of the cost. Of course, some of that could have been a result of the materials used, too, but it does seem likely that a very expensive dental printer ought to do better than a hobby-grade machine. But it doesn’t seem to do much better.

The DWS printer uses a laser, while most hobby printers use UV light with an LCD mask. We’ve seen low-end resin printers on closeout for around $100 and you can get something pretty nice in the $200 neighborhood. In between these two extremes are printers that use Digital Light Processing (DLP).

Continue reading “3D Printer Showdown: $350 Consumer Vs $73,000 Pro Machine”

Inspire Dev Kit Drops Price Of MSLA Printer To Just $30

Over the last couple of years, we’ve seen massive price reductions on consumer 3D printers based on masked stereolithography (MSLA) technology. As the name implies, these machines use a standard LCD panel to selectively mask off the ultraviolet light coming from an array of LEDs. Add in a motorized Z stage, and you’ve got a simple and cheap way of coaxing UV resin into three dimensional shapes. These days, $200 USD can get you a turn-key MSLA printer with resolution far beyond the capabilities of filament-based FDM machines.

But [JD] still thinks we can do better. His project aims to produce a fully-functional MSLA printer for $30, and perhaps as low as $15 if manufactured in sufficient quality. He believes that by making high-resolution 3D printing more accessible, it will allow users all over the globe to bring their ideas to life. It’s no wonder he’s calling his machine the Inspire 3D Printer.

A test fixture for the LCD module.

This isn’t just some pie in the sky concept rolling around in [JD]’s head, either. You can order the Inspire Development Kit right now for just $30, though he makes it clear what you’ll receive isn’t quite a functional MSLA printer. By leveraging a common LCD module, the ESP32, and several 3D printed parts, he’s proven his price point for the kit is achievable; but there’s still plenty of work that needs to be done before the machine is ready for the general public.

For one thing, he’s still working the kinks out of the Z movement. The current design is 3D printed, but [JD] says he’s not quite happy with the amount of slop in the movement and is considering replacing the entire thing with the linear actuator from an optical drive. We’ve already seen these parts reused for accurately positioning lasers, so there’s certainly precedent for it. The firmware for the ESP32 is also in its infancy, and currently only allows the user to print from a selection of simple hard-coded shapes as a proof of concept.

We’ve seen DIY attempts at resin printers in the past, but they’ve often been based on more complex techniques involving projectors or UV lasers. Masked stereolithography is much more approachable for the home gamer, and projects like the Inspire 3D Printer show just how little it really takes to pull solid objects out of a puddle of goo.

DIY Monochrome LCD Hack Doesn’t Go As Planned

Manufacturers of low-cost 3D printers that use the masked stereolithography (MSLA) process are able to build their machines so cheaply because they’re using repurposed smartphone or tablet LCD panels to mask off the UV backlight. Considering the quality you get out of even the entry-level MSLA resin printers, we certainly aren’t complaining about this bit of thrift. But as [Jan Mrázek] explains in a recent blog post, there’s certainly room for improvement.

The problem is that those repurposed LCD panels are, as you’d expect, color displays. After all, even the bottom of the barrel mobile devices moved away from monochrome displays decades ago. But in this case, that’s not what you really want. Since the printer operates on a single wavelength of light, the color filters inside the LCD are actually absorbing light that could otherwise be curing the resin. So an MSLA printer with a monochrome screen would use less energy and print faster. There’s only one problem: it’s not very easy to find high-resolution monochrome displays in the year 2020.

So [Jan] decided to see if he could take a replacement screen intended for his Elegoo Mars MSLA printer and convert it from color to monochrome by disassembling it and manually removing the color filters. If this sounds a bit crazy, that’s because it is. Turns out taking apart an LCD, modifying its internal layout, and putting it all back together in working order is just as difficult as you’d think.

But it was still worth a try. [Jan] pulls the display apart, removes the liquid crystals, scrapes off the color filters, and then puts it all back together again. His first attempt got him a monochrome display that actually worked, but with debris trapped inside the screen, the image was too poor to be useful. He tried again, this time trying harder to keep foreign material out of the crystals. But when he got it back together a second time, he found it no longer functioned. He thinks it’s possible that his attempt to clean up the inside of the display was too aggressive, but really there are so many things that could go wrong here it’s hard to pin down just one.

Long story short, manually creating monochrome displays for low-cost MSLA printers might not be a viable option. Until a better solution comes along, you might be interested in seeing some slightly less invasive ways of improving your resin print quality.

Improving Exposure On A Masked SLA Printer

It’s taken longer than some might have thought, but we’re finally at the point where you can pick up an SLA 3D printer for a few hundred bucks. These machines, which use light to cure a resin, are capable of far higher resolution than their more common FDM counterparts, though they do bring along their own unique issues and annoyances. Especially on the lower end of the price spectrum.

[FlorianH] recently picked up the $380 SparkMaker FHD, and while he’s happy with the printer overall, he’s identified a rather annoying design flaw. It seems that the upgraded UV backlight in the FHD version of the SparkMaker produces somewhat irregular light, which in turn manifests itself as artifacts on the final print. Due to hot spots on the panel, large objects printed on the SparkMaker show fairly obvious scarring.

Now you might expect the fix for this problem to be in the hardware, but he’s taken it in a different direction. These printers use an LCD panel to block off areas of the UV backlight, thereby controlling how much of the resin is exposed. This is technique is officially known as “masked SLA”, and is the technology used in most of these new entry level resin printers.

As luck would have it, the SparkMaker FHD allows showing various levels of grayscale on the LCD rather than a simple binary value for each pixel. At least in theory, this allows [FlorianH] to compensate for the irregular backlight by adjusting how much the UV is attenuated by the LCD panel. He’s focusing on the printer he personally owns, but the idea should work on any masked SLA printer that accepts grayscale values.

The first step was to map the backlight, which [FlorianH] did by soaking thin pieces of paper in a UV reactant chemical, and draping them over the backlight. He then photographed the illumination pattern, and came up with some OpenCV code that takes this images and uses the light intensity data to compensate for the local UV brightness underneath the sliced model.

So far, this method has allowed [FlorianH] to noticeably reduce the scarring, but he thinks it’s still possible to do better. He’s released the code for this backlight compensation script, and welcomes anyone who might wish to take a look at see how it could be improved.

An uneven backlight is just one of the potential new headaches these low-cost “masked” SLA printers give you. While they’re certainly very compelling, you should understand what you’re getting into before you pull the trigger on one.