A Minimal ESP8266 Digital Picture Frame

Over the last few years, the price of a good digital picture frame has dropped to the point that we don’t often see DIY versions anymore. As much as we might hate to admit it, it’s hard to justify building something yourself when the economies of scale have made it so you can buy the final product for less than the cost of the parts themselves. But of course, there are always fringe cases where building it might be the only way to get what you need.
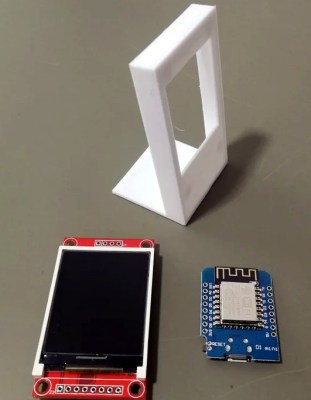
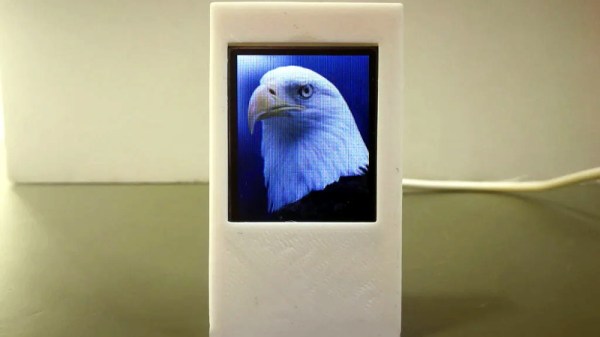
Granted we’re not sure that [Tony Liu] actually needs a 1.8-inch digital picture frame, but we’re sure somebody out there does. The ST7735R display used in this project is a real TFT, so the color and refresh rate is pretty good; but with a resolution of just 128×160, we’d recommend keeping your expectations low in regards to visual fidelity.

What’s really interesting about this project is how low the part count is. All you need is the ST7735R display and the ESP8266 itself (or the development board of your choice, naturally). Even the 3D printed frame is technically optional. The display is driven by SPI, so with the power added in, that’s only eight wires that need to be soldered between the two devices. If you’re looking for an easy way to add a photo slideshow to a small device, say a conference badge, this is about as easy as it gets.

But where are the images coming from? You might think SPIFFS, but in this case [Tony] has converted the images to bitmaps and is loading them into the Arduino Sketch as a header file with PROGMEM. Helpfully, he provides the link for the tool he uses to convert the images into an array the graphics library can understand. This makes adding new images slightly time consuming, but we imagine if you have the need for something like this, it’s probably only showing a pretty specific set of images anyway.

If you’re looking for something bigger, or maybe just an excuse to put that dusty Raspberry Pi to use, you might be interested in one of the more substantial builds we’ve seen over the years.

Continue reading “A Minimal ESP8266 Digital Picture Frame”

Never Miss A Doorbell With This Notifier

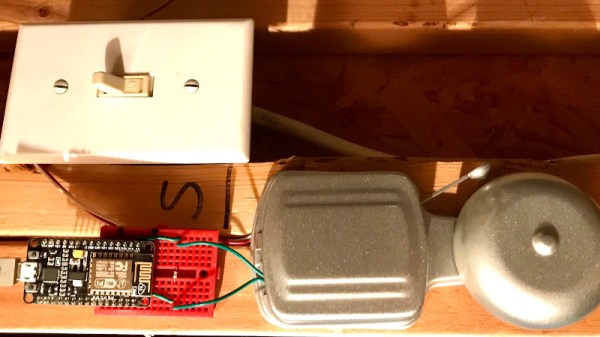
[PatH] tells us that he tragically missed a craft beer delivery to his home, and vowed never to let this happen again. His problem was that he’d missed the doorbell, resulting in one of those annoying notes from the delivery guy. His solution? An ESP8266-driven doorbell detector, that both sends him an SMS and records each doorbell press to a Google Sheet.

The doorbell detection is surprising but simple and non-intrusive, instead of running a GPIO line through some kind of interface to the button itself he’s added a reed switch to his ESP8266 board and used that to detect the magnetic field of the bell solenoids. It’s a convenient method, but one that only works with an old-style bell.

When the bell rings the magnetic field triggers the reed switch, and in turn the sketch running on the ESP calls out to IFTTT which triggers both an SMS and a write to a Google Sheets document that records each doorbell activation.

The ESP8266 seems to be a popular choice with doorbell automatprs probably because of its built-in networking and low price, but it’s not the only option. This optocoupler-sensed effort for example uses a Particle Xenon.

Hackaday Links Column Banner

Hackaday Links: March 1, 2020

Talk about buried treasure: archeologists in Germany have – literally – unearthed a pristine Soviet spy radio, buried for decades outside of Cologne. While searching for artifacts from a Roman empire settlement, the archeologists found a pit containing the Soviet R-394KM transceiver, built in 1987 and apparently buried shortly thereafter without ever being used. It was found close to a path in the woods and not far from several sites of interest to Cold War-era spies. Curiously, the controls on the radio are labeled not in Cyrillic characters, but in the Latin alphabet, suggesting the radio was to be used by a native German speaker. The area in which it was found is destined to be an open-cast lignite mine, which makes us think that other Cold War artifacts may have fallen victim to the gore-covered blades of Bagger 288.

Good news for Betelgeuse fans, bad news for aficionados of cataclysmic cosmic explosions: it looks like the red giant in Orion isn’t going to explode anytime soon. Betelgeuse has been dimming steadily and rapidly since October of 2019; as a variable star such behavior is expected, but the magnitude of its decline was seen by some astronomers as a sign that the star was reaching the point in its evolution where it would go supernova. Alas, Betelgeuse started to brighten again right on schedule, suggesting that the star is not quite ready to give up the ghost. We’d have loved to witness a star so bright it rivals the full moon, but given the times we live in, perhaps it’s best not to have such a harbinger of doom appear.

If you plan to be in the Seattle area as the winter turns to spring, you might want to check out the Vintage Computer Fair Pacific Northwest. We visited back during the show’s first year and had a good time, and the Living Computers: Museum + Labs, where the event is held, is not to be missed. The Museum of Flight is supposed to be excellent as well, and not far away.

Mozilla announced this week that Firefox would turn on DNS over HTTPS (DoH) by default in the United States. DoH encrypts the DNS requests that are needed to translate a domain name to an IP address, which normally travel in clear text and are therefore easily observed. Easily readable DNS transactions are also key to content blockers, which has raised the hackles of regulators and legislators over the plan, who are singing the usual “think of the children” song. That DoH would make user data collection and ad-tracking harder probably has nothing to do with their protests.

And finally, sad news from California as daredevil and amateur rocketeer “Mad” Mike Hughes has been killed in a crash of his homemade rocket. The steam-powered rocket was to be a follow-up to an earlier, mostly successful flight to about 1,900 feet (580 m), and supposed to reach about 5,000 feet (1.5 km) at apogee. But in an eerily similar repeat of the mishap that nearly killed Evel Knievel during his Snake River Canyon jump in 1974, Mike’s parachute deployed almost as soon as his rocket left the launch rails. The chute introduced considerable drag before being torn off the rocket by the exhaust plume. The rocket continued in a ballistic arc to a considerable altitude, but without a chute Mike’s fate was sealed. Search for the video at your own peril, as it’s pretty disturbing. We never appreciated Mike’s self-professed Flat Earth views, but we did like his style. We suppose, though, that such an ending was more likely than not.

A Patch Antenna Is Just A Rectangle, It Should Be Easy To Design, Right?

If a grizzled RF engineer who bears the soldering-iron scars of a thousand projects could offer any advice, it would be that microwave antennas are not a field to be entered into lightly. Much heartache is to be saved by using an off-the-shelf design, and only the foolhardy venture willingly down the stripline into the underworld of complex microwave resonances.

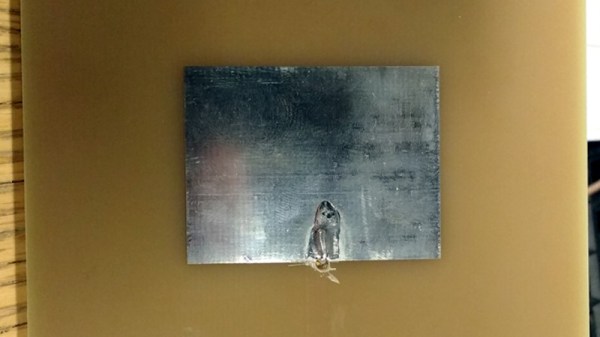
But every would-be microwave designer has to start somewhere, and for [Adam Gulyas] that start came with a 2.4 GHz patch antenna. His write-up is a fascinating tale of the challenges and pitfalls of creating something which is deceptively simple at first sight but which becomes significantly more complex as he characterizes his design made real as a PCB.

The process started with a set of calculations to derive the patch dimensions and a bit of PCB work adding a stripline feed. This was produced on a PCB, a normal 1.6mm thick FR4 fiberglass board. When hooked up to a VNA its impedance was all wrong. Further, it had a resonance at the required frequency but also unexpected ones at 3.7 and 4.6 GHz. Simulation of the design also yielded a different resonance from the one calculated, and discussing it with others yielded the conclusion that the feed might be at fault. He ended up using an inset feed, with a co-axial cable emerging away from the edge of the patch, and was able to achieve a far better result.

We can all learn something from [Adam]’s write-up, and we salute him for staying the course to get the design to a usable point. It would be interesting to see the same antenna produced from a more consistent dielectric material than generic FR4. Meanwhile, if you are interested in microwave RF design, take a look at Michael Ossmann’s primer on the subject.

The High Seas Are Open Source

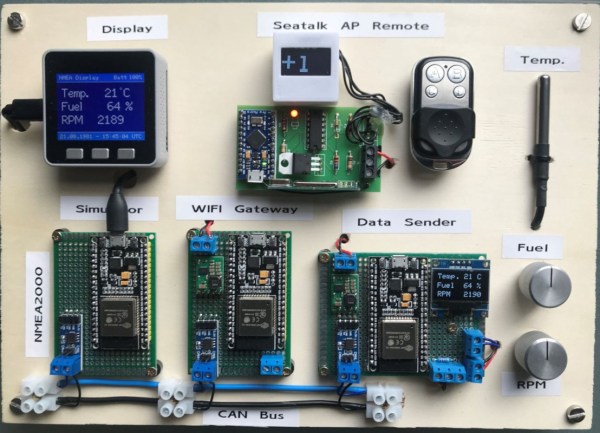
One of the biggest problems of owning an older boat (besides being a money pit – that is common to all boats regardless of age) is the lack of parts and equipment, and the lack of support for those parts if you can find them at all. Like most things, this is an area that can benefit greatly from some open source solutions, which the Open Boat Projects in Germany has been able to show. (Google Translate from German)

This group has solutions for equipment problems of all kinds for essentially any sized boat. At their most recent expo, many people were interested in open source solutions for situations where there is currently only an expensive proprietary option, such as support for various plotting devices. This isn’t the only part of this project, though. It includes many separate projects, like their solutions for autopilot and navigation. There are even complete hardware packages available, all fully documented.

Open source solutions for large, expensive things like this are often few and far between for a number of reasons. There are limited options for other modes of open source transportation too, as it seems like most large companies are not willing to give up their secrets easily. Communities like this, however, give us hope that people will have other options for repairing their vehicles without having to shell out too much money.

Thanks to [mip] for the tip!

DIY Monochrome LCD Hack Doesn’t Go As Planned

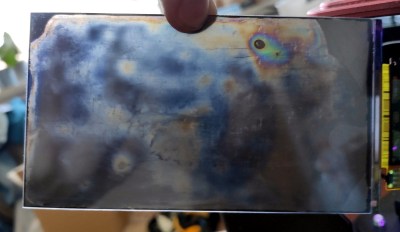
Manufacturers of low-cost 3D printers that use the masked stereolithography (MSLA) process are able to build their machines so cheaply because they’re using repurposed smartphone or tablet LCD panels to mask off the UV backlight. Considering the quality you get out of even the entry-level MSLA resin printers, we certainly aren’t complaining about this bit of thrift. But as [Jan Mrázek] explains in a recent blog post, there’s certainly room for improvement.

The problem is that those repurposed LCD panels are, as you’d expect, color displays. After all, even the bottom of the barrel mobile devices moved away from monochrome displays decades ago. But in this case, that’s not what you really want. Since the printer operates on a single wavelength of light, the color filters inside the LCD are actually absorbing light that could otherwise be curing the resin. So an MSLA printer with a monochrome screen would use less energy and print faster. There’s only one problem: it’s not very easy to find high-resolution monochrome displays in the year 2020.

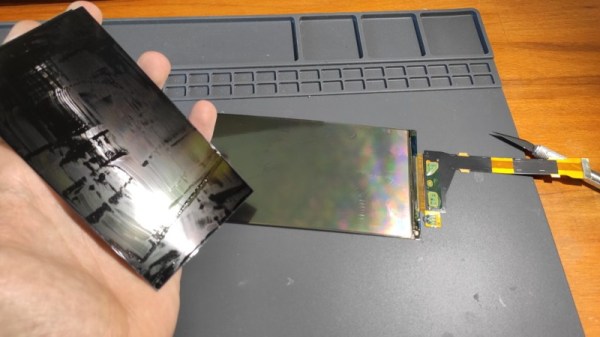
So [Jan] decided to see if he could take a replacement screen intended for his Elegoo Mars MSLA printer and convert it from color to monochrome by disassembling it and manually removing the color filters. If this sounds a bit crazy, that’s because it is. Turns out taking apart an LCD, modifying its internal layout, and putting it all back together in working order is just as difficult as you’d think.

But it was still worth a try. [Jan] pulls the display apart, removes the liquid crystals, scrapes off the color filters, and then puts it all back together again. His first attempt got him a monochrome display that actually worked, but with debris trapped inside the screen, the image was too poor to be useful. He tried again, this time trying harder to keep foreign material out of the crystals. But when he got it back together a second time, he found it no longer functioned. He thinks it’s possible that his attempt to clean up the inside of the display was too aggressive, but really there are so many things that could go wrong here it’s hard to pin down just one.

Long story short, manually creating monochrome displays for low-cost MSLA printers might not be a viable option. Until a better solution comes along, you might be interested in seeing some slightly less invasive ways of improving your resin print quality.

Single Bolt Transformed Into A Work Of Art

Every once in a while, this job helps you to discover something new and completely fascinating that has little to do with hacking but is worth sharing nonetheless. Turning a single brass bolt into a beautiful Cupid’s bow is certainly one of those times.

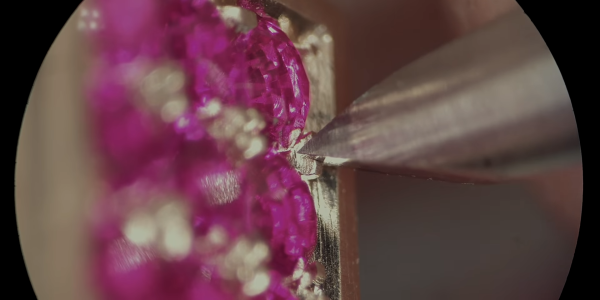
Watching [Pablo Cimadevila] work in the video below is a real treat, on par with a Clickspring build for craftsmanship and production values. His goal is to use a largish brass bolt as the sole source of material for a charming little objet d’art, which he achieves mainly with the use of simple hand tools. The stave of the bow is cut from the flattened shank of the bolt with a jeweler’s saw, with the bolt head left as a display stand. The offcuts are melted down and drawn out into wire for both the bowstring and the shaft of the arrow, a process that’s fascinating in its own right. The heart-shaped arrowhead and the faces of the bolt head are bedazzled with rubies; the technique [Pablo] uses to create settings for the stones is worth the price of admission alone. The complete video below is well worth a watch, but if you don’t have the twelve minutes to spare, a condensed GIF is available.

[Pablo]’s artistry reminds us a bit of this not-quite-one-bolt combination lock. We love the constraint of sourcing all a project’s materials from a single object, and we really appreciate the craftsmanship that goes into builds like these.

Continue reading “Single Bolt Transformed Into A Work Of Art”