An Epic Quest For A Motorized Volume Knob

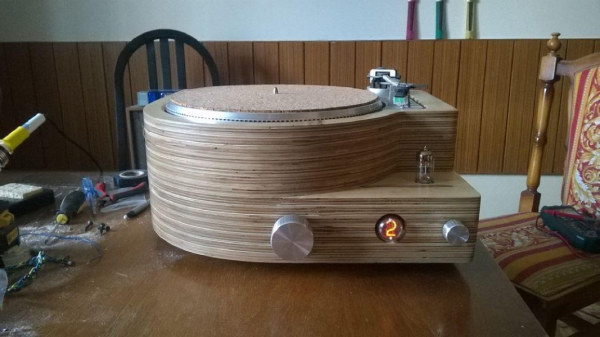
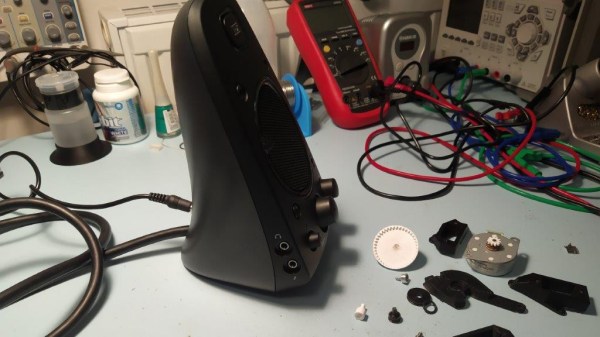
[Haris Andrianakis] likes his Logitech Z623 sound system. He likes it a lot. Which is why he was willing to hack in his own remote volume control rather than just get a new pair of speakers. But he certainly didn’t make things easy on himself. Rather than trying to tap into the electronics, he decided to take the long way around and motorize the volume knob.

The belt drive looked great, but didn’t work.

The idea seemed simple enough. Just drill a hole through the PCB behind the knob’s potentiometer, attach some kind of extension to the axle, and turn it with a small servo. Modifying the PCB and potentiometer went well enough, but the trouble came when [Haris] actually tried to turn the thing.

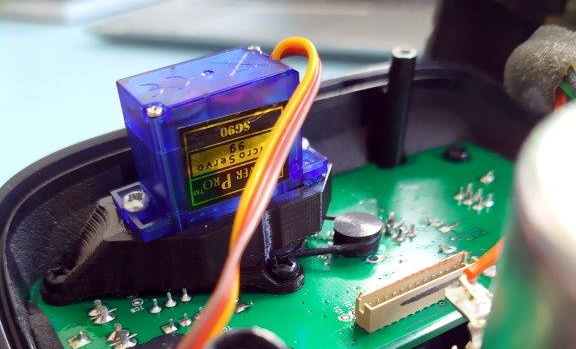
Attaching the servo directly to the axle worked, but it made turning the knob by hand extremely difficult. His next idea was to add a small belt into the mix so there would be some slip in the system. But after designing a 3D printed servo mount and turning custom pulleys on the lathe, it ended up having too much slip, and the knob didn’t always move when the servo turned.

He then swapped out the servo for a small stepper motor. The motor was easy enough to spin when powered down, but didn’t have quite enough torque to turn the knob. He tried with a larger stepper motor that he salvaged from an old printer, but since he could only run it at half the recommended 24 VDC, it too had a tendency to skip steps.

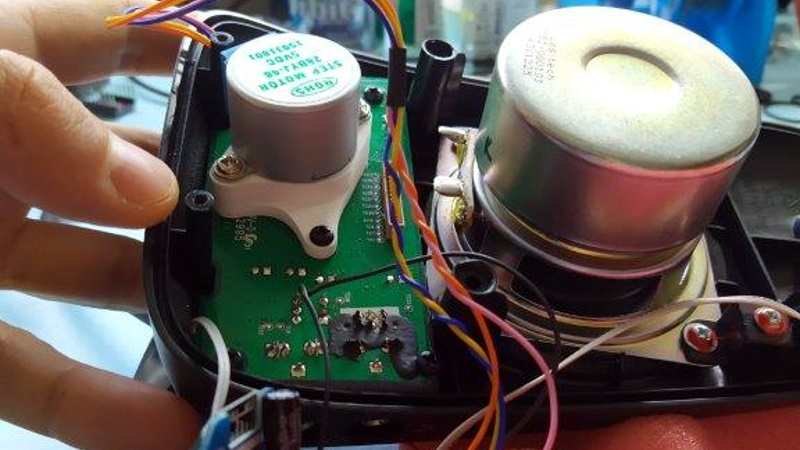
After experimenting with some 3D printed reduction gears, [Haris] finally stumbled upon the 28BYJ-48. This small stepper with an integrated gearbox proved to be the perfect solution, as it had enough muscle to turn the knob while at the same time not restricting its movement when powered down. The rest of the project was relatively easy; with a DRV8825, an ESP8266, and an IR receiver, he’s able to spin the stepper with his TV’s remote. A simple web page running on the ESP8266 even allows him to control volume over the network with his smartphone. Based on similar projects we’ve seen, he could probably add support for HDMI CEC as well.

[Haris] says you shouldn’t follow his example, but we’re not so sure. He kept going when others would have given up, and the engineering and thought that went into each attempt is certainly commendable. Even if he hadn’t ultimately gotten this project working, we’d still say it was a valiant hack worthy of praise.

Motorized Magic Over HDMI

There is a certain warmth that seems to emanate from stereo receivers of the 70s, 80s, and 90s. Despite their large footprint and considerable heft, the soft glow of the indicator lights and solid kerthunk of switches provide a sense of coziness. When [Tom] recently swapped his receiver for a 1970s Pioneer SX-950, he found himself getting up from the couch to adjust the volume when watching TV far too often for his liking. Resolving to do something about it, he added some magic in the form of a motorized volume knob. One of the coolest tricks for stereos was to have a small motor attached to the volume knob so that it could turn the volume up or down via a remote.

The first obstacle came when [Tom] had to forgo the center tap on the potentiometer to get a motorized one. This meant the volume compensation feature would be disabled, which is but a small price to pay for convenience. After scouring the internet, he finally had the part in hand only to discover some troublesome capacitors in the way. The new pot had a rather large motor hanging off the back that the previous one didn’t have. Fortunately, there was a good bit of space between the PCB and the bottom of the chassis, so Tom was able to just flip the capacitors to the underside of the board and bend them on their sides.

The next problem to solve was how to change the volume remotely. IR was considered as well as optical cable control signals. What [Tom] did instead was to implement HDMI CEC (consumer electronics control). CEC was well documented and seemed simple to implement on an ATTINY4313 with the help of a half-H driver. The CEC protocol implemented by [Tom’s] TV seemed to be very sensitive to timing, so an external crystal was used to get more precise timing and additional handshaking was implemented to get the TV to accept the microcontroller as valid. A few fail-safes were added to make sure the motor didn’t burn out if something went wrong with the CEC protocol and a nice enclosure wrapped up the build quite nicely.

We’ve seen CEC implemented before on a PIC 18F87J50, but as a sender of CEC commands not a receiver. [Tom’s] code is available on GitHub and might prove useful if you’re looking to implement CEC on an AVR.

Thanks [Tom] for sending this one in!

DIY Turntable In A Beautiful Wooden Case

Old timers who have been around for the last 40 years or so have been fortunate enough to have lived through several audio reproduction technologies – Vinyl Records, Cassette Tapes, Laser Disks and CD-ROM’s. Most will also swear that analog, especially vinyl records, sounded the best. And when it comes to amplifiers, nothing comes close to the richness of vacuum tubes.

[MCumic10] had a long time desire to build his own HiFi turntable encased in a nice wooden housing, with the electronics embedded inside. When he chanced upon an old and battered turntable whose mechanism barely worked, he decided to plunge right in to his pet project. The result, at the end of many long months of painstaking work, is a stunning, beautiful, wooden turntable. Especially since in his own words, “I didn’t have any experience in electronics or woodworking before I started this project so it took me many long months in learning analyzing and frustration. I burned some electronic parts few times and made them from the beginning.”

The build is a mix of some off the shelf modules that he bought off eBay and other sources, and some other modules that he built himself. He’s divided the build in to several bite sized chunks to make it easy to follow. The interesting parts are the 6N3 Valve Preamplifier (the main amplifier is solid-state), the motorized Remote Volume Control Input kit, and the Nixie tube channel indicator. And of course the layered, plywood casing. By his own reckoning, this was the toughest and longest part of his build, requiring a fairly large amount of elbow grease to get it finished. He hasn’t yet measured how much it tips the scales, but it sure looks very heavy. The end result is quite nice, especially for someone who didn’t have much experience building such stuff.

Thanks [irish] for sending in this tip.