Peltier Powered Sous-vide Rig Gets It Right Every Time

diy_sous_vide_refrigerator_cooker

It seems that sous-vide cooking is becoming increasingly popular lately. [Meseta] caught the sous-vide bug and wanted to try his hand at it, though he did not have enough money for a premade sous-vide cooker. After seeing a good handful of lackluster DIY sous-vide rigs online, he decided that he would design and build a sous-vide cooker of his own.

He already had a Forebrain microcontroller at his disposal to use as a PID controller, but what he really needed was a cooking vessel. Rather than use an old crock pot or similar device, he purchased a small personal refrigerator that could be used for cooling or heating. The unit ran off a Peltier cooler that could be switched between modes, making it quite easy for him to control.

In his blog, he discusses the modification from beginning to end, and even shows off the results of his cooking endeavors. He hasn’t posted code as of yet, but he says that he is more than happy to share it with anyone who might be interested in building their own sous-vide cooker.

Demystifying PID Control With A Look At The New Arduino PID Library

We’ve been hiding away in air-conditioned comfort to wait out the hot weather afflicting most of the US right now. Luckily we’re keeping busy with the great links coming into our tips box.

[Brett] sent us a note about his work on the new Arduino PID library. He is the author of the original library and recently decided it was time for a ground-up rewrite. But along the way he took the time to explain PID control and the choices he made during development.

We see a lot of PID controllers around here, like this router based espresso machine add-on. Proportional-Integral-Derivative Controllers are a way to make sure the control you intended to get from your devices is actually achieved in practice. They monitor a process and accumulate results over time in order to account for future events. From what we’ve just described you can see why the subject needs to be demystified.

Get yourself elbow-deep into [Brett’s] article. He does a great job of discussing each issue, and uses a multitude of easily understandable graphs to show the hurdles each portion of code is meant to overcome.

PID Sous-Vide Slow Cooker – Bon Appétit!

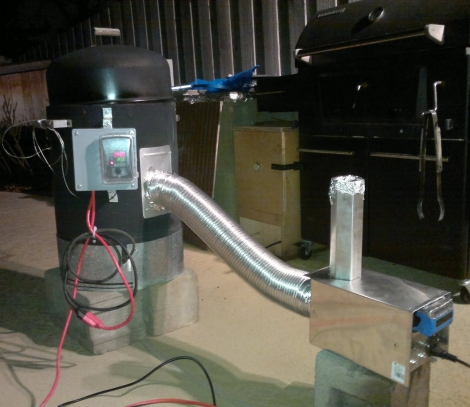
In search of a perfectly-cooked brisket, [Aaron] recently completed this DIY  PID-controlled sous-vide slow cooker. Sous-vide (French for “under vacuum”) is a cooking technique in which foods are typically vacuum-sealed and then cooked in a relatively low temperature water bath for an extended period of time. This is done to minimize temperature gradients throughout the food to ensure even cooking. Precise regulation of the water temperature is the key to ensuring that the results are exactly as desired – when cooking for many hours or days, even a few degrees discrepancy can greatly influence the final product.

A few months ago we featured a similar hack that utilized a simple switching temperature controller spliced into an extension cord.  Although probably sufficient for most aspiring “hacker-chefs”, the temperature was not as stable as it could be. The problem is that it takes time for the heat generated in the slow cooker’s heating element to reach the temperature probe (and food) suspended in the water bath.  By the time the probe reads the elevated temperature, the element is already too hot and the temperature overshoots the target. One way to mitigate this effect is to circulate the water to minimize temperature gradients, as is done in many of the expensive commercial units. In order to achieve similar results, [Aaron] instead created a PID controller that uses temperature feedback over time to precisely maintain the desired temperature and reduce any deviations resulting from outside disturbances.

The build is covered in detail and looks great in a custom acrylic enclosure. All of the board schematics, enclosure layout files, and source code are available under Creative Commons licensing at the bottom of his blog page. A good deal of time is also spent addressing the actual PID programming and tuning – something that could be useful for many different hacks requiring precise feedback control.

The end result is a professional looking control box and a slow cooker that is able to maintain temperature within 1°F even while using a DS1820 temperature sensor that is only rated as accurate to 0.5°C (0.9°F). From the pictures it looks like [Aaron] has finally achieved brisket bliss! Now the only question remaining is: what is the best setting for reheating left-over pizza?

DIY Hot Air Reflow Station

Add to you bench tools by building this hot air reflow station. [Tobi] had a difficult time and was getting frustrated with the reflow oven he was building. He ditched that and set out on this project after drawing inspiration from a hot-air pencil project.

Pictured above is the business end of the device. On the right you can see the tubing that delivers air from an aquarium pump. At the center of the probe is a glass tube containing the heating element. A thermocouple is monitored by an ATmega644 to maintain the desired air temperature which can be dialed in on the base unit. This thing can put out air that’s around 500 degrees Celsius which has cause some problems with melted tubing and singed spacers. The final design includes a cover that fits over everything and hopefully provides adequate thermal isolation for the user’s hand.

[Tobi’s] base unit include faceplates for the front and back milled out of copper clad board. This really makes the tool look a bit more trustworthy. He assures us that there is a demonstration video on the way.

bradley_smoker_clone

PID Controlled Bradley Smoker Clone

Bradley smokers are coveted for their ease of use, as they require very little interaction from the user once the hopper is loaded with wood pucks and the machine is powered on. The more robust models are quite pricey, so [Maukka] decided to build his own version of a Bradley smoker as an add on to his existing unit. He fabricated a smoke generator out of aluminum, including all of the components you would normally find in an automated smoker. Once the hopper is loaded with wood pucks, the smoker runs autonomously, shuffling new pucks onto the heating element, presumably at timed intervals. The main barrel of the smoker has a separate PIC-controlled heating element installed, and is connected to the smoke generator by an aluminum duct. This configuration allows [Maukka] to cold smoke items such as fish, nuts, and cheeses using the smoke generator by itself, while also permitting the smoking of meats at far higher temperatures when the main heating element is used. This is truly a fantastic build, and the cold smoker component is something I would love to have as an addition to my Weber bullet.

Be sure to explore his blog a bit to catch all of the build details, as they are separated into various posts.

[Thanks Hali Batsuiba]

PID Controlled Smoker

[dafonso] purchased a nice 1500W smoker but was somewhat dismayed that it only had one cooking temperature. To compensate he designed his own PID control system which allows him to set the cooking temperature digitally. At the heart of the system is a PICAXE 18 micro which switches the smoker on and off using a solid state relay. Rather than testing the 110V system on the smoker itself (which would have been a pain indoors) he used a lamp instead. To see if he was getting the correct temperature he taped his thermocouple to the light bulb and let the PID switch the lamp on and off. Also be sure to checkout his video which does a good job of explaining how he was able to solder the surface mount components required for the control board.

My RepRap Is Bigger Than Yours

This 3D printer build is a thing of beauty. It prints in ABS plastic on quite a large base. The platform provides all of the X and Y movement, making the gantry stationary except for the Z axis. it is possible to print parts up to about 15″x15″ by 13″ high. The gray hose snaking down around the right side of the print head is a fume extractor, keeping the air clear around the PID controlled head, and heated base. Judging from the example items this prints with fantastic accuracy.

[via Make]