Raspberry Pi GPU Goes Open Source! $10,000 Bounty For Quake 3

raspberrypi_logo

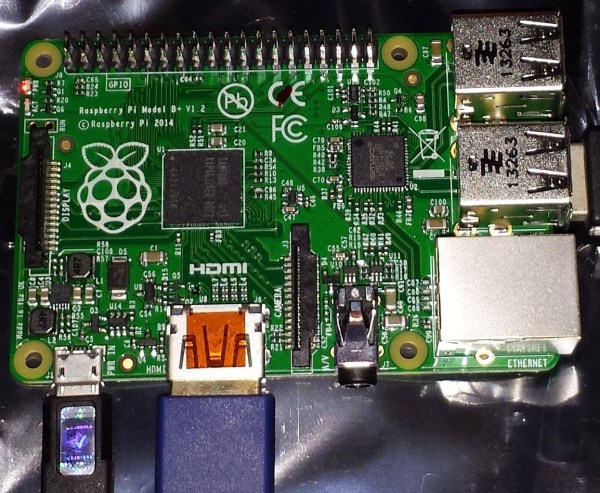
One of the thorns in the side of the Raspberry Pi crowd has been the closed source GPU. Today that all changes. [Eben Upton] reports that Broadcom is opening the source to the VideoCore® IV 3D graphics subsystem. In Broadcom’s own words:

The VideoCore driver stack, which includes a complete standards-compliant compiler for the OpenGL® ES Shading Language, is provided under a 3-clause BSD license; the source release is accompanied by complete register-level documentation for the graphics engine

Full documentation is available on Broadcom’s support site. To celebrate this, The Raspberry Pi Foundation is offering $10,000 to the first person to run Quake III at a playable frame rate on Raspberry Pi with open source drivers. The competition is worldwide. Full rules available here.

This release doesn’t cover everything, as there are still parts of the Pi’s BCM2835 which are hiding behind the blob files. However, it is a very big step for open source. Congrats to the Raspberry Pi Team, and good luck to all the entrants.

Wireless AC Control With The Raspberry Pi

We’ve seen some of [Connor]’s work before, and it looks like he’s now turning to product design. He’s come up with an adapter for the Raspberry Pi to control a few wireless wall socket relays, allowing anyone with a Pi to control lights, coffee makers, TVs, and anything else that falls under the very broad home automation banner.

The system uses a 315MHz radio breakout board for a Raspberry Pi to control the relays in one of three wall socket adapters. There’s a script running on the Pi with a very nice GUI to turn the lights on and off.

[Connor]’s product is extremely similar to a certain WiFi-enabled wall-plug relay system controlled by a smartphone, and to that end, he’s decided to call his device the Belchin’ Emo Switch. The name might need work, but he’s selling three Raspberry Pi-controlled wall plugs for the same price of one wall plug from Brand A.

Below you’ll find [Connor]’s videos for his device. You can also check out this reddit thread where he shows off just how open source he can be; there are part suppliers and even how he’s packaging this system for shipment.

Continue reading “Wireless AC Control With The Raspberry Pi”

Vintage DACs And A Raspberry Pi

DAC

Before the days of iPod docks in every conceivable piece of audio equipment, most devices were actually built very well. Most shelf top equipment usually came with well designed circuits using quality components, and late 90s CD players were no exception. [Mariosis] heard of some very nice DACs found in some of these units and decided to take one out for a spin. He’s using a Raspberry Pi to play audio with the DAC found in a late 90s Kenwood CD player.

After fortune favored a CD player with a dead drive on [Mariosis]’ workbench, he dug up the service manual and found some interesting chips – a PCM56 DAC, a little bit of logic, and an SM5807 oversampling chip that does all the conversion for the DAC.

This oversampling chip uses an I2S – not I2C – bus to carry the data from the CD to the DAC. There is, of course, an I2S driver for the Raspi, but the first attempts at playing audio didn’t result in anything. It turned out there was a problem with what the oversampler expected – the ‘standard’ I2S signal delays the data one tick behind the LRCLK signal.

There are two ways to fix this problem: programming a kernel driver, or building some custom logic to fix the problem. Obviously breaking out some flip-flops and NOR gates was the cooler option, giving [Mariosis] a great sounding stereo with a vintage DAC.

Mobile Hackerspace Status Indicator

HACKERSPACE LIGHT

Cruising around town, not sure what to do — oh hey look, someone is at the hackerspace! Introducing the Mobile Spacestate Indicator!

During our Hackerspacing in Europe tour, we had the pleasure of visiting ACKspace in Heerlen, the Netherlands. And like many hackerspaces, they have an online status indicator letting members and non-members alike know if the space is open. [Vicarious], the gentleman who kindly picked us up from the train station, has just finished off an awesome modification to his car. Using an Arduino Uno and a Raspberry Pi, he has created a mobile indicator of his hackerspace’s status.

The Raspberry Pi automatically tethers to his phone and checks the status of the hackerspace online. It then sends the data to the Arduino Uno which controls a small strip of RGB LEDs. He’s cleverly hidden all of this inside his center console, and it looks awesome!

To see more of ACKspace’s cool projects, check out their wiki!

HTPC For Lunch

xbmcLunchbox

If you’re hungry for a portable HTPC (Home Theatre PC) solution, maybe packing everything into a stylish mini lunch box is the way to go. [tomhung] wanted a quick and easy way to drag his media around while he’s away from home, but in an intentionally portable, self-contained enclosure, and the Star Wars lunch box provided plenty of space for the necessary guts.

Inside, he’s stacked the RasPi and a USB hub on top of one another. Each is mounted to its own platform made out of plastic DVD covers, and kept separate by standoffs carved from what appear to be the casings of inexpensive plastic pens. The stack also includes a 250GB 2.5″ HD, which [tomhung] simply attached with velcro for easy removal. The cables underwent minor surgery to keep the rat’s nest under control, and although the interior may still cause cable management enthusiasts to cringe, the exterior of the box cleans up well for its evening out. [tomhung] fit a simple 6-port keystone wall plate to the face of the lunch box to provide simple connections for all the important plugs.

40-Node Raspi Cluster

Multi-node RasPi clusters seem to be a rite of passage these days for hackers working with distributed computing. [Dave’s] 40-node cluster is the latest of the super-Pi creations, and while it’s not the biggest we’ve featured here, it may be the sleekest.

The goal of this project—aside from the obvious desire to test distributed software—was to keep the entire package below the size of a full tower desktop. [Dave’s] design packs the Pi’s in groups of 4 across ten individual cards that easily slide out for access. Each is wired (through beautiful cable management, we must say) to one of the 2 24-port switches at the bottom of the case. The build uses an ATX power supply up top that feeds into individual power for the Pi’s and everything else, including his HD array—5 1TB HD’s, expandable to 12—a wireless router, and a hefty fan assembly.

Perhaps the greatest achievement is the custom acrylic case, which [Dave] lasered out at the Dallas Makerspace (we featured it here last month). Each panel slides off with the press of a button, and the front/back panels provide convenient access to the internal network via some jacks. If you’ve ever been remotely curious about a build like this one, you should cruise over to [Dave’s] page immediately: it’s one of the most meticulously well-documented projects we’ve seen in a long time. Videos after the break.

Continue reading “40-Node Raspi Cluster”

Meet ‘Raspberri’, Your Personal Voice Controlled Assistant

raspda

We’ve all seen the old movie scene where the executive calls his assistant on the intercom for some task or other. [Jan] may not be an executive, and he may not have an assistant. He does have Raspberri, his voice controlled personal digital assistant. Raspberri started life as a vintage Televox intercom box. [Jan] found it at a second-hand store, and snapped it up in hopes of using it in a future project. That project eventually happened when [Jan] got a Raspberry Pi and learned how to use it. He decided to build the Televox and Pi together, creating his own electronic assistant.

[Jan] started by adding a cheap USB sound card and WiFi module to his Pi. He also added a small 3 Watt audio amp board. The Televox used a single speaker as both audio input and output. [Jan] didn’t want to make any modifications to the case, so he kept this arrangement. Using a single speaker would mean dead shorting the audio amplifier and the sound card’s microphone input. To avoid this, [Jan] added a DPDT relay controlled by the original push-to-talk button on the Televox. The relay switches between the microphone input and the audio output on the USB sound card. Everything fit nicely inside the Televox case.

With the hardware complete [Jan] turned his attention to software. He went with PiAUISuite for voice input. Voice output is handled by a simple shell script which uses google voice to convert text to speech. For intermediate processing, such as scraping a weather website for data, [Jan] created custom python scripts. The end result is pretty darn good. There is a bit of lag between saying the command and receiving an answer. This may be due to transferring the audio files over WiFi. However,  [Jan] can always get away with saying his assistant was out getting him more coffee!

Continue reading “Meet ‘Raspberri’, Your Personal Voice Controlled Assistant”