AltSoftSerial Looks To Speed Up Arduino Software UART

So let’s say your using an Arduino in your project. You already have the hardware-based serial interface working with one portion of the project and need a second serial port for unrelated hardware. The obvious solution is to write one in software. But this is a place where working in the Arduino environment gets really hairy. Since there’s a layer of abstraction between the code and the hardware interrupts, it can be difficult to know if you are going to have timing problems. But there’s a new library available which seeks to reduce the latency of software-based serial communications so that you don’t have to worry about it.

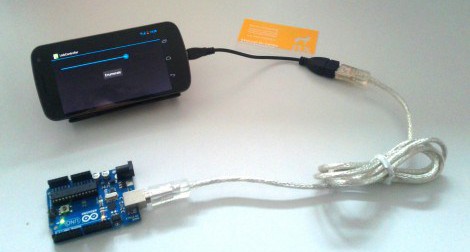
It’s named AltSoftSerial because it is a software-based serial library that is an alternative to the NewSoftSerial package. The former can function with just  2-3 microseconds of latency, while the latter has as much as a 174 microsecond hit. If it functions as advertised that’s quite an improvement. It’s not hard to put together a hardware test platform, and the example program is only about a dozen lines of code (which is the beauty of working in this environment) so give it a try if you have a free hour here or there.

Building LED Walls On The Cheap

Around this time last year, [KopfKopfKopfAffe] was enlisted as a set designer and was told to build some sort of light effects for electronic music parties. The budget for the project wasn’t much at 200 Euros, but he did manage to build decent 5×5 RGB LED matrix that is fully controllable by a computer.

[KopfKopfKopfAffe] didn’t have the time or money to wait for manufactured PCBs, so a bunch of perfboard was placed in a CNC mill with a pen to act as a plotter. All the lines that needed soldered were drawn on by the mill, a feat that probably saved hours of looking at the design before committing solder to iron.

A total of five boards were constructed, each one capable of controlling five RGB LEDs. Each board can be dasiy-chained with an RS-232 serial connection for further expansion. The only thing that’s needed to control the matrix is 17 bits that includes an address and RGB color data for each LED. The system only cost about 10 Euros per node, but we think that could be significantly reduced by leaving out the Molex and DB-9 connectors. [Kopf] project turned out very nice, check it out after the break.

Continue reading “Building LED Walls On The Cheap”

Commandeer X10-based Home Automation With Your Favorite Microcontroller

X10 has been around for a long time. It’s the brand name for a set of wireless modules used to switch electrical devices in the home. There’s all kinds of different units (bulb sockets, electrical outlets and plug pass-throughs, etc.) and they’re mass-produced which makes them really inexpensive. Whether you already have some X10 controlled devices or just plan to add them later, we think you’ll find [Jeff Ledger’s] post on controlling the system with a Propeller chip interesting. The technique is not Propeller specific and will be simple to port to your microcontroller of choice.

[Jeff] got his hands on an X10 Firecracker. This provides a DB-9 serial connection meant to be used for computer control. But the interface is so simple all you need is two I/O pins feeding the level converter circuit seen above. You can get the TC4427 for less than a dollar, and the Firecrcker module for as little as $6. Since [Jeff] has already covered adding Ethernet via a ENC28J60 he goes on to detail a web-server that lets him switch his devices, all served from the Propeller chip.

Here’s a different ENC28J60 Ethernet tutorial for those interested in webpages from microcontrollers. And then there’s also a ZigBee home automation project if you’re not warming up to the idea of using X10 modules.

Pushing FPGA Config Files Via Serial Using ‘cat’

[Andrew] is trying to buckle down and hammer out his PhD project but was surprised by the sorry state of the configuration options for his FPGA/ARM dev board. Using JTAG was painfully slow, so he studied the datasheet to see if there was another way. It turns out the Xilinx FPGA he’s using does have a slave serial mode so he came up with a way to push configuration from the ARM to the FPGA serially.

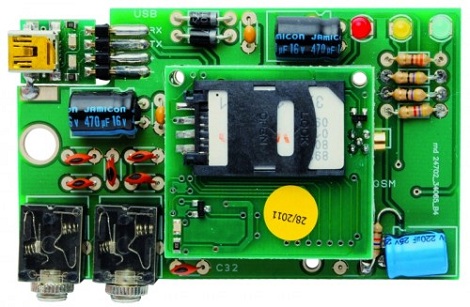
Four of the connects he needed were already mapped to PortC pins on the AT91SAM9260 ARM System on a Chip. He ended up using the EN_GSM pin on the FPGA, since there is no GSM module on this board; connecting it to the microcontroller with a piece of wire. Now he can SSH into the ARM processor, grabbing information on the FPGA from /dev/fpga0. When it comes time to program, it’s as easy as using the cat command on the binary file and redirecting the output to the same hook.

N64 Controller Input Using An ATtiny85

[Larsim] worked out the timing necessary to read button and joystick data from an N64 controller using an ATtiny85 microcontroller. The project was spawned when he found this pair of controllers in the dumpster. We often intercept great stuff bound for the landfill, especially on Hippie Christmas when all the student switch apartments at the same time.

Instead of cracking the controllers open and patching directly to the buttons, [Larsim] looked up the pinout of the connector and patched into the serial data wire. In true hacker fashion, he used two 5V linear regulators and a diode in series to step his voltage source down to close to 3.6V, as he didn’t have a variable regulator on hand. It does sound like this causes noise which can result if false readings, but that can be fixed with the next parts order.

The controller waits for a polling signal before echoing back a response in which button data is embedded. This process is extremely quick, and without a crystal on hand, the chip needs to be configured to use its internal PLL to ramp the R/C oscillator up to 16Mhz. With the chip now running fast enough, an external interrupt reads the serial response from the controller, and the code reacts based on that input.

It seems the biggest reason these N64 controllers hit the trash can is because the analog joystick wears out. If you’ve got mad skills you can replace it with a different type.

Add A Real Life Hardware Terminal To That Newfangled Computer Of Yours

vt200_serial_hardware_terminal_over_usb

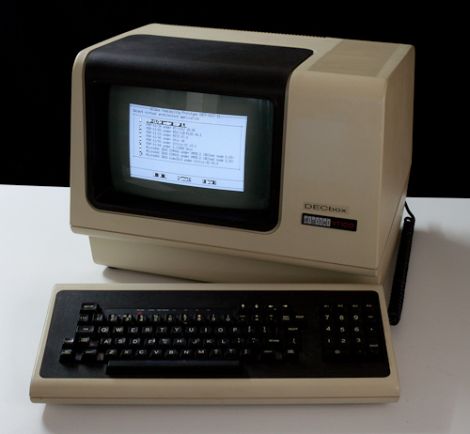
If you find a crusty old IT guy and give him half a chance, he’ll probably regale you with stories of how things were done “in the old days” where no one had their own computer and everyone worked on mainframe-connected dumb terminals. [JSTN] yearned for a true to life terminal display that he could attach to his 2010 Mac Pro, and since there’s no chance anybody is bringing one to market any time soon, he pieced one together on his own.

He dug up a digital VT220 terminal, and got to work trying to interface this office relic with his shiny new Mac. He found a few helpful tips from someone

Flashing Arduinos With A Zipit

zipit_arduino_flashing

[Giacomo] finds that every once in awhile, he needs to flash a sketch to an Arduino while on the go. While he doesn’t always carry his laptop with him, he almost certainly has his Zipit Z2 on hand. He prefers to use the Zipit because it’s tiny, it uses Debian, has built-in WiFi, and can run for about 5 hours before requiring a recharge. The only shortcoming is that the device lacks a serial port.

Following instructions we featured last year he added a serial port to his device, then built a small converter cable that allows him to connect it to virtually any Arduino. He says it only takes a moment to get avrdude up and running on the Zipit via apt-get, and once that’s done, he is in business. He wrote a short script that saves him from entering the flash command over and over, so the process couldn’t be simpler.

He does mention that since the Zipit does not have a DTR line, Arduino resetting must be done manually. For the convenience of flashing sketches from the palm of our hand, we can deal with that.

Check out the video below for a quick demonstration of his setup.

Continue reading “Flashing Arduinos With A Zipit”