Jenkins Given An Industrial Stack Light For Build Reporting

When working on software development in a team environment, it’s important to know the status of your build at all times. Jenkins can display build automation info on a screen but where’s the fun in that? A popular office project is to build some kind of visual display of a project’s status, and [dkt01] has done just that with this stack light build monitor.

In this day and age of online shopping, random bits of industrial hardware are just an eBay away, so it’s easy to find some cool lamps or indicators for any project. [dkt01] sourced a standard 24V stack light off the shelf. With its green, red, and yellow indicators, its perfect for showing the current status of their build server.

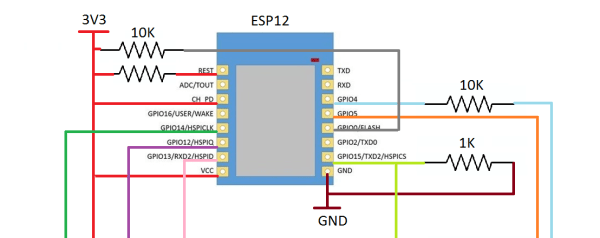
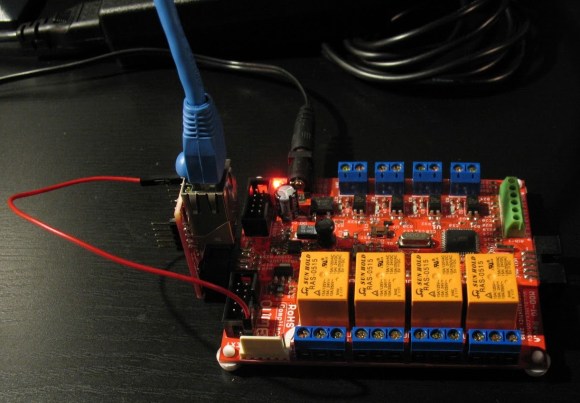
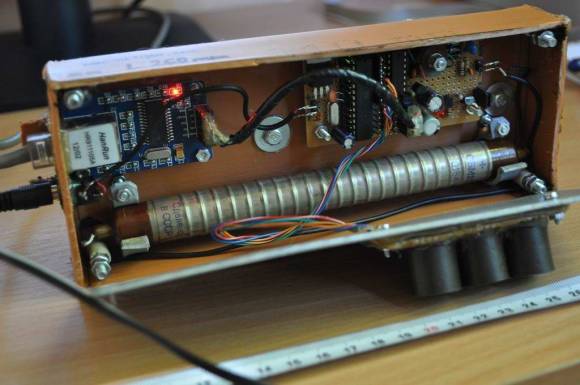
The project uses an Arduino Pro Micro combined with an ENC28J60 Ethernet adapter. We used to see that chip all the time but in 2017 it’s somewhat of a classic setup with the great unwashed masses largely migrating to the ESP8266. However, for the purposes of this project, it was perfect for connecting to the wired office network (after all, you want to know the status of your build and not of your WiFi). [dkt01] even managed to get a web configuration to work despite the relatively meager resources of the ATmega32u4.

The build is cleanly executed, with the microcontroller and Ethernet hardware tucked into a 3D printed base for the stack light’s enclosure. It’s far more likely to become a permanent office fixture if it’s a tidy build without wires hanging out everywhere so a custom PCB ties everything together neatly. In another nice touch, the stack lights flash on initialization to indicate if the DHCP lease was successful, which makes troubleshooting easier. There’s an overview of all different light combinations and meanings in the video after the break.

Overall it’s a solid build with some off-the-shelf components that serves a genuine purpose. For a similar project built on a smaller scale, check out the Indictron. For something bigger, show us how you’ve learned to output your server status on the city’s traffic lights. Ask first, though.
Continue reading “Jenkins Given An Industrial Stack Light For Build Reporting”

Wired Networking For The ESP8266

The ever popular ESP8266 is popping up in more and more projects. There are CNC controllers, blinkey WiFi lighting, and downright bizarre WiFi to Ethernet bridges. [Cicero] has thrown his hat into the ring with one of these Ethernet-enabled ESP8266 builds, and right now everything works, it’s simple to put together, and cheap to build.

Astute readers will notice we’ve seen something like this before. A few months ago, [cnlohr] discovered the Ethernet controller in the ESP8266. This was, by every account, the hard way of doing things. [cnlohr] was driving the Ethernet directly through the ESP’s I2S bus. [Cicero]’s project does not. It uses the cheap ENC28J60 SPI to Ethernet adapter to put the ESP on a wired network. Is one solution better than the other? That’s arguable. Is one solution much simpler than the other? Yes, [Cicero]’s work allows anyone to add Ethernet to the ESP8266 with a few resistors and a module that costs $3 from the usual online shops.

With the Ethernet stack taken from [Ulrich Radig], the SPI driver from [MetalPhreak], and an ESP8266-based web server from [Sprite_tm], [Cicero] managed to serve up web pages through both the wired and wireless connections.

Although this build is not as technically amazeballs as [cnlohr]’s work with driving Ethernet directly from the ESP, it is very easy to implement, opening up the doors to a few of the more interesting capabilities of a wired ESP. With the Ethernet unlocked, there’s a free WiFi interface to wardrive, snoop around in promiscuous mode, inject packets, bridge a bunch of ESPs in mesh mode to another network, and other network shenanigans. The ENC28J60 modules have probably already found their way into a few parts bins and junk boxes already, making [Cicero]’s work the quick start guide to wired networking on the ESP.

Thanks [PuceBaboon] for sending this one in.

Link Trucker Is A Tiny Networking Giant

If you’re a networking professional, there are professional tools for verifying that everything’s as it should be on the business end of an Ethernet cable. These professional tools often come along with a professional pricetag. If you’re just trying to wire up a single office, the pro gear can be overkill. Unless you make it yourself on the cheap! And now you can.

[Kristopher Marciniak] designed and built an inexpensive device that verifies the basics:

  • Is the link up? Is this cable connected?
  • Can it get a DHCP address?
  • Can it perform a DNS lookup?
  • Can it open a webpage?

What’s going on under the hood? A Raspberry Pi, you’d think. A BeagleBoard? Our hearts were warmed to see a throwback to a more civilized age: an ENC28J60 breakout board and an Arduino Uno. That’s right, [Kristopher] replicated a couple-hundred dollar network tester for the price of a few lattes. And by using a pre-made housing, [Kristopher]’s version looks great too. Watch it work in the video just below the break.

Building an embedded network device used to be a lot more work, but it could be done. One of our favorites is still [Ian Lesnet’s] webserver on a business card from way back in 2008 which also used the ENC28J60 Ethernet chip.
Continue reading “Link Trucker Is A Tiny Networking Giant”

A Cable Box Becomes A Network Time Display

DVR

In 2011 [Erkki]’s DVB box gave up the ghost. It had been a fixture of his media center for quite a while, decoding cable and recording shows faithfully for years. A flaky power supply will bring down the mightiest machine, though. and the Topfield box eventually found itself in disuse. One thing [Erkki] liked about this cable box is its wonderful green LED clock – even after the box had been declared dead, he still used it as a clock. Not wanting to keep a faulty machine on life support, [Erkki] decided to strip the guts and replace them with a networked Arduino that receives time over a network

[Erkki] originally used an Arduino and an ENC28J60 Ethernet module to receive time from an NTP server and spit it out onto the LCD display. A full Arduino for this kind of job, especially one that’s a more or less complete project, is a bit overkill so [Erkki] designed a PCB to put his ‘duino to better use.

One interesting bit about this build is that [Erkki] found it completely broken one day. Figuring this was a problem with the microcontroller, he first fried the ATMega with 9 volts – the reasons escape us, however – and started work on programming a new chip. After looking at different ports on his NTP server with a microcontroller, [Erkki] realized he had reset his network switch recently, meaning the previous microcontroller was working perfectly.

In the future, [Erkki] hopes to add some new features to this 8×4 seven-segment display sitting in a large box; something like reading off the temperature, checking IRC and his physical mailbox, and notifying him when someone is at the front door.

Embedded Web Server Is All About Clever Formatting

embedded-web-server

Take a look around here and you’ll find all kinds of embedded web servers. This one doesn’t look all that interesting, especially because it’s just a NIC plugged into a development board. But for us the interesting part is in how [Andrew Rossignol] chose to format the webpage assets to best utilize the under-powered server.

The project was spawned as part of a class in Internet Embedded Systems which [Andrew] is taking. The board has an ATmega16 microcontroller and he’s using the ever popular ENC28J60 on that Ethernet adapter board. The TuxGraphics TCP/IP Stack takes care of communications with the network.

One constraint which [Andrew] imposed upon himself was to use just a single response which the available RAM limits to about  700 bytes. Any decent webpage needs to have at least some graphics but that’s tough with the size limit. He managed to display an AVR logo by optimizing an SVG in Inkscape then stripped the rest of the cruft using VIM (explained in the demo after the break). With that piece of Linux-fu in his pocket he set to work streamlining the CSS file. The webpage isn’t just static either. He displays the server up-time and even allows the relays and LEDs on the Olimex board to be controlled.

Despite the limitations of the ATmega family they still seem to do some amazing Internet-connected stuff. Here’s one used as a Minecraft server.

Continue reading “Embedded Web Server Is All About Clever Formatting”

Online Radiation Monitoring Station

geiger-counter-build

This is a Geiger counter which charts its readings on a webpage. [Radu Motisan] put a lot of time into the build and it shows. This thing is packed with features and the hardware choices were the best combinations found through several iterations of development.

In addition to radiation levels the sensor unit takes several other measurements. These include temperature, humidity, luminosity, and barometric pressure. All of the sensor data is monitored and gathered by an ATmega168 which can be charted on a webpage with the help of an ENC28J60 Ethernet chip. The collection and display of this data is detailed at the post linked above.

For those interested in the hardware development, [Radu] published many updates along the way. These are available in his forums posts, as well as his build log. He doesn’t have any videos of his recent work, but way back in May he did publish a clip (found after the break) which shows the testing of different Geiger tubes.

Continue reading “Online Radiation Monitoring Station”

An STM32 Processor Powers This PC

This 32-bit computer is a project [Bogdan Marinescu] built as a contest entry. Sadly he didn’t win, but he did do an excellent job of documenting the build. Having seen several other home built PC projects we’re familiar with the challenges that go into such a thing, and he found some great solutions to each of them.

He started with an STM32F103ZET6 chip. This is an ARM Cortex-M3 processor which brings a lot of power to the playing field. That being said, generating a VGA signal would pretty much zap the usefulness of the chip for other processes so he offloaded that work on a separate Propeller chip. A microSD card serves as storage for the machine, which runs eLua (embedded Lua programming language). There is 1 MB of external RAM and a PS/2 port for keyboard interface. The system is networked thanks to an ENC28J60 Ethernet controller. Don’t miss the video after the break where you can see several demos running on the system.

Continue reading “An STM32 Processor Powers This PC”