Ray's panels on the wall - circles of different sizes (from 60 to 15cm in diameter) covered by fabric of different shades, their arrangement vaguely resembling a cloud.

DIY Acoustic Panels Or Modern Artwork? Can’t Tell

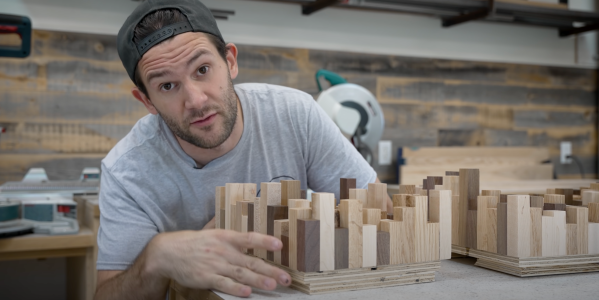
The acoustic properties of a room have a surprising impact when you want to use a microphone. [RayP24]’s son was trying to make his bedroom into a better recording studio, and for [Ray], that turned into an artfully-executed wall panel project. Fortunately, the process is documented so we all can learn from it. When it comes to acoustics, you can often get a whole lot of improvement from surprisingly few changes. And, as this project demonstrates, you can make it look like a decorative piece to boot.

When arranged and placed on the wall, these panels look like an art piece, a decoration you could get from a somewhat fancy store. If you show them to someone, they might not believe that they also serve as a functioning home acoustics improvement, dampening the sound quite well for audio recording needs. The panels are built out of individual circles, cut out in a way that uses as much of a 3/16″ (5mm) plywood sheet as possible, with hollow circles serving as frames to attach foam-backed fabric. In the Instructables post, [Ray] talks quite a bit about how you can assemble your own and what liberties you can take. There’s also a short video accompanying this project, which you can see after the break. This project is begging to be recreated.

There’s a sizeable amount of hacking-meets-home improvement-meets-home acoustics projects out there, especially lately, when so many people are stuck at home for one reason or another. Just a few months ago, we covered another marvelous “art piece turned reverb killer” project operating by a slightly different principle, and also going a bit more into the theory. Perhaps in a few years, we will no longer have to build panels or structures for our soundproofing needs, as purpose-grown mycelium shapes will do that for us. And once it becomes a question of where to hang your newly-built acoustic panels, this simple guide is a good place to start.

Continue reading “DIY Acoustic Panels Or Modern Artwork? Can’t Tell”

Zac shows off his sound diffusion panels

Taking The Bark Out Of Reverb With Wood Scraps

For the past few years, many have become used to having virtual meetings in their homes. Spaces like kitchen tables, couches, spare bedrooms, and hammocks in the yard have all become “offices”. As you can imagine, many of these spaces aren’t well known for their acoustic qualities. [Zac] built a sound diffusion art piece out of scrap pieces of wood to help his office sound better when recording.

Reverb is caused by sound bouncing off hard, flat surfaces like drywall. These reflections are picked up by the microphone and lead to a noticeable drop in perceived sound quality. There are generally two ways to kill reverb in a space: diffusion and absorption. Diffusion is the technique that [Zac] is going for, with thousands of faces at different angles and locations, it breaks up the harsh reflections into millions of tiny reflections. Absorption is usually accomplished with foam and other typically soft substances.

[Zac] happened to have a large pile of offcuts and extra material from past projects of various wood species, making it easy to make a visually interesting piece. He used a table saw to rip them to a consistent width and a drum sander reduced them all to the same depth. Next, the long sticks were cut with a miter saw into 5 different lengths, leaving him with thousands of little pieces of wood. The hard part began when he had to glue several thousand pieces to a plywood backer board with CA glue. Sanding, finishing with poly, and a french cleat made the three pieces ready to hang on the wall.

Overall, the effect is stunning. While we’d love more hard data on the improvement, it certainly does sound better anecdotally. If you’re interested in more woodworking, take a look into making an inlay without a CNC. Video after the break.

Continue reading “Taking The Bark Out Of Reverb With Wood Scraps”

Quiet Your Car The Cheap And Effective Way

If you’ve been on the Earth for a couple of decades or more, or have just grown up riding around in some older metal, you’d know that cars can be incredibly noisy. If you’re unfamiliar, buy yourself a nice car like a 2000 Honda Civic, strip out all the carpet and interior panels, and go for a drive. Huge amounts of research and development have gone into making modern cars as quiet and comfortable as possible. Through the correct use of sound deadening materials and techniques, a car can be made much quieter and audio quality from the sound system can be improved too. [camerajack21] decided to get to work on their Volkswagen to see what could be done.

The project in question pays special attention to the door panels. These are where the primary speakers are housed, and there were issues with rattles if the speakers were allowed to operate at frequencies below 100 Hz. Weather stripping, foam, and improved fasteners were pressed into service to reduce this issue.

Think of a musical bell. If you touch a small part of the bell with just your finger, it no longer can ring true. You don’t need to wrap your entire hand around a bell to keep it from ringing. Your finger is not absorbing sound, just preventing the bell from ringing.

Focus then moved to the body panels. Special sound deadening material (in this case, Silent Coat brand) was then applied to the insides of the doors and trunk to bring the sound level down. The key to effective application of such materials is not to waste money covering entire panels – the Reddit comments are particularly enlightening here. It only takes a small amount of material to stop a panel from vibrating, with most testing suggesting anymore than 30% coverage of a panel brings diminishing returns.

With your car’s sound environment tidily improved, you might be looking for ways to improve your sound system. There’s plenty of ways to go about it – you can even use guitar effects.