It’s almost hard to remember a time when the obvious answer to most questions about manufacturing wasn’t “Throw it on the CNC.” CNC machines have become so entrenched that the acronym has become a verb; few people would misunderstand a statement like “Let’s just CNC that.”
But before CNC machines became so ubiquitous, there were plenty of clever tricks for cutting material in a controlled fashion, as [Pask] shows us with this tool to machine wood for inlays. The tool is called a parser (or passer) drill, and is designed for use in conjunction with a steel template. [Pask]’s version seems pretty easy to make; a pair of mild steel bars are forged flat into spade shapes before having a cutting surface ground into them. The two halves of the drill are welded together and ground down to fit in the chuck of a hand drill, a modern nod to the fact that few people will want to use the traditional bow and breastplate that drove the original parser drills.
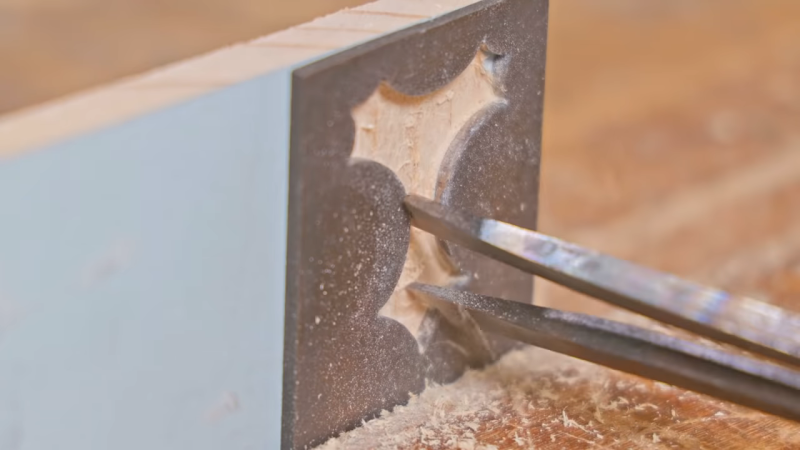
In use, a steel template that determines the shape of the inlay is affixed to the workpiece. The cutting edges of the bits are plunged into the template cutout to machine out the wood; the overhangs of the bits act as depth stop and guide. It only takes a few seconds to make a neat, CNC-free inlay. The video below shows the tool being made and in action.
It’s nice to see what can be accomplished without the need for fancy CNC machines. Not that we have anything against them, of course, but when the same results can be had with some scraps of steel and a little ingenuity, it’s pretty impressive. Looking for something between manual tools and CNC for woodworking? The pantorouter might be just your speed.
Thanks to [Keith O] for the tip.


Retro-mechanics – exellent video
I’ve seen that video appear in my feed page and i’ve never watched, i thought it was another click bait video with that thumbnail.
Ended up to be far more interesting than i thought.
Same here! Just say no to click bait titles!
10 ways to say no to clickbait titles. You will be amazed at no .1.
:D
Well
…played
Almost 2022 and still no way to edit comments -.-
Those are not mild steel bars he forges. He specifically calls out spring tempered high carbon steel.
Very cool video. This technique gets into inside corners that a standard CNC machine simply cannot reach. It gives me ideas for combining this for recesses and CNC for inlays.
If you need sharp corners with CNC and don’t care about depth, you can do them by tracking up to the corner with a v bit.
There’s a seriously lovely bit of software by scorchworks called f-engrave, that’ll generate arbitrarily sharp corners and curves as an inlay, and also generate the inverse shape, and then you can glue the two together and cut through and have a perfect complex inlay from a single piece of wood, with the grain continuous across discontinuous features.
That works, but leaves you with a void that has all it’s surfaces exposed to the outside of the part. With this method, you can and usually do end up with a void that is wider inside the part the at the surface. The upshot of that is that what ever you put in the void may be trapped solely by the geometry, and not by any chemical adhesive. This is especially useful in the use case laid out in the Roy Underwood video for brass inlays.
interesting technique, thanks for posting
+1
man this guy obviously knows his metal but i’m terrified of the tool coming apart and sending one of those bars flying! pretty cool result though
Very nice. I saw this same technique demonstrated by Roy Underhill of “The Woodwright Shop”. It was originally aired on PBS television. Roy of course used the hand drill with the breastplate.