Understanding The T12 Style Soldering Iron Tip

Soldering irons and their tips come in a wide range of formats and styles, with the (originally Hakko) T12 being one of the more interesting offerings. This is because of how it integrates not only the tip and heating element, but also a thermocouple and everything else in a self-contained package. In a recent video [Big Clive] decided to not only poke at one of these T12 tips, but also do a teardown.
These elements have three bands, corresponding to the power supply along with a contact for the built-in thermocouple. After a quick trip to the Vise of Knowledge, [Clive] allows us a glimpse at the mangled remnants of a T12, which provides a pretty good overview of how these tips are put together.

Perhaps unsurprisingly, most of the length is a hollow tube through which the wires from the three contacts run. These power the ceramic heating element, as well as provide the soldering iron handle access to the thermocouple that’s placed near the actual tip.

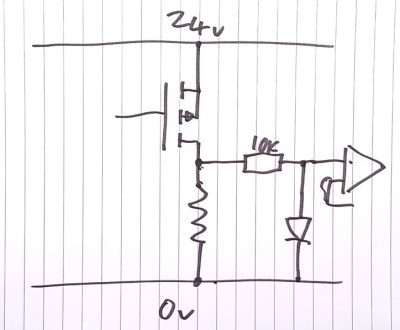
With a simple diagram [Clive] explains how these T12 elements are then used to regulate the temperature, which isn’t too distinct from the average soldering iron with ceramic heating element, but it’s still nice to have it all integrated rather than having to try to carefully not damage the ceramic heater while swapping tips with the average soldering iron.

Continue reading “Understanding The T12 Style Soldering Iron Tip”

DIY Arduino Soldering Iron Hits Version 2.0

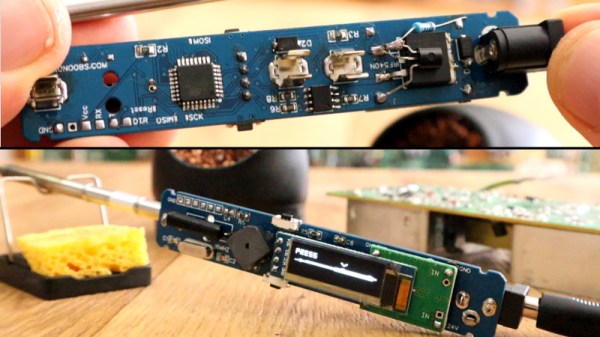
A few months ago we brought word that [Electronoobs] was working on his own open source alternative to pocket-sized temperature controlled soldering irons like the TS100. Powered by the ATMega328p microcontroller and utilizing a 3D printed enclosure, his version could be built for as little as $15 USD depending on where you sourced your parts from. But by his own admission, the design was held back by the quality of the $5 replacement soldering iron tips he designed it around. As the saying goes, you get what you pay for.

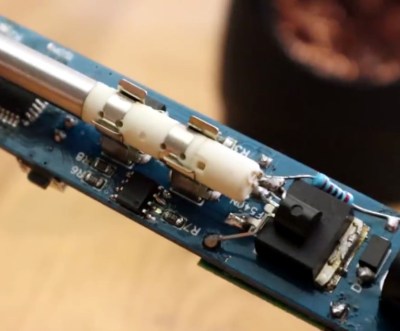
But [Electronoobs] is back with the second version of his DIY portable soldering iron, and this time it’s using the vastly superior HAKKO T12 style tip. As this tip has the thermocouple and heating element in series it involved a fairly extensive redesign of the entire project, but in the end it’s worth it. After all, a soldering iron is really only as good as its tip to begin with.

This version of the iron deletes the MAX6675 used in V1, and replaces it with a LM358 operational amplifier to read the thermocouple in the T12 tip. [Electronoobs] then used an external thermocouple to compare the LM358’s output to the actual temperature at the tip. With this data he created a function which will return tip temperature from the analog voltage.

While the physical and electrical elements of the tip changed substantially, a lot of the design is still the same from the first version. In addition to the ATMega328p microcontroller, version 2.0 of the iron still uses the same 128×32 I2C OLED display, MOSFET, and 5V buck converter from the original iron. That said, [Electronoobs] is already considering a third revision that will make the iron even smaller by replacing the MOSFET and buck converter. It might be best to consider this an intermediate step before the DIY iron takes on its final form, which we’re very interested in seeing.

The first version of the DIY Arduino soldering iron garnered quite a bit of attention, so it seems there’s a decent number of you out there who aren’t content with just plunking down the cash for the TS100.

Continue reading “DIY Arduino Soldering Iron Hits Version 2.0”

Shop Lighting: Weighing Cost And Efficiency

[Ben Krasnow] wanted to upgrade his shop lighting but before he made any decisions he decided to educate himself about the options that are out there. Luck for us, he shares the facts about different lighting in terms of cost and efficiency.

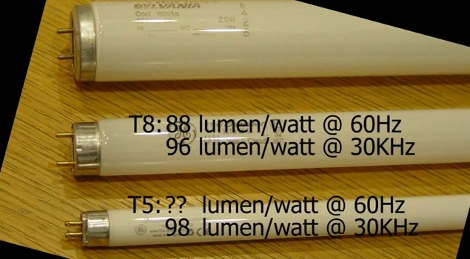
His old setup uses fluorescent light fixtures with T12 bulbs. These are rather bulky and inefficient bulbs. Many folks, ourselves included, would think of LED as a logical replacement. [Ben] started by looking into the various high-intensity LED modules that are available. He grabbed a catalog and started doing a couple of different calculations to compare Lumens/dollar for the upfront cost, and Lumens/Watt for the operational costs. Hands down, newer fluorescent bulbs come in cheaper on both counts and provide a wider spectrum of light.

The next decision was between purchasing the newer T5 bulbs which are rated at very high efficiencies, or to go with T8 bulbs which are better than the T12 standard but can use the same fixtures. After doing some digging he found that T5 is not much more efficient than T8, but they use an electronic ballast to boost efficiency. He ended up replacing his old magnetic ballasts with electronic ones to get high T8 efficiency at a cost that was lower than buying new T5 fixtures.

See [Ben’s] own recount of this process in the clip after the break.

Continue reading “Shop Lighting: Weighing Cost And Efficiency”