
Liquid two-part resins that cure into a solid are normally used for casting, and [Cuddleburrito] also found them useful to add strength and rigidity to 3D printed pillar supports. In this case, the supports are a frame for some arcade-style buttons, which must stand up to a lot of forceful mashing. Casting the part entirely out of a tough resin would require a mold, and it turns out that filling a 3D print with resin gets comparable benefits while making it easy to embed fastener hardware, if done right.
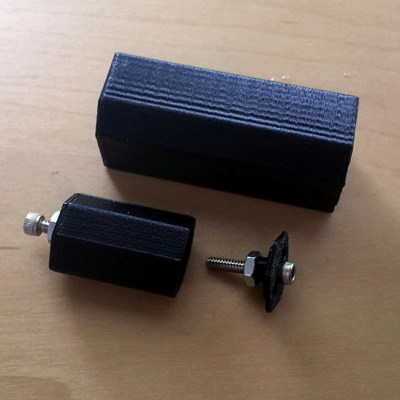
Filling the inside of an object with some kind of epoxy or resin to reinforce it isn’t a new idea, but [Cuddleburrito] learned how a few small design considerations can lead to less messy and more successful results. The first is that resin can be poured with screws in place without any worry of trapping the screws in the resin, if done correctly. As long as only the threads of the screw are in the resin, they can be backed out after the resin has cured. Embedding nuts into the resin to act as fasteners becomes a much easier task when one can simply pour resin with both nut and screw in place, and remove the screw afterwards. A thin layer of a lubricant on the threads to act as a release may help, but [Cuddleburrito] didn’t seem to need any.
The second thing learned was that, for a pillar that needs a cap and embedded nut on both ends, it can be tricky to fill the object’s void with the perfect amount of required resin before capping it off. On [Cuddleburrito]’s first attempt, he underfilled and there wasn’t enough resin to capture the nut on the top lid of the pillar he was making. The way around this was to offset the nut on a riser, and design in either a witness hole or an overflow relief. A small drain hole or a safe area for runoff allows for filling things right up without an uncontrolled mess in the case of overfilling.
Something worth keeping in mind when experimenting in this area is that in general the faster a resin cures, the more it heats up in the process. It may be tempting to use something like 5 minute epoxy in a pinch, but the heat released from any nontrivial amount of it risks deforming a thin-walled 3D print in the process. For cases where resin would be overkill and the fasteners are small, don’t forget we covered the best ways to add fasteners directly to 3D printed parts.
 Some of us have looked at clear resin jewelry casting kits online and started to get ideas. Hackaday’s own [Nava Whiteford] decided to


