Current Limiter For A MOT Welder

current-limiter-for-MOT-welder

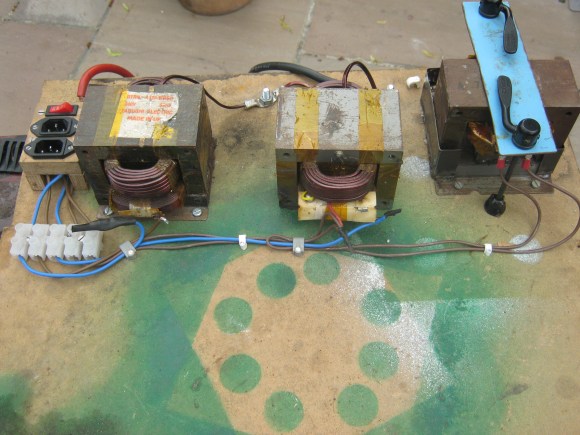
[Mike Worth] wanted the option to run his Microwave Oven Transformer welding rig at less that full power. After being inspired by some of the other MOT hacks we’ve featured he figured there must be a lot of ways to do this. But his searches on the topic didn’t turn up anything. So he just designed and built his own adjustable current limiter for the welder.

At the beginning of his write-up he details what we would call a bootstrap procedure for the welder. Go back and check out his original build post to see that he had been holding the framework for the cores together using clamps. To make the setup more robust he needed to weld them, but this is the only welder he has access to. So he taped some wood shielding over the coils and fired it up.

The current limiter itself is built from a third MOT. Adjustment is made to the cores by changing out the E and I shaped pieces. This allows for current limiting without altering the windings. [Mike] holds it all in place with a couple of bicycle wheel quick connect skewers.

It just goes to show that you should never get rid of a microwave without pulling the transformer. Even if you don’t need a welder wouldn’t you love a high-voltage bug zapper?

DIY Spot Welder Makes Metalwork Easy

At Hackaday, we’ve seen enclosures built out of just about every material. From wood, glass, epoxy resin, plastic, and even paper, all these different types of enclosures provide some interesting properties. Sometimes, though, you need an enclosure made out of metal and welding together steel cases isn’t exactly easy or cheap. [manekinen] came up with a really great solution to the problem of welding together sheet metal. It’s a very easy to build spot welder perfect for fabbing steel cases.

The core of the build is a transformer pulled from a Technics stereo amplifier. [manekinen] removed the stock secondary winding and rewound the transformer four turns of 35mm ² wire (about 2 AWG). This made the transformer put out 2.6 Volts a 1 kA – more than enough to weld 22 ga sheet.

For the control mechanism, [manekinen] put a limit switch on the electrode arm and wired that to a timer. A knob on the front of the welder allows him to vary the time the welder is on from 0 seconds to 4 seconds.

The results are fantastic – trying to rip apart a weld only results in the metal itself tearing; exactly what you want to see in a welder. It’s a great build made even more fantastic by the welder building its own enclosure.

Continue reading “DIY Spot Welder Makes Metalwork Easy”

Hundred Dollar Capacitive Discharge Welder

[Robert] needed to weld metal tabs on a few batteries. In a proper manufacturing situation, this is usually done with outrageously expensive welders. Not wanting to spend thousands of dollars to attach bits of metal together, [Robert] built his own capacitive discharge welder for only $100.

Instead of the giant transformers you’d find in a spot welder, a capacitive discharge welder uses a huge bank of capacitors – greater than 1 Farad – to weld pieces of metal together. Huge caps like these are commonly used for ridiculous car stereo setups, so with the addition of a car battery charger purchased from Walmart, [Robert] had most of a welder on his workbench.

To control the mass of power coming from his huge cap, [Robert] used a 13o amp Silicon controlled rectifier to improve the control of his welder. With the battery charger, cap, and SCR, [Robert] only needed a few bits of heavy gauge wire to tie the entire build together.

[Robert]’s build welds metal tabs on battery terminals beautifully, but the possibilities don’t end there. This welder could easily be repurposed to build the skeleton of outrageously intricate dead bug circuits, or maybe even keeping that thing you made with your Erector set in one piece permanently.

A Capacitive Discharge Welder/cutter For All Your Lightweight Needs

microspot-welder

[Radu Motisan] wrote in to share a cool project he has been working on lately, a pulsed microspot welder/cutter.

The device is capable of spot welding thin metals such as foils and battery tabs by sending a pair of high current pulses between the two electrodes whenever [Radu] presses the trigger button. The cutting portion of his device uses the same general mechanism, though it requires a far greater number of pulses to get the work done.

The welding/cutting process is controlled by an ATMega16, which is also tasked with taking input from the user and displaying information on the LCD panel. The microcontroller creates quick (in the ten to several hundred microsecond range) pulses for both welding and cutting, with the latter obviously requiring a long series of pulses.

[Radu] started out using a relatively small capacitor array to power the device, but has recently upgraded to a 1.6 Farad car audio capacitor, which works (and looks) much better than before. His blog seems to update every few days with more pictures and details about his welding station, so be sure to check back often for updates.

Be sure to stick around to see a short video of [Radu] adding metal tabs to batteries and tearing down an aluminum can with his cutter.

Continue reading “A Capacitive Discharge Welder/cutter For All Your Lightweight Needs”

Improving Your Welder Without A Microcontroller

We’re always impressed when a piece of hardware is torn apart, rebuilt and ends up exceeding the capabilities of the original device. [Dave] and [Will]’s home-built TIG welder is no exception to that rule.

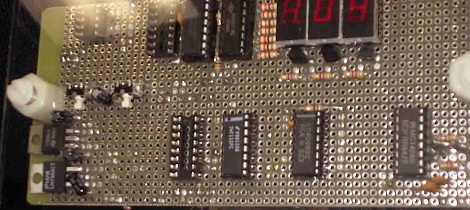
When [Dave] and [Will] started working on converting a simple AC stick welder to a welder with every function imaginable, they decided to keep it simple. After looking at some high-price commercial welders they came up with a list of features they wanted to have and decided to implement this in TTL and CMOS logic. The guys didn’t want to go with a microcontroller solution because not everyone can code, and discrete chips are very easy to troubleshoot given minimal tools.

For the high voltage part of the build, the original flyback transformer was replaced with a neon sign transformer and homebrew spark gap and capacitor. The plans for a homebrew spark gap and cap didn’t quite work out so they were replaced with commercial units. The guys included schematics and a PCB layout (PDF warning) of their build. It’s always great to see an amazing logic chip build, and improving an existing tool never hurts.

Thanks to [Franci] for sending this one in.

1000W Search Light – Now Build A Bat Signal

Forget flashlights, and leave those burning lasers at home, [Ben Krasnow] built a search light using a 1000W xenon arc lamp. That box you see on the side of the trash-can housing countains a starting circuit that shoots 30 kilovolts through the xenon lamp to get it started but it is separate from the power supply. [Ben] started experimenting with the lamp back in April but recently finished the project by using the inverter from an arc welder to get the 50 amps at 20 volts needed when the lamp is on.

The insert on the left of the image above is an outdoor picture of the beam. You can make out a tree at the bottom. Take a look at the video after the break for a full walk-through of the circuitry and some test footage of the finished product.

Continue reading “1000W Search Light – Now Build A Bat Signal”

LED Goggles Make You Trip Out?

Who knows if this works and should you really want to try to induce hallucinations by flashing colors in front of your eyes? But we do love the zaniness of the project. [Everett’s] homemade hallucination goggles come in two flavors, the small swimming-goggle-type model and the heavy-duty trip visor made from welder’s goggles. Each brings together the same components; a half ping-pong ball for each eye to diffuse the light from an RGB LED. The system is controlled by an Arduino with some buttons and 7-segment displays for a user interface. Put this together with some homemade EL wire and you’re ready for Burning Man.
[Thanks Evan]