Before a spectrometer can do any useful work, it needs to be calibrated to identify wavelengths correctly. This is usually done by detecting several characteristic peaks or dips in a well-known light source and using these as a reference to identify other wavelengths. The most common reference for hobbyists is the pair of peaks produced by a mercury-vapor fluorescent light, but a more versatile option is a xenon-bulb light source, such as [Markus Bindhammer] made in his latest video.
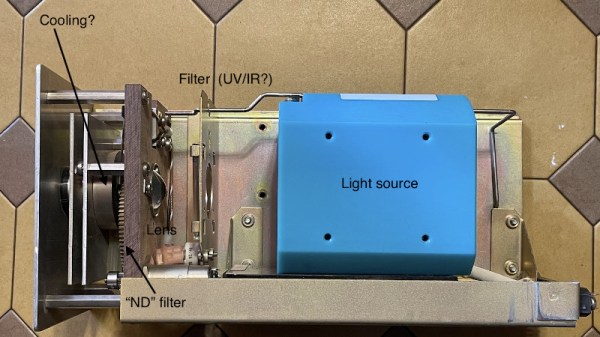
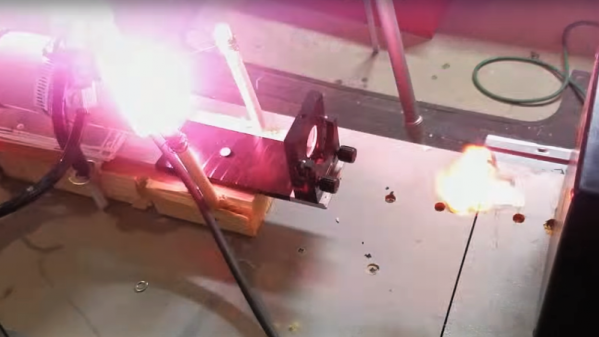
A xenon gas discharge produces a wide band of wavelengths, which makes it a useful illumination source for absorbance spectroscopy. Even better, Xenon also has several characteristic spikes in the infrared region. For his light source, [Markus] used an H7 xenon bulb meant for a vehicle headlight. The bulb sits in the center of the source, with a concave mirror behind it and a pair of converging lenses in front of it. The converging lenses focus the light onto the end of an optical cable made of PMMA to better transmit UV. A few aluminum brackets hold all the parts in place. The concave mirror is made out of a cut-open section of aluminum pipe. The entire setup is mounted inside an aluminum case, with a fan on one end for cooling. To keep stray light out of the case, a light trap covers the fan’s outlet.
[Markus] hadn’t yet tested the light source with his unique spectrometer, but it looks as though it should work nicely. We’ve seen a wide variety of amateur spectrometers here, but it’s also illuminating to take a look at commercial scientific light sources.