How To Bend PVC The Nice Way

PVC pipe is a valuable material to the backyard hacker. It’s cheap, readily available, and comes in a range of different sizes. However, what do you do if you need to bend it? The typical approach would be to grab a heat gun or blowtorch, warm it up, and go from there. These methods can get messy however, with kinks and melted surfaces spoiling the final result. Now [Linn] has released a video with a method that delivers impressively neat results.

A bending jig can help create repeatable results.

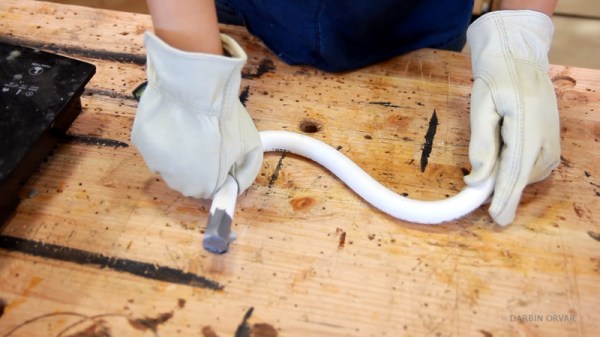
The method is simple, using that classic hacker staple — duct tape. The end of the pipe is taped off, and the pipe filled with sand. With the correct amount measured out, the sand is heated on a cooktop, then poured back into the pipe. After giving the heat some time to soften the plastic, the pipe can then be manipulated into the desired shape.

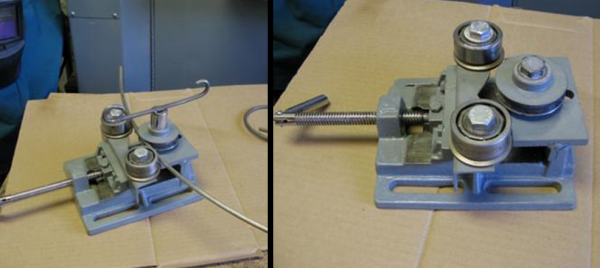
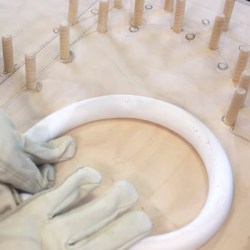
[Linn] does a great job of explaining the process in a clear and concise manner, and shares tips on how to use a bending jig to guide the final shape. Results are best with smaller pipes that are easier to heat through, but larger sections can be manipulated with patience.

We can’t wait to see what [Linn] builds with this new technique. The possibilities could be further expanded by combining with these PVC fittings designed just for building stuff.

[Thanks to George for the tip!]

Roll Bender

Vise Reborn As A Roll Bender

Have you ever tried bending a metal rod into a consistent curve? Maybe you bent it over your knee or broke out a bucket or something. Doing it by hand never really gets the arc perfect. Handyman [Joe] found himself needing to bend a bunch of 1/4″ metal rod into various diameter rings. He didn’t have any tools to bend or roll metal and instead of fretting about it, he put on his ingenuity hat and built a perfect tool for the job.

That perfect tool is called a Roll Bender and it uses 3 rollers to bend metal into an arc of consistent radius. The straight piece of metal is passed by the rollers many times. The distance between the rollers is continually adjusted to reduce the radius of the arc of the metal until it reaches the correct size.

[Joe] started out with an old drill press vise. A piece of plate steel was welded to the  stationary vise jaw to provide a platform for a grooved pulley to be mounted. On the clamping jaw, a piece of angle iron was attached to support two very large bearings. The metal rod is clamped between the two bearings and the grooved pulley. A key made from a socket and some scrap metal as a handle allow the user to rotate the pulley by hand while the distance between the rollers is adjusted by the vise’s crank. Doing this moves the rod back and forth between all 3 rollers to gradually mold the once-straight rod into a full ring.

We’ve always been fond of machines that do the bending for you. Even if they haven’t been invented yet.

Heating, Bending, And Gluing To Make Acrylic Enclosures

acrylic-enclosures-heating-bending-gluing

You can do a lot with acrylic and few tools. If you’re just starting out we’d suggest taking a look at [Michael Colombo’s] guide to heating, bending, and gluing to create custom acrylic enclosures. Chances are you already have most of what you need. The one tool you might be lacking is a heat gun.

The process starts with math. Before cutting the acrylic down to size you need to calculate how much you need. Next [Michael] demonstrates his cutting technique using a Dremel and a cut-off wheel. We prefer to clamp along the cut line, score many times with a razor knife, and snap the stuff. But you can also send it through a table saw if you have the right blade.

The bending technique he uses starts by clamping boards on either side of the bend. The acrylic left sticking out is pushed with a scrap board while the bend is heated with the heat gun. Once all of the corners were made in one piece the sides were glued in place. This last step can be tricky. The acrylic glue is made to work with perfect seams, so make sure your cuts are clean and the bent pieces line up.

The process was documented in the clip found after the jump. If you’re looking for a more targeted heat source check out this dedicated acrylic bender.

Continue reading “Heating, Bending, And Gluing To Make Acrylic Enclosures”

Reverse Engineering A PCB

Occasionally when a device breaks, the defect is obvious. Whether it is a blown fuse or a defective capacitor, generally the easy to see stuff is easy to fix. When a problem is more subtle, or when doing some more advanced tasks like adding functionality to a device, greater knowledge about a circuit board is required. While there might be details hidden in lower levels of PCB, often just knowing the mounted components and layout of the outside layers can be enough to create a rough schematic of a device. [Throbscottle] has put together an excellent guide for procedurally breaking down a photo of a board and turning it in to something useful. The guide utilizes some open source image processing software such as the GIMP, Inkscape, and Dia, all of which are widely available. Keep in mind this reverse engineering can be a time consuming process, but will almost definitely reward those patient enough to work through it.

[Thanks to everyone who sent this in!]

Heater For Bending Acrylic

We like using acrylic in our projects but there are a couple of tricky techniques, particularly getting clean cuts for glued edges and bending the material into curves. [Giorgos Lazaridis] has a great solution to the latter, a dedicated acrylic heater. Instead of using an oven to warm the material for bending he’s using localized heat produced by a high-powered lamp pulled from an old laser printer. The next part of his solution is to keep the heated area of the acrylic as small as possible. This was achieved by creating heat sinks on either side of the bulb. The metal bars seen above have water running through them to help isolate the softening of the material to a narrow strip. See how well this system works in the video after the break.

Continue reading “Heater For Bending Acrylic”