Learn Shift Registers Without Involving A Microcontroller

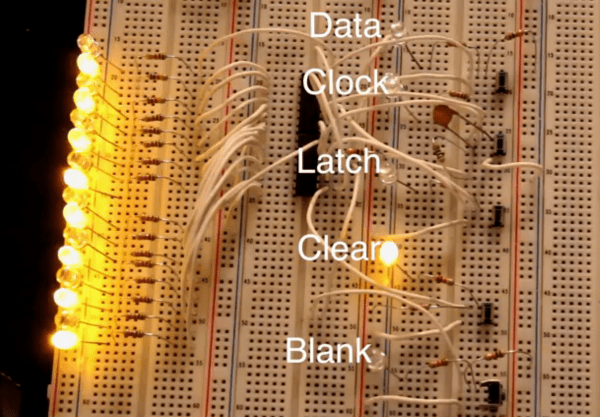
This is a truly hands-on approach to learning. [Kevin Darrah] ditched the microcontroller and is using push buttons to learn about 595 shift registers. The test rig uses two of the serial-in, parallel-out chips. These are cascading which means that as data from the first chip overflows it feeds the input of the second. The parts are commonly used to drive LEDs, or reduce the number of pins needed to drive peripherals like this character LCD.

The five push-buttons give you a chance to intuitively learn how the chip logic works. The blank button is also commonly called Output Enable (OE). Driving it high shuts off the outputs of the chips but doesn’t clear the data. That task is performed by the clear button which is driven low to set all of the shift register memory to zero. The other three buttons set the logic level, shift it into the chip using the clock signal, and push the stored values to the outputs using the latch.

To get a visual approximation of what’s happening inside of these chips you should check out the shift register tutorial linked to in this post.

Continue reading “Learn Shift Registers Without Involving A Microcontroller”

USB Apple ][ Disk Emulator

One of the most commonly frustrating things about having an old Apple ][ lying around in your basement or attic is the lack of software. While at one time in the late 80s you may have had your own copy of Oregon Trail, that disk is either lost or non-functional, and it’s pretty hard to get new disk images onto 5 1/4″ disks.

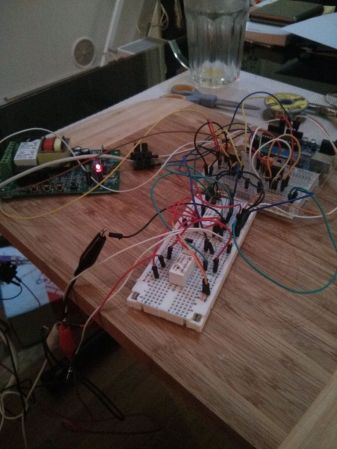
To solve this problem for himself, [Eric] came up with an Apple disk emulator. A project like this has been done many, many times over the last few decades, but [Eric] put his own twist on it: he doesn’t use a microcontroller. Instead, he used a simple USB FTDI device to talk to the Apple disk drive.

The FTDI device in question is a UM232H chip that takes a USB connection and turns it into an SPI bus. Of course the Apple ][ disk doesn’t speak SPI, so [Eric] needed to do a little logic conversion with a 74LS251 multiplexer and a 74LS161 counter.

In the video after the break, you can see [Eric] loading Apple disk images on a IIc from his new Intel Mac. It’s a neat build, but it’s not done yet: [Eric] plans on adding a microcontroller with an SD card, allowing just about every Apple ][ game every made to fit in your pocket. Yes, [Eric]’s project is quite similar to the A][ pocket serial host we saw just a bit ago, but this will hopefully have a lower component count.

Continue reading “USB Apple ][ Disk Emulator”

Add Motorized Blinds To Your Home Theater

motorized-blinds

[Chipsy] found himself with an interesting problem. The room that serves his home theater has a wall mirror which reflects part of the screen during viewing. In an otherwise dark room this was very distracting. His solution was to add a blind that covers the mirror during viewing, but who wants to constantly pull that down and back up again? Since the motorized projection screen he is using has a remote control he figured out a way to motorize the blind and synchronize it with the screen’s remote.

The screen uses mechanical relays to switch the motor. He patched into these with an Arduino to detect whether the screen was going up or down. It was easy enough to use his own relay and motor with the blind, but he needed a way to stop the blind once it was in position. For covering up the mirror he simply sets an 18 second timer, but for retracting the blind he wanted precise alignment so he added a magnet and sense its position with a reed switch. See the synchronized screen and blind in the clip after the break.

Continue reading “Add Motorized Blinds To Your Home Theater”

WebSockets, Raspis, And GPIO

socket

A while back, [Blaise] tried his hand at getting the WebSocket protocol working with PIC microcontrollers, WiFi adapters, and a few pots, knobs, and switches. It was an excellent project for its time, but now [Blaise] has a Raspberry Pi, and the associated GPIO pins and Ethernet connection. He decided it was time to upgrade his build to the Pi, this time with a project he calls PiIO.

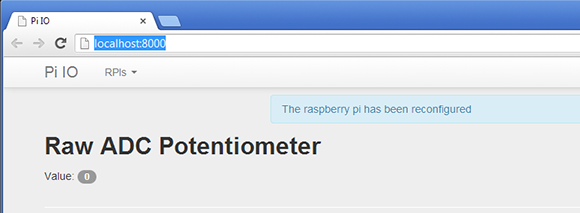
The basic idea of [Blaise]’s project requires a Pi, a server, and a computer running a browser for the end user. On the Pi side of the build, [Blaise] connected a Microchip MCP3008 eight input, 10-bit ADC via the SPI bus. The Pi takes the ADC sensor values from pots, buttons, or any other analog source and sends them to a server with the WebSocket protocol.

The server hosts a web site written with Django, Autobahn, and Python to communicate with the Pi and host the web page for the data received from the Pi. There’s support for multiple Pis in [Blaise]’s build, making complicated projects we can’t even conceive very possible.

[Blaise] put up an awesome demo video of PiIO up; you can check that out after the break.

Continue reading “WebSockets, Raspis, And GPIO”

PCB Production Workshop Means Everyone Gets An Arduino

nano

Over at the LVL1 hackerspace in Lousiville, [Brad] is putting together a workshop on etching PCBs at home. [Brad] wanted all the participants to take home something cool, so he settled on an Arduino clone as the workshop’s project.

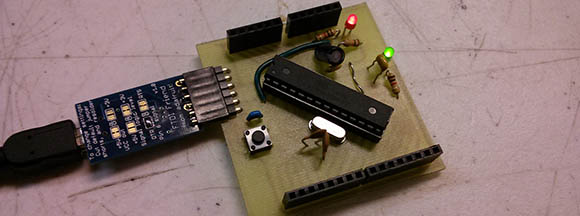
The clone [Brad] used is the Nanino, a single-sided board we’ve seen before. Unfortunately, there aren’t any CAD files for the Nanino and doing a toner transfer with the existing PDFs was a pain. This led [Brad] to redraw the Nanino in Diptrace and put the files up for everyone to grab.

In his workshop, [Brad] is going to be using a laser printer, hydrogen peroxide, and HCl. one of the most common setups for home etching. If you’re in the Louisville area, you can make your own Nanino with a home etching workshop on March 16th. Be careful, though: those LVL1 guys are pretty weird; they have a moat and are building a homicidal AI.

Quantifying Cloudiness With OpenCV

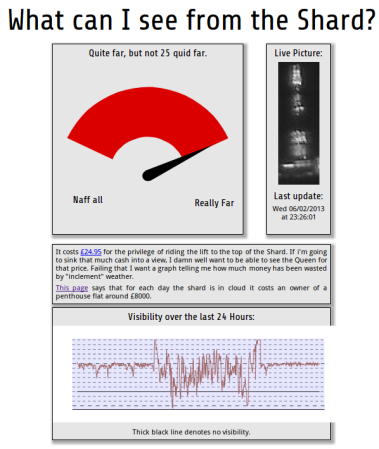
What Can I see From the Shard?

The Shard is the tallest building in Western Europe, and has a great view of London.  The condos in the building are very expensive, and a tourist ride to the top of the building costs £24.95.

Since the value of the view is so high, [Willem] wanted to quantify the quality of the view at any given time. His solution is the Shard Rain Cam. This device combines a Logitech webcam with a Raspberry Pi to capture a time-lapse set of images. These images are fed to a Python script using OpenCV which quantifies the cloudiness.

[Willem] also had to build a weatherproof enclosure with a transparent window for the camera and RPi. ‘Clingfilm’, which is British for saran wrap, and mineral oil is used to improve the waterproofing of an IP54 rated enclosure.

The resulting data is displayed on www.whatcaniseefromtheshard.com, which provides an indication of whether or not the view is worth £24.95. All of the Python code is available, and is a good starting point for learning about image processing with OpenCV.

Midwest RepRap Festival

midwest-reprap-meetup

Midwesterner’s should take note — here’s an event that’s happening somewhere other than New York or California! We jest, of course there are great events in the Midwestern states every year, like the Kanasas City or Detroit Maker Faires. This event puts focus on 3D printing. The Midwest RepRap Festival will be held in Elkhart, Indian March 15-17, 2013. Despite the name, the event is meant to encompass all things involved with any brand, make, or variety of 3D printing.

The owners of a local business called The Royal Phoenix have opened their doors for the weekend. Organizers have arranged for [Josef Prusa] and [Johnny R] to speak. There will also be build events (one session will show the build process of the MendelMax 2.0) so feel free to bring your own equipment for help with construction or getting it dialed in.

There is no registration fee, or tickets. But it would be best if you did fill out the questionnaire so they have some semblance of how many people might be coming.