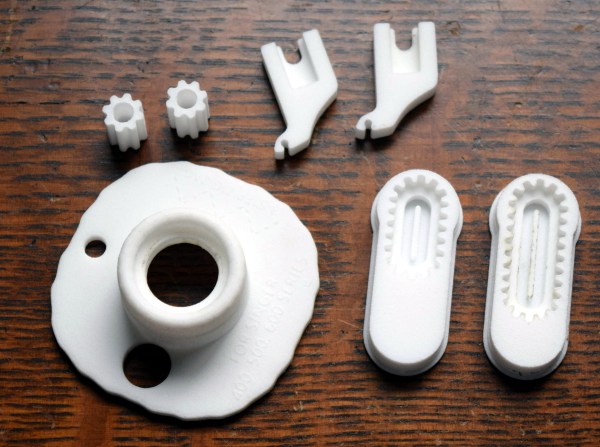
An array of 3D-printed parts for old sewing machines.

Printed Sewing Machine Parts Extend Singer’s Range

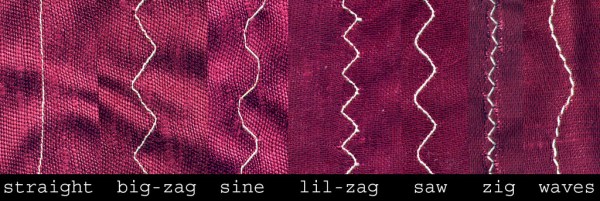
[Grow Your Own Clothes] had finally found their ideal sewing machine for doing zig-zag stitches (/\/\/\) and converting to a treadle drive (mechanically foot-fed) — a Singer 411G. This is a well-respected workhorse of a machine, and if you see one in a secondhand store, you might want to grab it. The only problem is that its multi-step zig-zag stitch is a 4-stepper and not a 3-step, which is what [GYOC] prefers. Having heard it was possible to hack them into doing a 3-step, [GYOC] set out to learn Tinkercad and grow their own sewing machine parts.
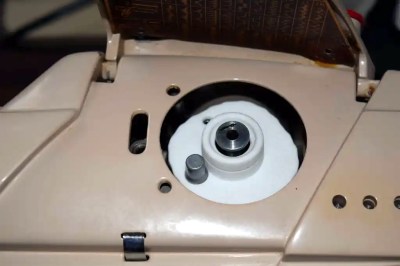
A 3D-printed cam lets this machine do the zig-zag in three steps instead of four.
The new zig-zag top hat cam in place.

So once upon a time, sewing machines didn’t just do a bunch of things out of the box. They needed an array of plastic cams to do different stitches, kind of like trading out the element or disk in a typewriter to print in italics. While most machines still have exchangeable feet for different needs and special parts for sewing things like buttonholes, most domestics now have decorative stitches and their cams built in.

The 3-step zig-zag cam was just the beginning. [GYOC] decided to make a few more parts before their Tinkercad knowledge faded: a needle adapter with an improved design, some tension stud sprockets for a different machine, and a couple of buttonhole templates for making different sizes with a buttonholer. Although they aren’t giving away the files for free, all of these parts are available quite cheaply in their Shapeways store.

Got an old machine you don’t know what to do with? Try converting it to a computerized embroidery machine.

Thanks for the tip, [Raphael]!

Arduino CNC Sewing Machine

Arduino Controlled Sewing Machine Increases Stitch Options

[Andrew] is bringing his old mechanical sewing machine into the 21st century by adding an Arduino control module. Originally, his Alfa sewing machine could only do a straight stitch or a zig-zag of varying widths. Since this was an old sewing machine, all of the controls were knobs and levers. RC car servos were installed in the sewing machine and now are solely responsible for controlling, in real time, the horizontal movement of the needle and the amount of stroke of the feed dogs (the metal components responsible for advancing the fabric through the sewing machine). There is also a switch on the needle bar that feeds back to the Arduino when the needle is in the full-up position.

With full control of the stitch width and fabric advance, it is possible to come up with some awesome stitch patterns that were not possible on this machine before. Each of the stitch patterns are pre-programmed in the Arduino. Right now it is possible to control the sewing machine over the Arduino’s serial USB connection but the workflow for such an operation is in its infancy. [Andrew] plans on making this sewing machine fully automatic so that he can embroider letters and numbers.

Although the project is still a work in progress, [Andrew] has made his preliminary Arduino code available for folks who want to further his accomplishments. To continue reading about hacked sewing machines, check out this one converted to an embroidering machine.

Continue reading “Arduino Controlled Sewing Machine Increases Stitch Options”

DIY Embroidery Machine Sews Your Name In Your Undies

DIY Embroidery Machine

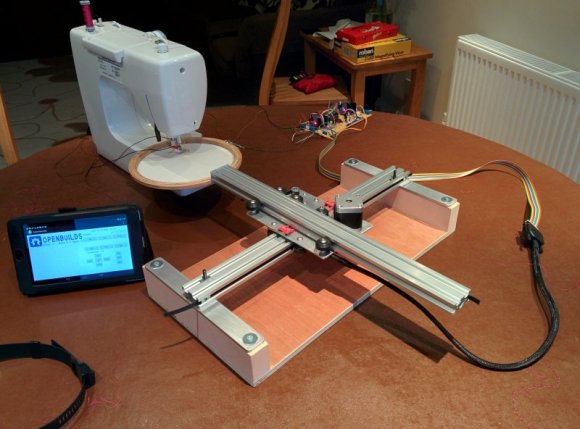
If you were in the market for a sewing machine with embroidery capabilities, you’d either be spending a bunch of money or settling for a lower-cost machine that can only do a handful of pre-programmed designs. A DIYer by the name of [SausagePaws] came up with a 3rd option, he would build one himself. He was also highly motivated, [Mrs SausagePaws] wanted one!

An off the shelf embroidery machine is similar to a standard sewing machine except the movement of the fabric is done automatically rather than by hand. Not only does the work move, but it has to move in time with the needle traveling up and down. [SausagePaws] took a no-nonsense approach and decided the simplest way to go about the task was to mount an embroidery hoop to the end of an XY drive system.

Continue reading “DIY Embroidery Machine Sews Your Name In Your Undies”

Sewing Conductive Thread In Parallel Lines

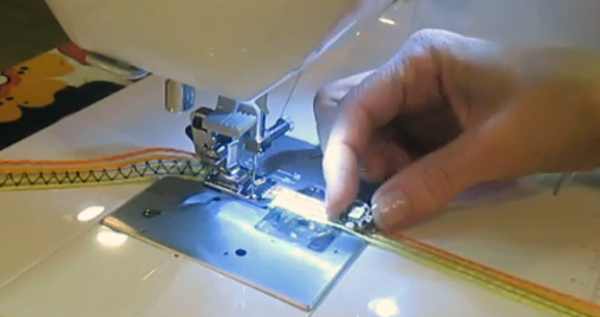
[Cynthia] has shared a great video of  machine sewing parallel lines of conductive thread onto ribbon using a cording foot which usually comes standard with most machines. This technique could be particularly useful when using addressable LEDs like a NeoPixel to get the ground, data, and positive lined up fairly accurately. Sewing the conductive thread onto ribbon also makes it a hell of a lot easier to attach to many garments or textiles,  and also makes it easier to replace or reuse.

The method is pretty easy, essentially using the grooves in the cording foot to guide the conductive treads and ensuring even spacing. Two of the lines are sewn down approximately 3 mm apart using a zigzag stitch. The third line is sewn separately making sure the stitching doesn’t break the first two lines. In the video, a striped ribbon is used which has slight troughs that additionally helps the threads stay in place and the sewer to stay on target.

[Cynthia] of Cynthia Designs Studio has been experimenting with embedding electronics in textiles and has quite a few great videos that you can check out on the Cynthia Designs Studio YouTube channel.

We have seen a machine embroidered LED matrix and a hand sewn LED quilt here on Hackaday, but those who have tried know that conductive thread can be very tricky to work with and keep conductivity.  Do you have any tips or tricks for hand or machine sewing conductive thread? If so, please share in the comments below.

Continue reading “Sewing Conductive Thread In Parallel Lines”

DIY Scroll Saw

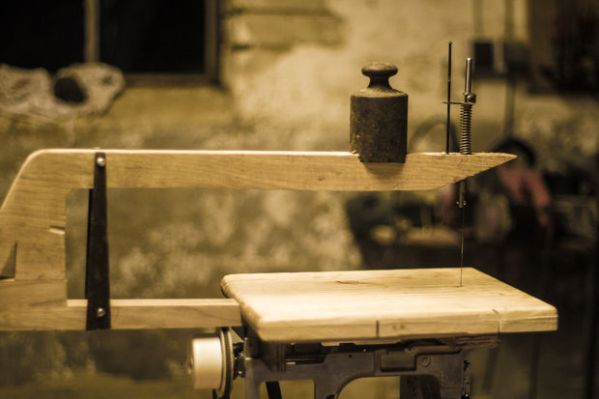
Scroll saws are super handy tools, but it’s sometimes hard to justify buying one for a single project. So why not make it your project? [SDX42] shows us how, using a…wait a second, is that an old sewing machine?

First a little back story. He picked up an old sewing machine that had been thrown out by its previous owner: they said it didn’t work right. He took it anyway and decided to fix it up. He encountered two problems. First, it turned out to be a lot harder to fix than he first imagined. Second, he realized he had no use for a sewing machine. What he did need, however, was a scroll saw.

A sewing machine is actually fairly similar to a scroll saw. They both work by converting rotary movement into linear reciprocation. The only difference is the layout. [SDX42] flipped the mechanism upside down and built a scroll saw frame on top of the stripped-down sewing machine. It’s a bit more complicated than that, but we’ll let him explain it to you in the video after the break.

Continue reading “DIY Scroll Saw”