Electronic Embroidery Birthday Card Is A Celebration Of Skills

Hackers and makers can sometimes feel like they’re getting the short end of the stick when it comes to gift giving. You’re out there making thoughtful, intricate circuit sculptures, helpful software, or face masks for people, and what do you get in return? Okay, yes, usually gift cards or tools or other things that feed your creativity in the first place. But darn it, it would be nice to receive a handmade gift once in a while, right?
So here’s what you do: make friends with enough other makers that you find your birthday twin, or close enough that you both feel the warmth of the personal holiday you share. Then you get them to agree to trade handmade birthday presents with you. That’s more or less what happened between [Becky Stern] and [Estefannie], who seem to have found each other through the magic of sharing projects on YouTube.

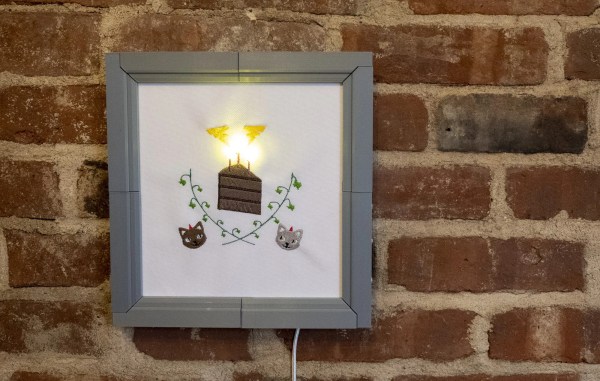
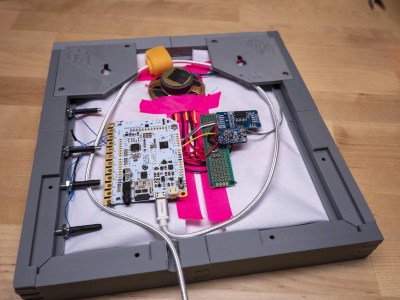
[Becky]’s gift to [Estefannie] is a busy intersection of maker elements including graphic design, embroidery, electronics, and 3D printing. [Becky] started with the embroidery, which was made possible thanks to a new open-source library for Processing called PEmbroider. Once that was done, she 3D printed the frame and added the electronics — candle flicker LEDs for the birthday cake, and a handful of songs that are accessible via touch contacts screwed into the side of the frame. [Becky] added a real-time clock module so it plays a few extra songs on [Estefannie]’s actual birthday.

The most thoughtful element here is personalization, and it’s amazing what can happen when you put 100% of yourself into something that is 100% about someone else. Every bit of the art is personal to [Estefannie], and every atom of the build is pure [Becky]. Check out the demo and build video and see what [Estefannie] made for [Becky] after the break.

[Becky]’s varied creativity has graced these pages many times before. See how she bid adieu to 2020, built a daily affirmation mirror, and gave a mask-making masterclass in the early stages of the pandemic.

Continue reading “Electronic Embroidery Birthday Card Is A Celebration Of Skills”

Hand-Stitched Keycaps For Truly Luxurious Typing

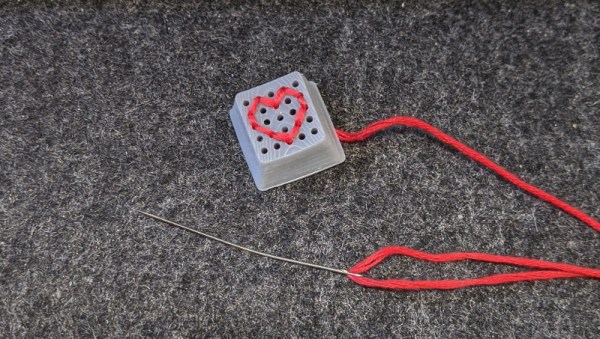
We’ve seen some very unique custom keycaps recently, but nothing quite like the embroidered ones that [Billie Ruben] has been experimenting with. Using a clever 3D printed design, she’s crafted what could well be one of the most easily customizable keycaps ever made…assuming you’ve got a needle and thread handy.

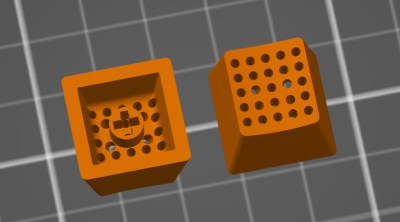
The idea is to take a standard keycap blank and pop an array of 25 holes in the face. Your thread or yarn is run through these holes, allowing you to create whatever shape you wish within the 5 x 5 matrix. While it’s somewhat tight quarters on the underside of the cap, nothing prevents you from using multiple colors or even materials to do your stitching. As an added bonus, the soft threads should provide a very comfortable and particularly tactile surface to tap on.

Now the most obvious application is to simply stitch up versions of all the alphanumeric keys, but there’s clearly room for some interpretation here. [Billie] has already shown off some simple iconography like a red heart and we’re sure creative folks will have no trouble coming up with all sorts of interesting needlepoint creations to top their prized mechanical keyboards.

The intricate details necessary to make this idea work may be beyond the common desktop FDM 3D printer, so [Billie] ran these prototypes off on a resin printer (she attributes the visible layer lines to a hasty print). She’d love to hear feedback from other keyboard aficionados who’ve made the leap to liquid goo printing, so be sure to drop her a line if you print out a set of your own. It sounds like a new version is in the works which will provide a false bottom to cover the stitching from below, but functionally these should get you started.

A Better Embroidery Machine, With 3D Printing And Common Parts

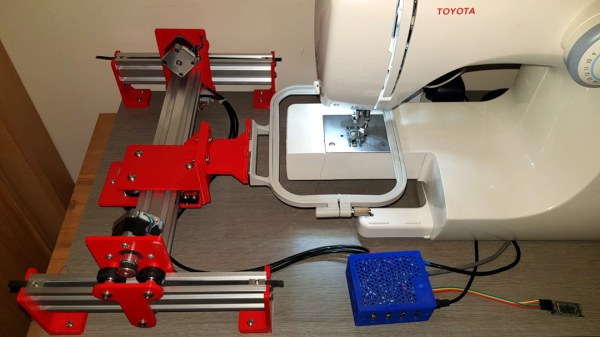
In concept, an everyday sewing machine could make embroidery a snap: the operator would move the fabric around in any direction they wish while the sewing machine would take care of slapping down stitches of colored thread to create designs and filled areas. In practice though, getting good results in this way is quite a bit more complex. To aid and automate this process, [sausagePaws] has been using CNC to take care of all the necessary motion control. The result is the DIY Embroidery Machine V2 which leverages 3D printed parts and common components such as an Arduino and stepper drivers for an economical DIY solution.

It’s not shown in the photo here, but we particularly like the 3D printed sockets that are screwed into the tabletop. These hold the sewing machine’s “feet”, and allow it to be treated like a modular component that can easily be removed and used normally when needed.

The system consists of a UI running on an Android tablet, communicating over Bluetooth to an Arduino. The Arduino controls the gantry which moves the hoop (a frame that holds a section of fabric taut while it is being embroidered), while the sewing machine lays down the stitches.

[sausagePaws]’s first version worked well, but this new design really takes advantage of 3D printing as well as the increased availability of cheap and effective CNC components. It’s still a work in progress that is a bit light on design details, but you can see it all in action in the video embedded below.

Continue reading “A Better Embroidery Machine, With 3D Printing And Common Parts”

The Embroidered Computer

By now we’ve all seen ways to manufacture your own PCBs. There are board shops who will do small orders for one-off projects, or you can try something like the toner transfer method if you want to get really adventurous. One thing we haven’t seen is a circuit board that’s stitched together, but that’s exactly what a group of people at a Vienna arts exhibition have done.

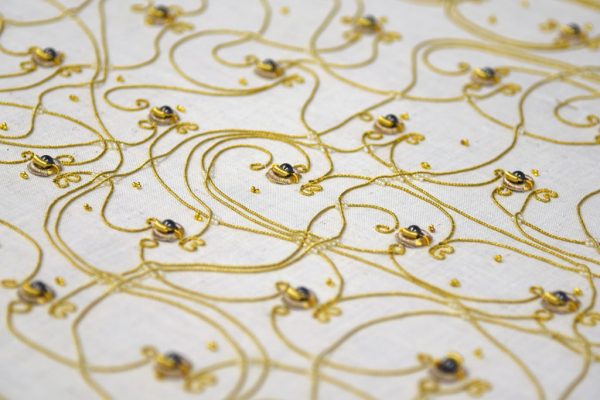
The circuit is stitched together on a sheet of fabric using traditional gold embroidery methods for the threads, which function as the circuit’s wires. The relays are made out of magnetic beads, and the entire circuit functions as a fully programmable, although relatively rudimentary, computer. Logic operations are possible, and a functional schematic of the circuit is also provided. Visitors to the expo can program the circuit and see it in operation in real-time.

While this circuit gives new meaning to the term “wearables”, it wasn’t intended to be worn although we can’t see why something like this couldn’t be made into a functional piece of clothing. The main goal was to explore some historic techniques of this type of embroidery, and explore the relationship we have with the technology that’s all around us. To that end, there have been plenty of other pieces of functional technology used as art recently as well, but of course this isn’t the first textile computing element to grace these pages.

Thanks to [Thinkerer] for the tip!


CNC Embroidery Machine Punches Out Designs A Stitch At A Time

It’s doubtful that the early pioneers of CNC would have been able to imagine the range of the applications the technology would be used for. Once limited to cutting metal, CNC machines can now lance through materials using lasers and high-pressure jets of water, squirt molten plastic to build up 3D objects, and apparently even use needle and thread to create embroidered designs.

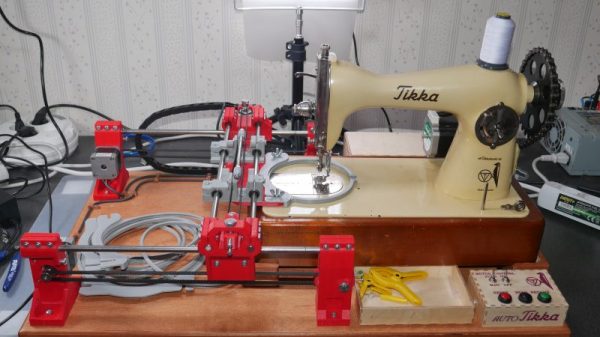
It may not seem like a typical CNC application, but [James Kolme]’s CNC embroidery machine sure looks familiar. Sitting in front of one of the prettiest sewing machines we’ve ever seen is a fairly typical X-Y gantry system. The stepper-controlled gantry moves an embroidery hoop under the needle of the sewing machine, which is actually the Z-axis of the machine. With the material properly positioned, a NEMA 23 stepper attached to the sewing machine through a sprocket and drive chain makes a stitch, slowly building up a design. Translating an embroidery pattern to G-code is done through Inkstitch, and extension to Inkscape. [James]’ write-up is great, and the video below shows it in action.

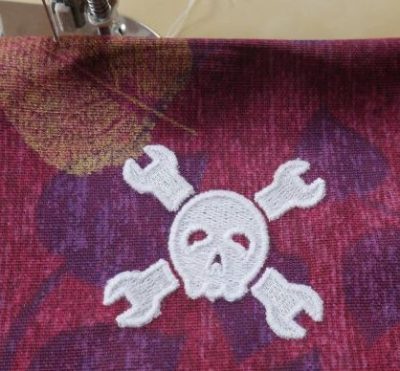
We’ve seen a CNC embroidery machine or two before, but our conspicuously non-embroidered hat is off to [James] on this one for its build quality and documentation. And the embroidered Jolly Wrencher doesn’t hurt either.

Continue reading “CNC Embroidery Machine Punches Out Designs A Stitch At A Time”

Hackaday Links Column Banner

Hackaday Links: April 15th, 2018

San Fransisco is awash in electric scooters. Three companies — Lime, Bird, and Spin — have been dumping ‘smart’ electric scooters on the sidewalks of San Fransisco over the last few weeks. The business plan for all these companies is to allow anyone to ride them via an app. $1 unlocks the scooter, and rides are fifteen cents a minute. No one, it appears, is looking at the upside of abandoned, dead electric scooters: they’re a remarkable source of lithium batteries and brushless motors. Hello, my name is Mr. Cyberpunk. My friends and I drive around the city collecting abandoned electric scooters to harvest their batteries and motors. A quick hit from a drill in the middle of the top panel of a Bird scooter disables the cellular modem, but then you don’t get to harvest the Particle dev board. You’re welcome, Mr. Doctorow, for the scene in your next novel.

There are a huge number of tips and tricks that are obvious if you already know them, and genius if you don’t. Working with wood? Need to hide a gap? Use sawdust and wood glue to make DIY wood filler. The trick here is using sawdust from whatever you’re trying to hide a gap in, but it’s not a bad idea to keep a few small containers of different sawdusts if you’re working with exotic tropical hardwoods. Titebond III, mango.

Ever since the Bayeux tapestry meme generator of 2003, embroidery has been recognized as a legitimate art form. [Irene Posch] is using traditional embroidery skills to create a computer. Conductive thread exists, but you can’t make a computer out of just wire; you need some sort of switching element. This is a relay computer, with the relays built out of beads, coils of conductive thread, and a tiny flippy bit. This is the best picture you’re going to get of the relay. This is still a work in progress and the density of components means this will probably never meet any reasonable definition of ‘computer’, but it is digital logic, done completely with tools in the embroidery toolset.

You know what’s awesome? Hashtag Badgelife. What is Badgelife? It’s the hardware demoscene of independent electronic conference badges, mostly going down at DEF CON every year. This year, Badgelife is bigger than ever. Want proof? AND!XOR, the folks behind the infamous Bender badge and last year’s Hunter S. Rodriguez badge have unleashed this year’s design. It was a Kickstarter, until it sold out. The DC Furs have launched their pre-order whatever for a badge filled with LEDs and fleas. Most surprisingly, there will now be an official mini-village of Badgelife at this year’s Defcon! This is a hardware demoscene, people, and if you want to be as cool as the guys rocking Amiga homebrew in 1993, you gotta get on board with the badgelife.

Vintage Sewing Machine To Computerized Embroidery Machine

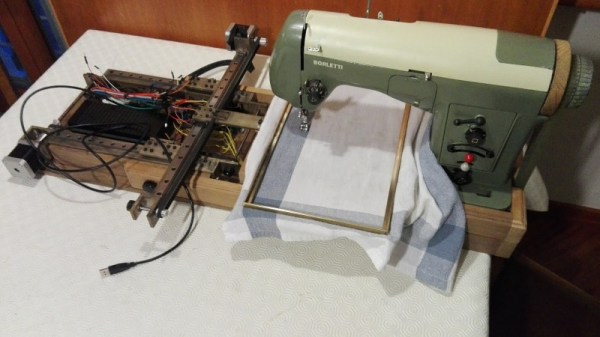
It is February of 2018. Do you remember what you were doing in December of 2012? If you’re [juppiter], you were starting your CNC Embroidery Machine which would not be completed for more than half of a decade. Results speak for themselves, but this may be the last time we see a first-generation Raspberry Pi without calling it retro.

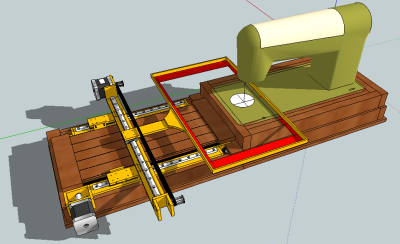
The heart of the build is a vintage Borletti sewing machine, and if you like machinery porn, you’re going to enjoy the video after the break. The brains of the machine are an Arduino UNO filled with GRBL goodness and the Pi which is running CherryPy. For muscles, there are three Postep25 stepper drivers and corresponding NEMA 17 stepper motors.

The first two axes are for an X-Y table responsible for moving the fabric through the machine. The third axis is the flywheel. The rigidity of the fabric frame comes from its brass construction which may have been soldered at the kitchen table and supervised by a big orange cat. A rigid frame is the first ingredient in reliable results, but belt tension can’t be understated. His belt tensioning trick may not be new to you, but it was new to some of us. Italian translation may be necessary.

The skills brought together for this build were vast. There was structural soldering, part machining, a microcontroller, and motion control. The first time we heard from [juppiter] was December 2012, and it was the result of a Portable CNC Mill which likely had some influence on this creation. Between then, he also shared his quarter-gobbling arcade cabinet with us.

Continue reading “Vintage Sewing Machine To Computerized Embroidery Machine”