Move Aside Mercury: Measuring Temperature Accurately With An RTD

Temperature is one of the most frequently measured physical quantities, and features prominently in many of our projects, from weather stations to 3D printers. Most commonly we’ll see thermistors, thermocouples, infrared sensors, or a dedicated IC used to measure temperature. It’s even possible to use only an ordinary diode, leading to some interesting techniques.

Often we only need to know the temperature within a degree Celsius or two, and any of these tools are fine. Until fairly recently, when we needed to know the temperature precisely, reliably, and over a wide range we used mercury thermometers. The devices themselves were marvels of instrumentation, but mercury is a hazardous substance, and since 2011 NIST will no longer calibrate mercury thermometers.
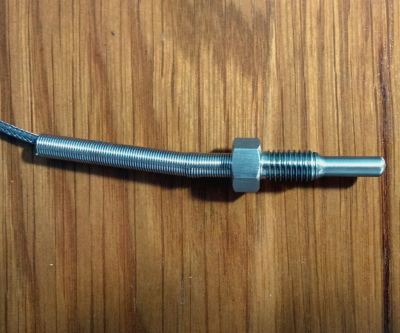
A typical Pt100 RTD probe

Luckily, resistance temperature detectors (RTDs) are an excellent alternative. These usually consist of very thin wires of pure platinum, and are identified by their resistance at 0 °C. For example, a Pt100 RTD has a resistance of 100 Ω at 0 °C.

An accuracy of +/- 0.15 °C at 0 °C is typical, but accuracies down to +/- 0.03 °C are available. The functional temperature range is typically quite high, with -70 °C to 200 °C being common, with some specialized probes working well over 900 °C.

It’s not uncommon for the lead wires on these probes to be a meter or more in length, and this can be a significant source of error. To account for this, you will see that RTD probes are sold in two, three, and four wire configurations. Two-wire configurations do not account for lead wire resistance, three-wire probes account for lead resistance but assume all lead wires have the same resistance, and four-wire configurations are most effective at eliminating this error.

In this article we’ll be using a 3-wire probe as it’s a good balance between cost, space, and accuracy. I found this detailed treatment of the differences between probe types useful in making this decision.

Continue reading “Move Aside Mercury: Measuring Temperature Accurately With An RTD”

A Thermometer Probe For A Hotplate, Plugging Stuff Into Random Holes

[NurdRage], YouTube’s most famous chemist with a pitch-shifted voice, is back with one of our favorite pastimes: buying cheap equipment and tools, reading poorly translated manuals, and figuring out how to do something with no instructions at all.

[NurdRage] recently picked up a magnetic stirrer and hotplate. It’s been working great so far, but it lacks a thermometer probe. [NurdRage] thought he was getting one with the hotplate when he ordered it, he just never received one. Contacting the seller didn’t elicit a response, and reading the terribly translated manual didn’t even reveal who the manufacturer was. Figuring this was a knock-off, a bit more research revealed this hotplate was a copy of a SCILOGEX hotplate. The SCILOGEX temperature probe would cost $161 USD. That’s not cool.

The temperature probe was listed in the manual as a PT1000 sensor; a platinum-based RTD with a resistance of 1000Ω at 0°C. If this assumption was correct, the pinout for the temperature probe connector can be determined by sticking a 1kΩ resistor in the connector. When the hotplate reads 0ºC, that’s the wires the temperature probe connects to.

With the proper pin connectors found, [NurdRage] picked up a PT1000 on eBay for a few dollars, grabbed a DIN-5 connector from a 20 year old keyboard, and connected everything together. The sensor was encased in a pipette, and the bundle of wires snaked down piece of vinyl tube.

For $20 in parts, [NurdRage] managed to avoid paying $161 for the real thing. It works just as good as the stock, commercial unit, and it makes for a great video. Check that out below.

Thanks [CyberDjay] for the tip.

Continue reading “A Thermometer Probe For A Hotplate, Plugging Stuff Into Random Holes”

Some Technical Improvements On [Alton Brown’s] Hacked Smoker

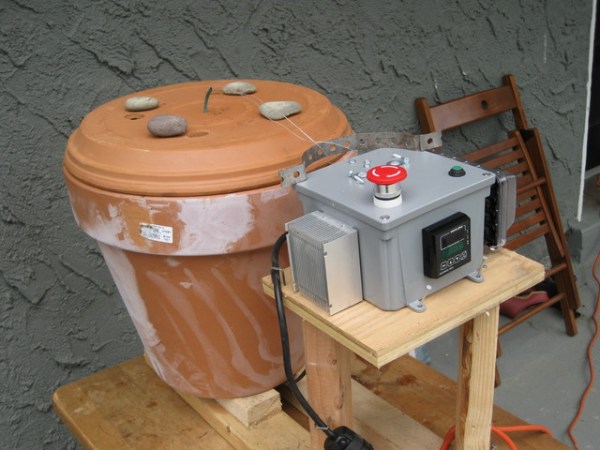
Bringing that smoky goodness to your cooking is neither hard, nor is it expensive. [Alton Brown], who we consider to be the MacGyver of cooking, always seems to be able to build cooking contraptions from common items. The smoker he built from a flower pot was the inspiration for [Tom’s] own project. But [Tom] added in PID hardware to smoke at just the right temperature.

The enclosure hides a single electric burner at the bottom. A metal tray full of wood chips sits on top of it, smoldering as the burner gets hot. You could just set it and forget it, but it will take a lot of trial and error to figure out which setting achieves the best results. [Tom’s] additional hardware, housed in the grey electrical box, switches the burner with a solid state relay. The PID controller takes measurements from a temperature sensor inserted in the lid of the smoker, ensuring perfectly prepared food every time.

If you’re interested in making your own you could try building a heating element from toaster oven parts.

ATtiny Hacks: Simple USB Temperature Probe

ATtiny Hacks Theme Banner
simple_attiny_usb_temperature_probe

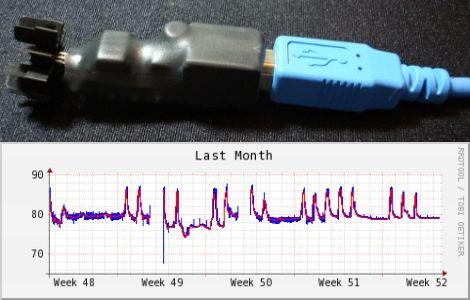
[Dan’s] office is awfully hot, but he needed some real temperature numbers that he could show the building management office to justify opening a maintenance ticket. He had seen some simple temperature probe examples online, and decided to build his own using a small AVR chip.

Based off a similar temperature monitoring example called EasyLogger, his temperature probe uses an LM34 temperature sensor, which is wired to an ATtiny45. The ATtiny communicates with his computer using the Ruby-USB library in conjunction with a bit of Ruby code he put together. Once the data is obtained, all of the temperature measurements are logged and graphed using RubyRRDTool.

As you can see by in the image above, his office is far hotter than it should be, so we’re pretty sure he’s happy to have actual measurements to back up his claims.

If you are looking to make a small temperature probe of your own, his code, schematics, and links to all of the tools he used in the project are available on his site.