SPDIF Passthrough Lets You Digitally Manipulate The Audio

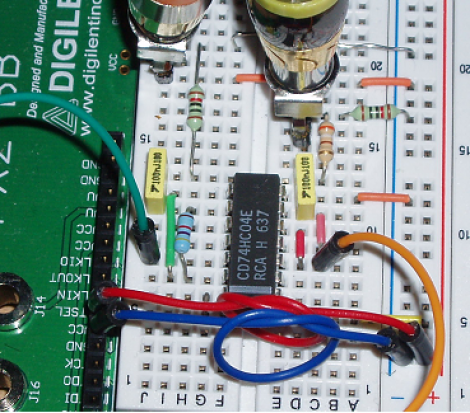
[Mike Field] took what he had learned with a few past projects and combined them to make this FPGA-based SPDIF audio pass-through. In order to get the SPDIF signal ready for the FPGA he needed a few components to use for level conversion. Once everything was connected he used a first in first out (FIFO) buffer to ensure that the outgoing bitrate is the same as the input, while still allowing enough time for the FPGA to do some digital manipulation.

This reminds us of the NeTV, which is an HDMI pass-through device. That one allows you to overlay your own video information to any TV that has an HDMI port. This would allow you patch into any audio system that’s using SPDIF, letting you inject your own audio, such as a paging system in a public lobby, or the ringing of a phone when you get a call, or to create your own sounds.

We like his overhand knot cable management system to keep those jumper wires from becoming too much of a mess on the breadboard.

JGPX Keeps The Bachelor Party Moving In The Right Direction, Regardless Of BAC

jGPX_bachelor_party_navigator

[Davy] and his friend [Chris] were tasked with putting together a bachelor party for their friend [J], and had a little more in mind than the standard drunken revelry. To earn the privilege of partying his brains out, they decided that [J] would have to fulfill a series of tasks and challenges before joining up with the rest of his friends for the evening’s events. [Davy] didn’t specify what these tasks were, lest he spoil the surprise, but he did let us in on a little device that he and [Chris] built to help guide the bachelor through his day.

They were a bit worried that the bachelor would get sidetracked during his journey if he happened to imbibe along the way, so they built a device called jGPX that would ensure [J] stayed on track and on time. jGPX is a custom GPS navigator consisting of an Arduino, a GPS module with built-in antenna, and a compass.  The pair created a set of routes in Google Earth, exporting the data to KML for interpretation by their device. The jGPX is meant to guide [J] along via a small LCD screen that shows him the distance to his target as well as the proper direction of travel to get there.

It looks like [J’s] friends put a lot of effort into his party, and although there are no details as to how things went, we’re sure it was a blast!

Burning Man 2011: Peter Hudson’s Charon Strobe Sculpture

Here at Hackaday the only thing we like better than giant whirling artistic desert based contraptions are interactive giant whirling artistic desert based contraptions. [Peter Hudston]’s Charon is no exception. Known for his strobe sculptures [Peter] has returned from a two year hiatus with possibly one of the craziest and nightmarish sculptures found on the deep playa. The work features a gigantic spinning wheel that has posed human skeletons mounted on it’s inner edge. Onlookers can pull a series of 6 rope pairs which cause the wheel to rotate rapidly. When the rope pullers are coordinated enough to get the wheel spinning at the right speed, a strobe is activated revealing the skeleton’s animation.

I wandered over to this thing one night after hearing the local buzz about the piece.  The towering wheel was spinning away as the rope pullers of the moment tried desperately to get the strobe to activate, every couple of minutes or so somebody would try and coordinate the pulling only to confuse things.  From my perspective it seemed to be very difficult to get the right speed, and the pullers had to yank the rope practically to the ground. During the short time I was watching the piece (jaw to the floor) the strobe activated once or twice and honestly it was completely worth the effort. To see what this monster looks like in action check out the video after the jump.

Continue reading “Burning Man 2011: Peter Hudson’s Charon Strobe Sculpture”

ATtiny Hacks: Roll 2d6 With An ATtiny

A pair of 6-sided electric dice (original in Dutch, here’s the Google Translate link) was sent in on the tip line for our ATtiny hacks theme. We really appreciate the simplicity of the circuit; it really shows how the complexity of discrete components can be cut down with a simple microcontroller.

The circuit is very simple – An ATtiny26 serves as the core of the project. Fourteen LEDs are connected to fourteen pins on the micro. The tiny26 might be a bit overkill. With Charlieplexing, we suspect this build could have been completed with an 8-pin micro like an ATtiny25. The code for the build (written in BASIC with BASCOM-AVR), board files and schematics have all been posted.

We’ve seen a few electronic dice builds before. this build uses an ATmega328 in a hugely overwrought circuit. Compared to what can be done with a 555, the ATtiny26 build provides a very nice middle ground.

Thanks [Roeland] for sending this in.

Steerable Bristlebot Via IR Control

Looking at the size of this bristlebot the first thing we wondered is where’s the battery? All we know is that it’s a rechargeable NiMH and it must be hiding under that tiny circuit board. But [Naghi Sotoudeh] didn’t just build a mindless device that jiggles its way across a table. This vibrating robot is controllable with an infrared remote control. It uses an ATtiny45 microcontroller to monitor an IR receiver for user input. An RC5 compatible television remote control lets you send commands, driving the tiny form factor in more ways than we thought possible. Check out the video after the break to see how well the two vibrating motors work at propelling the device. They’re driven using a PWM signal with makes for better control, but it doesn’t look like there’s any protection circuitry which raises concern for the longevity of the uC.

This build was featured in a larger post over at Hizook which details the history of vibrating robots. It’s not technically a bristlebot since it doesn’t ride on top of a brush, but the concept is the same. You could give your miniature fabrication skills a try in order to replicate this, or you can build a much larger version that is also steerable.

Continue reading “Steerable Bristlebot Via IR Control”

Hackaday Links: September 15, 2011

Open-source Mars rover

[Seth King] wasn’t satisfied with current robotics platforms that don’t work well outdoors. He started the Open Rover Kickstarter with the end goal of having a 6-wheel robot with a rocker-bogie suspension just like the Mars landers. We’re sure it’ll be an interesting platform.

Adding a Flash to a key fob video camera

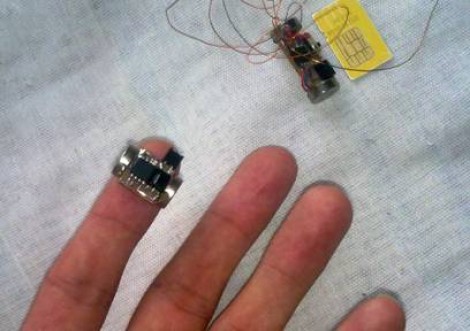
[doctormord] picked up a key fob “spycam” and was surprised that there wasn’t any onboard illumination. Then again, that would probably defeat the purpose of the “spycam.” A transistor, LED and resistor later (translation), he had a camera with a light. Pics here.

Automated WEP cracking

This is a video of [Elliott] using his autocrack script to crack a WEP wi-fi network. It took [Elliott] less than a minute to crack a network he set up. Lesson: don’t use WEP.

Adding wi-fi to a laptop the fast way

This laptop used to have a broken Mini-PCIe wi-fi adapter. [Mikko] fixed the wireless by taking out the old card and hooking up a USB wi-fi adapter. He soldered the USB leads directly to the back of an internal USB port and used hot glue “to prevent bad things from happening.” A very easy, fast, and cheap way of fixing a broken wireless adapter.

Han Solo’s soldering iron

When [Craig] was 15, he broke the Bakelite casing of his father’s soldering iron. Being a good son, he fixed it by gutting his original Star Wars Han Solo blaster. Nice, but not as great as Starsong from My Little Pony.

Have You Got What It Takes To Code Android Apps Using Assembly?

Do you have a rooted Android device and a computer running Linux? If so, you’re already on your way to coding for Android in Assembly. Android devices use ARM processors, and [Vikram] makes the argument that ARM provides the least-complicated Assembly platform, making it a great choice for those new to Assembly programming. We think his eight-part tutorial does a great job of introducing the language and explaining how to get the development tools up and running. You’ll need to know some basic programming concepts, but from what we saw you don’t need any prior experience with ARM or Android.

So why learn Assembly at all? We took a stab at Assembly for AVR a few months ago and really learned a lot about the hardware that we just never needed to know writing in C. It’s a great way to optimise functions that waste too much time because of quirks with higher-level language compilers. That means you don’t need to write your entire application in Assembly. You can simply use it to streamline hairy parts of your code, then include those Assembly files at compile time.