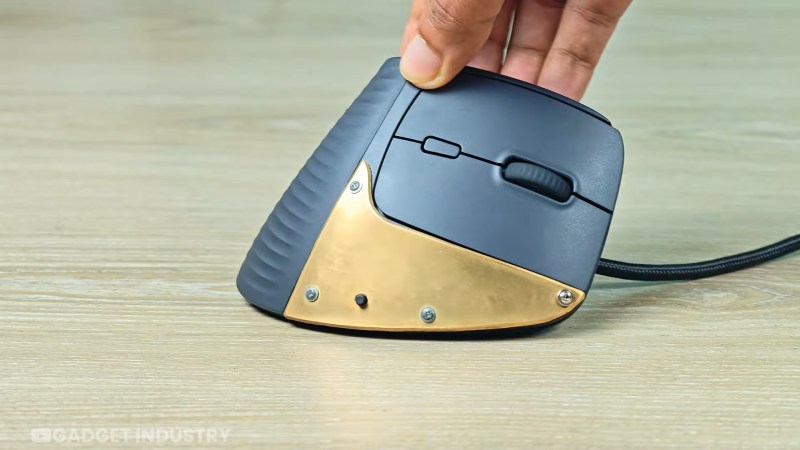
[Gadget Industry] bills it as “a PC inside a Mouse“, but that depends on your definition of a “PC”. This is a Personal Computer inside a mouse, yes, but there’s nothing IBM-compatible about the tiny ARM board he squeezes inside what’s normally a peripheral — it actually started life as a smartphone, which only takes this build up a notch compared to starting with a single-board computer like a Pi.
Specifically, he starts with a Galaxy S21 5G. Starting with a Samsung means he can leave the stock Android alone and just take advantage of Samsung’s DeX desktop mode, rather than layer a Linux environment on top or replace the operating system entirely with something like Postmarket OS, which are both viable options.
If you’re building a homelab rig, you could just use off-the-shelf hardware in standard cases and slap it all in a rack like the normies do. Or, you could follow the example of [Justin Garrison] and build a more oddball setup.
This particular homelab is, at its heart, built from familiar components. There are two Raspberry Pi 5s, two Raspberry Pi 4s, a GMKtec NucBox M6 Mini with an ASUS GeForce RT 2060 GPU, a LattePanda IOTA, an NVidia DGX Spark, and an HP Z4 G4 mini PC. These machines are all laced together with a TP-Link LS108GB PoE switch. [Justin] has the mini PC running the control plane components, with the rig as a whole running Talos and Kubernetes workloads. What makes this build particularly appealing, though, is the aesthetics of the rig. [Justin] documents how he hacked this hardware to fit into a bunch of old Linksys router cases, which provides a pleasant early 2000s look to the build. This included a bit of hackery to get status LEDs flickering as they should be. [Justin] also took the time to make the power buttons accessible.
If you want to stunt on your friends with a rad homelab, you either have to go for maximum power, or maximum style. This build would be the latter. Video after the break.
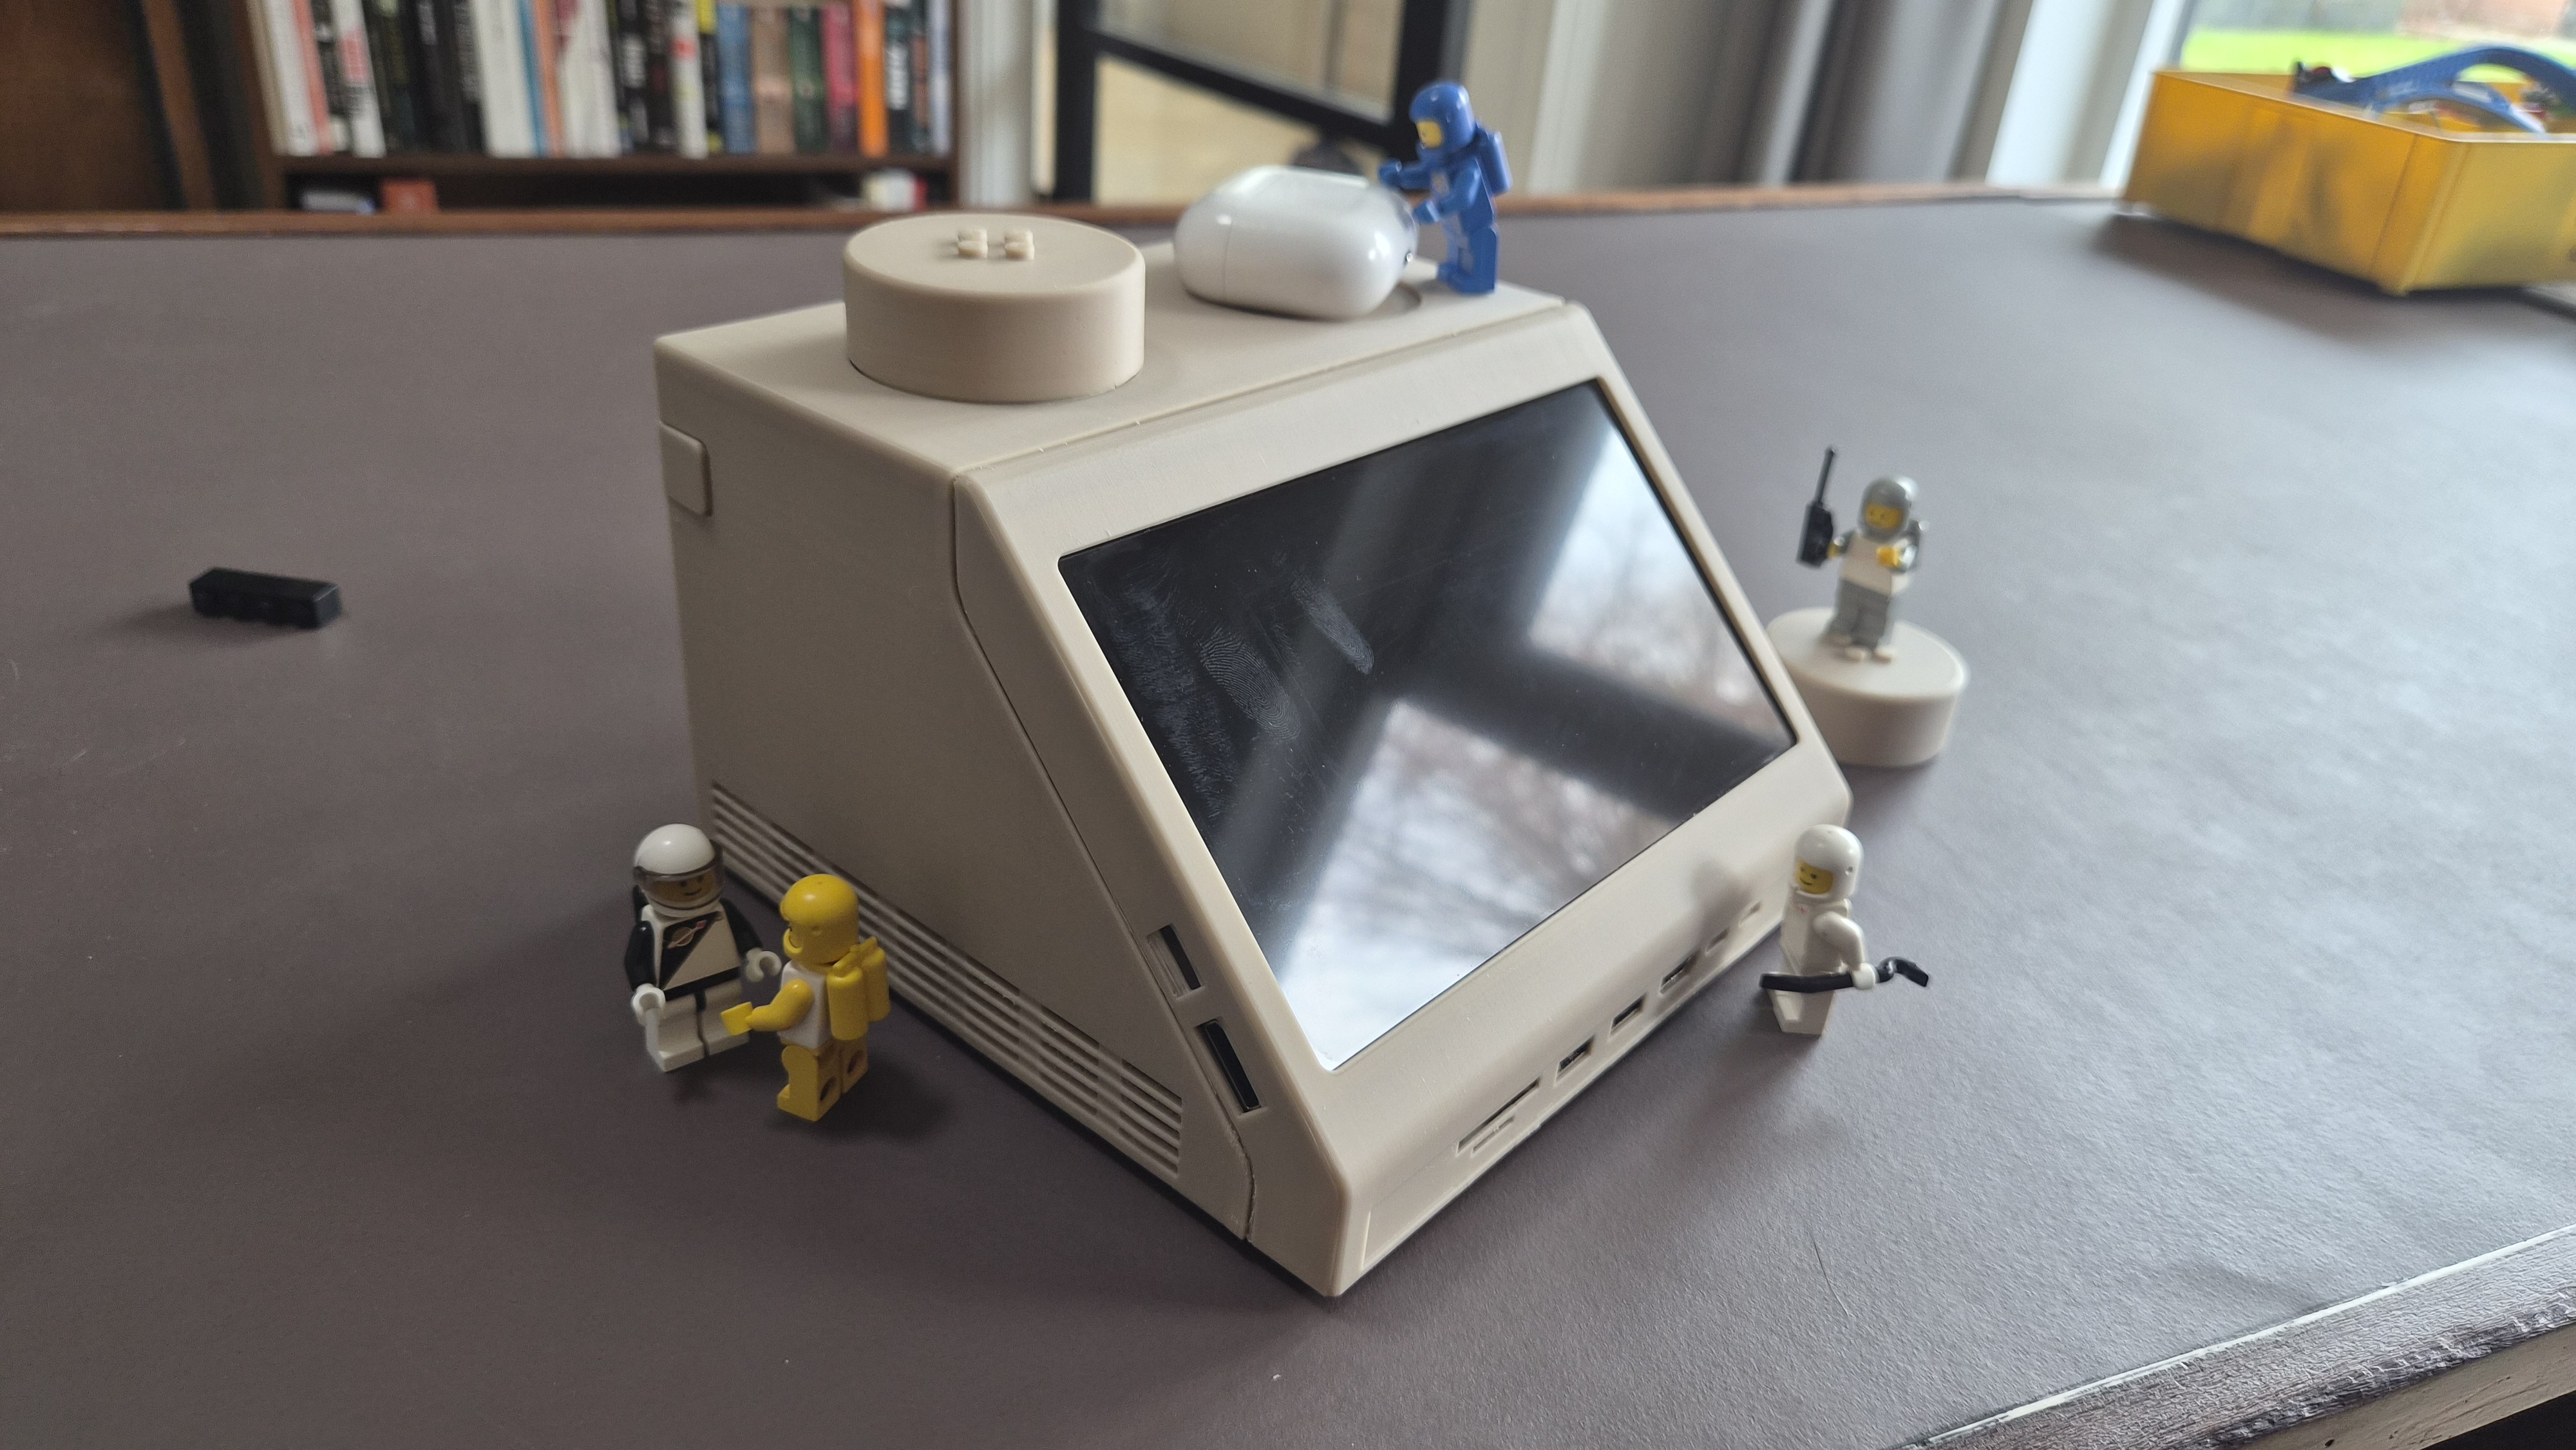
There’s just something delightful about scaled items. Big things shrunk down, like LEGO’s teeny tiny terminal brick? Delightful. Taking that terminal brick and scaling it back to a full-sized computer? Even better. That’s what designer [Paul Staal] has done with his M2x2 project.
In spite of the name, it actually has a Mac Mini M4 as its powerful beating heart. An M2 might have been more on-brand, but it’s probably a case of wanting the most horsepower possible in what [Paul] apparently uses as his main workstation these days. The build itself is simple, but has some great design details. As you probably expected, the case is 3D printed. You may not have expected that he can use the left stud as a volume control, thanks to an IKEA Symfonisk remote hidden beneath. The right stud comes off to allow access to a wireless charger.
The minifigs aren’t required to charge those airpods, but they’re never out of place.
The 7″ screen can display anything, but [Paul] mostly uses it either for a custom home assistant dashboard, or to display an equalizer, both loosely styled after ‘screen’ on the original brick. We have to admit, as cool as it looked with the minifigs back in the day, that sharp angle to the screen isn’t exactly ergonomic for humans.
Perhaps the best detail was putting LEGO-compatible studs on top of the 10:1 scaled up studs, so the brick that inspired the project can sit securely atop its scion. [Paul] has provided a detailed build guide and the STLs necessary to print off a brick, should anyone want to put one of these nostalgic machines on their own desk.
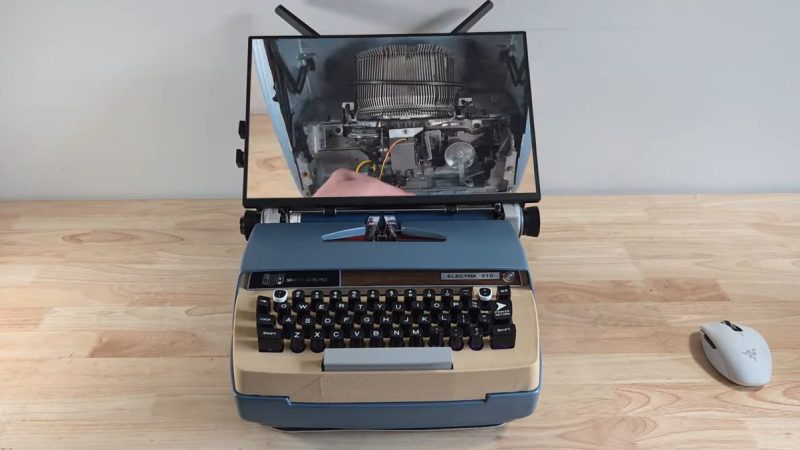
Go back a couple of generations, and rather than a laptop or a luggable, the office accessory of choice was a portable typewriter. As the 20th century wore on, the typewriter became electric before eventually being eclipsed by luggable and laptop computers. On YouTube, [Prototype] is turning back the clock, by turning an old Smith-Corona electric typewriter into a luggable computer– with a stretch goal of still being able to type.
Yeah, just gutting the typewriter and shoving an SBC inside wasn’t ambitious enough for [Prototype]: his goal is a working typewriter and an x86 gaming PC. To facilitate this, he guts the Smith-Corona keyboard, and 3D-prints a new top plate to add a little more vertical space in the old typewriter. The new top does recreate the original layout and the Corona switches get printed adapters to fit them to mechanical switches [Prototype] is using with a vibe-coded Arduino. Why one would bother with ChatGPT when QMK is right there, we could not say, but feel free to skip 6:20 to 15:00 if you’re watching the video but want to avoid that side quest.
Unfortunately, the “get the keyboard working” side-quest is either faked or deferred to video part II, which has not been posted yet. In this video he demonstrates that he can actuate a single hammer with a servo, but that’s a far cry from a working typewriter so, we’re really hoping he comes through on that promise in Part Two. Even if the build stops with just one hammer, that would give the tactile sound-and-feel that other builds turn to solenoids for. Squeezing a small-form-factor motherboard and graphics card into the old Smith-Corona is also going to be an interesting challenge. It’s certainly going to be a step up from using the keyboard as a terminal.
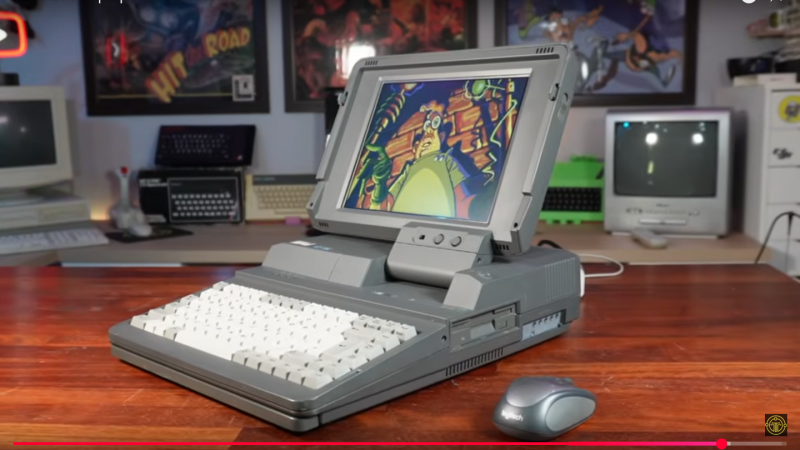
The donor laptop is an Amstrad ALT-286 with glorious 80s styling that [TME Retro] tried to save in a previous video. Even with help from the community there was no saving this unit, so we can put away the pitchforks and torches. This restomod is perhaps the best afterlife the old Amstrad could have hoped for.
At first [TME Retro] was going to try and fit an iPad Pro screen, but it turned out those don’t have the driver-board ecosystem the smaller iPads do, so he went with a non-retina LCD panel from Amazon instead. Shoving an LCD where an LCD used to live and sticking an expensive mini-PC inside a bulky 80s case is not the most inspiring of hacks, but that’s not all [TME Retro] did.
Sometimes you see something super cool and think of how it would be really neat if applied in a totally different context. [MXC Builds] saw an awesome lamp from [karacreates], but decided it would be better as a PC case.
We love seeing how different techniques can be used in conjunction to make something that no one method could produce on its own, and for this build, we see [MXC Builds] use 3D printing, laser cutting, CNC, sewing, soldering, and traditional woodworking techniques.
A large part of the video is spent on the CNC process for the walnut base and power button enclosure for the build. As with any project, there are a few places requiring some creative use of the tools on hand, like the walnut piece for the base being too tall for the machine’s usual z-calibration puck or any of [MXC Builds]’s bits to do in one pass, and it’s always interesting to see how other makers solve these issues.
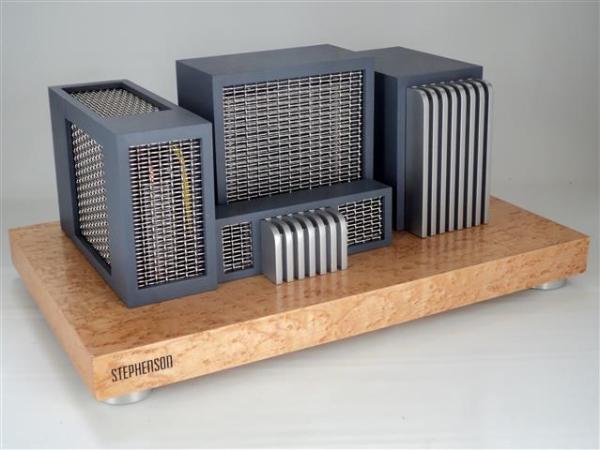
Hacks that bring a vintage flair to modern electronics never get old, and [Jeffrey Stephenson] delivers with his Project Clean Slate inspired by vintage tube amps.
Thinking outside the traditional single box PC, [Jeffrey] built his computer into a series of component-specific boxes all attached to a platform housing the Micro ATX motherboard. The base is made of plywood with a birds-eye maple veneer and each of the component boxes features two different sizes of wire mesh to manipulate the viewer’s perception of the dimensions. Even the I/O and graphics card plates are custom made from aluminum for this build.
If you really want to dig into how this PC came to life, there’s a very detailed build log including every step of the process from bare board to finished product. We love when we get an inside look at the thought process behind each design decision in a build.


![The LEGO-lookalike displaying [Paul]'s dashboard](https://hackaday.com/wp-content/uploads/2026/03/Screenshot-2026-03-04-at-14-08-38-Watt-IV-–-the-M2x2.png?w=600&h=450)