USB Geiger Counter Hack

usb_geiger

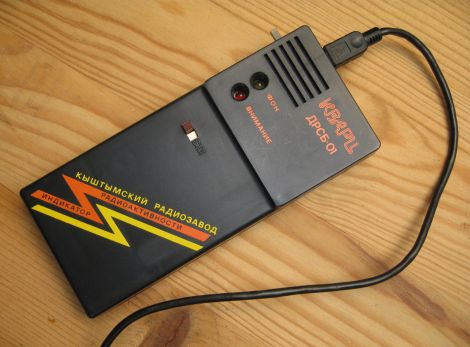
[Vic] bought a Kvarts DRSB-01 Geiger counter a few years ago, and recently dug it out of his electronics stash. The counter is a run of the mil no-frills unit. It lacks any kind of LCD display and it cannot be calibrated, so Sievert exposure ratings are out of the question. The unit essentially monitors background radiation and alerts the user to the presence of gamma and high-energy beta rays via audible clicks.

[Vic] wanted to make it a bit more useful, so he decided to interface it with his computer in order to take long-term radiation measurements. He dug up a schematic online and deadbugged a small circuit using an ATtiny44. The circuit allows him to enumerate the electrical pulses generated by ionizing particles striking the Geiger tube, passing them along to his PC over USB.

The counter seems to interface with the PC just fine, but [Vic] does say that he’s getting some odd readings. He thinks that he might have damaged the tube while messing around, but he’s all ears if you have any insight on the matter.

Adding MIDI To A Very Old Drum Machine

Long before drum machines played samples from an SD card or EPROM, drum sounds were analog – just filtered waveforms and noise. To the modern eye, these are very primitive machines, but for [Andrew], they’re the inspiration for this brilliant hack.

[Andrew] took a Roland CR-68 drum machine from 1978 and added MIDI input with the help of a PIC microcontroller. Not wanting to modify the look of the machine, [Andrew] programmed the PIC to watch the START/STOP button when the the unit is powered on. If the button is held down, the PIC enters it’s programming mode, where the sounds from the CR-68 can be mapped to an individual note on a MIDI controller. There’s no mention if the TRIGGER IN is queried by the PIC to modify the tempo of the preset patterns, but we assume that would be a relatively trivial implementation. Still, very impressive for a machine made 4 years before MIDI.

We love [Andrew]’s work, and we’re happy for any future owner that he documented how to use his device (and cleverly taped that to the bottom of the drum machine). It’s very nice to see old drum machines being used for more than doorstops after their samples have been recorded. Check out the video of [Andrew]’s walk through after the break.

Continue reading “Adding MIDI To A Very Old Drum Machine”

Using Google’s ADK On Standard Arduino Hardware

adk_on_arduino

When we heard that Google’s open accessory development standard was forthcoming, we were pretty excited. However once we heard that the reference hardware kit was going to cost nearly $400, our thoughts changed to, “Surely you can’t be serious.”

Well, Google is dead serious (and we hear they don’t take kindly to being called Shirley either.)

With such a ridiculous asking price, it was only a matter of time before someone tried getting the ADK software running on vanilla Arduino hardware. [Inopia] wrote in letting us know that he did just that.

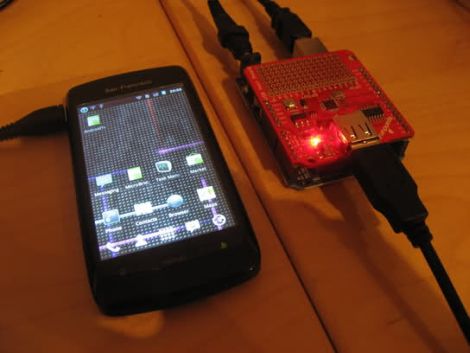
Using an Arduino Uno and a Sparkfun USB shield, he was able to get the ADK working without a lot of fuss. He tweaked the ADK firmware image in order to bypass a couple of hardcoded pin assignments Google made, and he was good to go. The image boots just fine, though he can’t necessarily guarantee that his setup works with an Android handset, as he doesn’t currently own one that supports accessory mode.

Now that just about anyone can get their hands on the ADK at a reasonable price, we look forward to seeing what you can put together!

ir_power_meter

Monitor Your Home’s Power Usage On The Cheap

[Paul] was pretty sure that he and his family used a lot of electricity throughout the day. Admittedly, he enjoys his creature comforts, but was wiling to try living a little greener. The problem was, he had no idea how much electricity he was using at a given time.

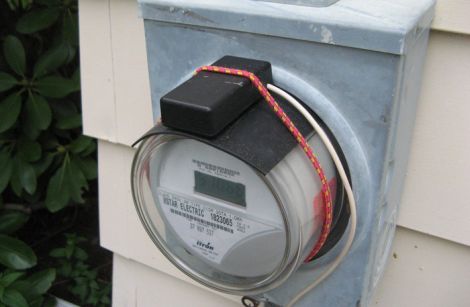
While some power companies offer devices allowing homeowners to monitor their energy usage, [Paul’s] did not. After a bit of research however, he was ready to build a power monitoring system of his own. He found that his meter emits a small infrared pulse every time a watt-hour of electricity is consumed, so his system counts how many flashes occur to measure usage.

The counting circuit is pretty simple consisting of only an AVR, a resistor, a capacitor, and a phototransistor. The data is fed to a computer where the results are graphed with gnuplot.

It’s quite a useful little hack, and undoubtedly far cheaper than purchasing a whole house power monitor.

ChipKIT Max32, An Arduino Mega Upgrade With A PIC32 Under The Hood

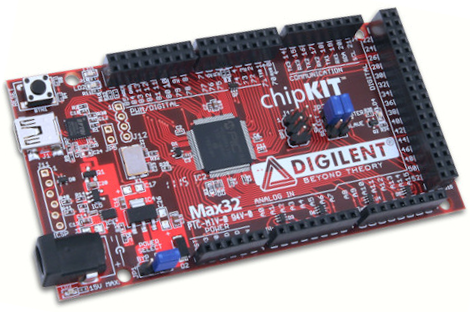
For those of you who are looking to put some power behind your Arduino shields,  Digilent just released their chipKIT Max32 prototyping platform. The board  features a Pic 32 microcontroller, USB programmer and all the things you would typically expect from a development board.

The PIC32MX795F512 is a  32-bit MIPS processor core running at 80Mhz, 512KB flash memory and packs 128KB of SRAM data memory. Digilent also mentions utilizing the Pic’s built in USB 2 controller, 10/100 Ethernet and dual CAN controllers, but these will require shields specific to the chipKIT Max32. The board is also fully compatible with Arduino IDE and libraries as well as MPLAB  and the PICKit3 in-system programmer/debugger.

With a price point just below the Arduino Mega 2560 this looks like a great resource for anyone looking to upgrade their Arduino webserver, or just embarrass their Arduino Arduino shield. Maybe it’ll just spawn some interesting gameduino upgrades. It can certainly cut down on extraneous Arduino usage. Either way we’ll be on the lookout to see what this performance bump can bring to table!

Plastic Plate Capacitors

We have been featuring some home made capacitors this week, and [Mike] wrote in to share his with us. While rolled capacitors are nice, they can be somewhat difficult to construct and grow to unwieldy sizes as capacitance and voltages increase. His solution is to stack the layers up using plastic plates.

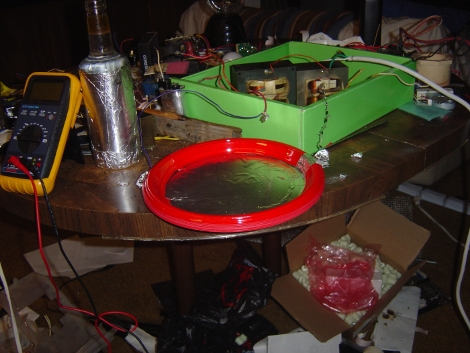
In this forum post he explains that using disposable plastic plates and tinfoil you’re able to quickly make a capacitor, that for him was valued at around 12.2nF, using eleven layers . Applying pressure to the stack capacitance grew to about 14nF, though he is having a bit of trouble holding it with just glue.

Testing was conducted with high voltages charging the capacitor up, then its leads were shorted for a nice spark and a good pop. Definitely fun for the next family cook out, though we don’t know how some left over potato salad goo would effect the end results.

Papercraft Flowers Teach Kids About Batteries

saltwater_papercraft_batteries

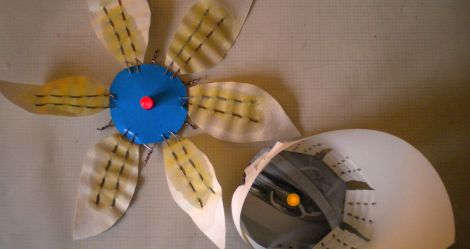
[Emily Daniels] has been teaching interactive electronics workshops geared towards children for some time now, recently holding a session that demonstrated how batteries work in a pretty novel fashion.

She wanted to keep things safe and simple due to the class size, so she didn’t want to rely on using soldering irons for the demonstration. Instead, she showed the children how batteries function by building simple voltaic cells with paper flowers, salt water, and LEDs. The paper flowers’ absorbency was used to act as a salt bridge between the wire pairs that adorned each petal. After salt water was applied to each of the flower’s petals, the center-mounted LED came to life, much to the amazement of her class.

The concept is quite simple, and the LED flowers are pretty easy to build, as you can see in her Instructables tutorial.

We think it’s a great way to demonstrate these sorts of simple concepts to kids, and hope to see more like it.

[via Adafruit blog]