Copper Etching: Not Just For PCBs

etching buttons

[Morag Hickman] is an artist who makes use of ferric chloride for something other than etching a PCB. She uses the process to etch beautiful designs into her jewelry.

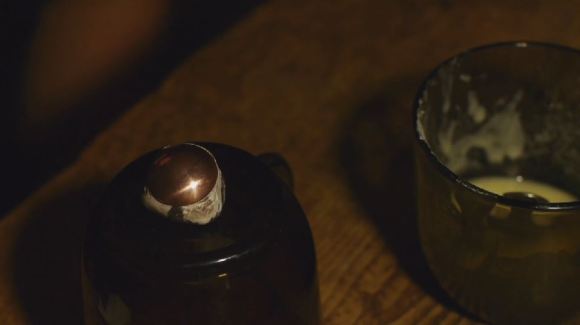
[Tortoise Butler] is a small film crew that created this three and a half minute film on the art of etching copper, and it is an absolute pleasure to watch. There are no computers, no toner transfers, and she doesn’t even etch on a flat surface. It’s an excellent example of doing something different — why not add etching to finish off a project? If you’ve already done PCBs, it can’t be that hard to do a logo instead!

Anyway, it’s been a while since we’ve shared a handmade hack, and we think this is a great example that deserves the spotlight. Don’t forget to send in your own handmade projects to the tips line!

Stick around after the break to enjoy the film — we recommend watching it full screen and in HD.

Continue reading “Copper Etching: Not Just For PCBs”

Fastening 3D Printed Parts

PC100358

Ever been curious on how to fasten 3D printed parts together? There are lots of ways to do it — but what’s the best way? [Chris Lopez] works in a machine shop and decided to do some testing of how best to tap 3D printed parts, so you don’t have to!

The typical ways to add fasteners in 3D printed parts include designing the thread right into the part (only works for big threads), adding a press-fit insert, drilling and tapping it like any other material, inserting a Heli-Coil, or even by using ultrasonic weld inserts. In fact, this Stratasys blog post actually goes into some good detail on the pros and cons of each!

But, there’s a much easier way. To tap a hole normally you need to locate it accurately, make a pilot hole with a center drill — ensuring it is straight and true — then drill through with the undersized tap drill, and finally, thread it with a tap. Luckily, your 3D printer takes care of almost all these steps. By simply designing your holes to be the tap drill size you can hand tap fairly strong threads in your 3D printed parts. Just make sure your wall thicknesses and or infill settings are high enough to make sure there is material to engage!

[Chris] also goes into some detail on creating captive nut geometry — but for that you’re going to have to check out his blog. And if you’re interested in another style of fastening 3D printed parts, why not inset magnets into them while they are printing?

Scooby-Doo Alarm Clock Repair

Scooby-Doo_alarm_clock_repair.Still001

This is more of a hack than a repair which is a good reason for me to feature my Scooby-Doo alarm clock repair. I started out trying to simply fix some broken hardware mounts that hold the display and button mechanism within the alarm clock that looks like the Scooby-Doo Mystery Van. During testing I noticed the display was very dim suggesting an unusual current load or other malfunction, plus the alarm was not functional.

One of the coolest features of the alarm was that it made a car honking noise when the alarm was activated. Unfortunately, it turned out that the chip-onboard which produced the honking sound was shorted internally causing some transistor overheating and the dim display. It was impossible to restore functionality of the custom chip-onboard, but lucky for me the data sheets for the LM8560 clock chip revealed that it could directly output a standard alarm beeping sound to a speaker. This required the PCB and some circuitry be configured differently.

In the end the clock’s current load came down to normal parameters, the display was once again bright and the alarm functioned using the standard beeping alarm sound that comes from the LM8560 clock chip. It is sad that the coolness factor of the alarm clock cannot be restored with the honking car sound alarm but my son is quite happy to have his favorite Scooby-Doo alarm clock functioning once again.

The circuit modifications may not have been the cleverest or the best solution, so if you have other suggestions please leave them in the comments below. You can watch the video of the circuit evaluation and repair modifications after the break.

Continue reading “Scooby-Doo Alarm Clock Repair”

An Arduino Library For The PS4

PS4 Controller

Looking to interface your Arduino with the PS4 controller? [Kristian] has updated his USB host library with support for the controller. The library makes it easy to read most of the inputs from the controller. Currently the buttons and joysticks work, and support for the light sensor, rumble, and touchpad is on the way.

To get this working, you will need the USB Host Shield for the Arduino and a Bluetooth dongle. Once you have the hardware setup, you can use the library to pair with the controller. When connected, simple function calls will let you read the state of the device.

While this does require some additional hardware to connect, all of the code is open source. If you’re looking to experiment with the PS4 controller yourself, [Kristian]’s work could be a helpful starting point. Of course, all of the source is available on Github, and the example sketch shows how easy it is to roll the PS4 controller into your own Arduino project.

Software Half Duplex UART For AVRs

If you have worked with very low cost microcontroller in the past, such as the ATtiny series from AVR, you’ve probably been stuck without a UART peripheral. The usual answer to this problem is to implement the UART in software. It’s not fast, but it works.

Lets say you’re even more limited on resources, and only have a single pin for UART. [Ralph] created a software library and a small circuit that enables half duplex UART using only one pin. With the above circuit, and a 62 byte Arduino compatible library, you can add UART to the tiniest of ATtinys.

In this circuit, the Tx/Rx pin is on the AVR, and the Tx and Rx pins are another device. The circuit relies on the idle state of UART being a logic high signal. When the Tx pin is idle, the transistor stays on. This allows the Tx/Rx pin to pull Rx low when the AVR sends a 0. When the Tx pin sends a 0, the Tx/Rx pin gets pulled low through the diode.

It’s a clever hack, and could definitely help add communication to your next tiny project.

Tape Measure VHF Yagi Antenna

tap measure yagi vhf antenna

Radio direction finding and fox hunting can be great fun and is a popular activity with amateur radio (ham radio) enthusiasts. These antennas are great and are not only good for finding transmitters but also will greatly increase directional distance performance including communicating with satellites and the international space station (ISS).

[jcoman] had a nephew who was interested in learning about amateur radio so [jcoman] figured building and using a cheap and portable 2 meter band VHF Yagi style beam antenna would be the perfect activity to captivate the young lad’s interest in the hobby.

His design is based on [Joe Leggio’s] (WB2HOL) design with some of his own calculated alterations. We have seen DIY Yagi antenna designs before but what makes this construction so interesting is that the elements come together using bits of cut metal tape measure sections. These tape measure sections allow the Yagi antenna, which is normally a large and cumbersome device, to be easily stowed in a vehicle or backpack. When the antenna is needed, the tape measure sections naturally unfold and function extremely well with a 7 dB directional gain and can be adjusted to get a 1:1 SWR at any desired 2 m frequency.

The other unique feature is that the antenna can be constructed for under $20 if you actually purchase the materials. The cost would be even less if you salvage an old tape measure. You might even have the PVC pipes, hose clamps and wire lying around making the construction nearly free.

We were quite surprised to find that such a popular antenna construction method using tape measure elements had not yet been featured on Hackaday. For completeness this is not the only DIY tape measure Yagi on Instructables so also check out [FN64’s] 2 m band “Radio Direction Finding Antenna for VHF” and [manuka’s] 70 cm band “433 MHz tape measure UHF antenna” postings. The other Yagi antenna designs featured on Hackaday were “Building a Yagi Uda Antenna” and “Turning an Easter Egg Hunt into a Fox Hunt” but these designs were not so simple to construct nor as cleverly portable.

A Simple LED Flashlight Composed Of A Relay And A Magnet

In our tips line we sometimes receive hacks that are amazing just because of their ingenuity. This relay-powered flashlight is definitely one of them. It has been named RattleGen by its creator [Berto], who apparently often makes simple hacks used in his everyday life (have a look at his YouTube channel).

To understand this hack, you first need to know (in case you didn’t already) that a magnet moving near a conductor (here a coil) induces a voltage at its terminals. This is called electromagnetic induction. In the picture you see above, you may distinguish a disassembled relay with a magnet located on the lever’s end. As a ferromagnetic metal is already placed inside the coil, the lever is by default ‘stuck’ in this position. By continuously pressing the latter on its other end, important voltage spikes are created at the coils terminals. [Berto] therefore used a bridge rectifier to transform the AC into DC, and a 1000uF capacitor to smooth the power sent to his super bright LED. A video of the system in action is embedded after the break.

Continue reading “A Simple LED Flashlight Composed Of A Relay And A Magnet”