Hackaday Visits NOVA Labs And Small Batch Assembly

header

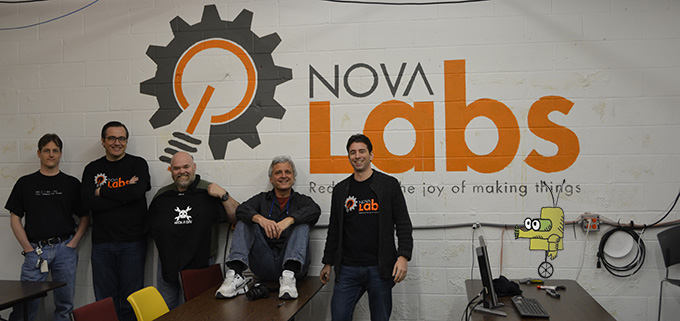
A few days ago Hackaday visited NOVA Labs, one of the premier hackerspaces around Washington, DC. In our video tour, co-founder [Justin Leto] shows off the space, going through all the awesome tools, workspaces, and projects his space has put together over the years.

One of the most impressive parts of NOVA Labs is the incredible amount of woodworking equipment. Everything from a Blacktoe CNC router, table and bandsaws, jointers, planers, real woodworking benches, and enough clamps to hold anything together are from a NOVA member that is co-locating his equipment for the rest of the hackerspace to share.

Apart from the woodworking tools, NOVA also has a few laser cutters and enough 3D printers for all the octopodes and Yoda heads you could ever imagine. A few of the members put together 3D build classes, and the machines being constructed are very, very cool. They’re using a Raspi with OctoPrint in their latest builds, attaching a camera to the frame and using a tablet for the interface. It’s just about the smoothest and cleanest 3D printer interface possible without using a computer.

There’s a lot of cool stuff happening at NOVA; the DC Area Drone User Group is the area’s largest group of unmanned aerial vehicles not housed in a five-sided building, and have done some aerial mapping for the metro station that will soon displace the hackerspace. NOVA also hosted a mini maker faire last weekend with over four thousand attendees. Impressive, to say the least.

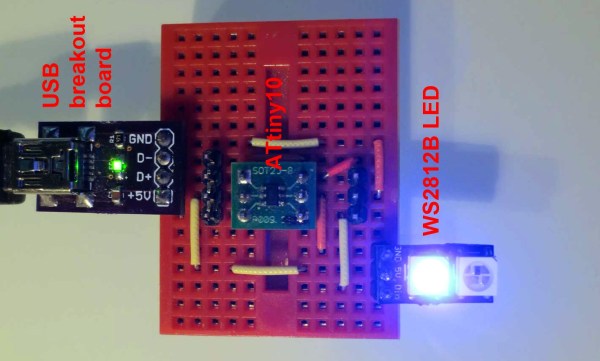
Also at NOVA Labs is a small business the guys are incubating headed up by [Bob Coggeshall], also known as one of the guys who wrote sudo. It’s Small Batch Assembly, a very cool service that takes panelized PCBs and reels of components and assembles them. While we were there, [Bob] was assembling a few dozen boards stuffed with WS2812 LEDs for the R2D2 Builders Club.

[Bob] is using a very cool and very expensive Manncorp pick and place machine for placing all the components, squeegeeing the solder paste through Kapton film he laser cut on the NOVA Labs machines. It’s only a small-scale operation, but when it comes to placing thousands of SMD components for a few dozen boards, there probably isn’t a better way.

You can check out the video of NOVA, Small Batch Assembly, and a whole bunch of pics below.

Continue reading “Hackaday Visits NOVA Labs And Small Batch Assembly”

Hackaday Video: Safe Area Operation For Components (and Helicopters)

We’re back and this time talking about Safe Operating Area also called Safe Area Operation (SAO) which is short for the combination of things that can conspire to ruin your design. We also talk about helicopters.

Why take all of this time to discuss SAO you might ask, and what is that business about helicopters? Depending on the design there may be quite a bit of tedious math involved and sometimes there is just no avoiding it. Alternatively if you can get a feel for when math is and is not critical (based on design choices), it should be easier to get your next project up and running while still obeying the rules of the road.

Continue reading “Hackaday Video: Safe Area Operation For Components (and Helicopters)”

Don’t Just Go Sticking That Anywhere: Protect The Precious With A USB Wrapper

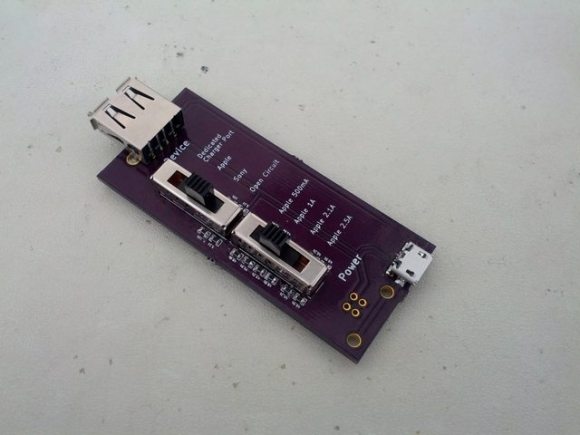
Oooh, look, a public charging station. Should you trust it? You might get juice jacked. Oh wait, you’ve got a USB Wrapper designed by [Scasagrande] to deny access to your datas.

This project was inspired by the USB Condom, but the problem with those is that they completely cut out the data lines and limit the charge rate to USB 2.0 (500mA). The data lines are used to communicate information about the charger’s power sourcing capabilities to the device. Many manufacturers short D+ and D- together, but Apple applies specific voltages to those lines.

[Scasagrande]’s USB Wrapper gives you options. You can set it to Dedicated Charging Port, Sony, Open Circuit, or Apple. The super-cool part of this hack is for you Apple fanboys. The bottom slider lets you emulate any Apple charger and use any USB cube (including one you may have made) as long as you have that funny cable in your messenger bag.  The hardware is open source and available at [Scasagrande]’s repo.

Make the jump to see [Scasagrande]’s nicely detailed video about the project.

Continue reading “Don’t Just Go Sticking That Anywhere: Protect The Precious With A USB Wrapper”

Authentic Blue Blueprints

blue

At one point in history, blueprints were actually blue. Now, if you even see a dead tree version of plans or assemblages, they’re probably printed off with a plotter or large format printer. You can, however, make your own blueprints at home, as [Tyler] shows us in his Hackaday Project.

Back in the olden days, master drawings were traced onto large sheets of transparent film. These master prints were then laid over paper prepared with Potassium Ferricyanide and Ferric Ammonium Citrate to create an insoluble Prussian Blue background for the prints. Developing is easy – just expose the transparent positive and undeveloped paper to UV light, in the form of fluorescent bulbs or the sun.

[Tyler] began his blueprint creation process by getting a few design sketches of the RSI Aurora and Nautilus, editing them on a computer, and printing them out on transparency sheets. A solution of equal parts Potassium Ferricyanide and Ferric Ammonium Citrate were painted onto a piece of paper and allowed to dry. Exposing was a simple matter of laying the transparency over the undeveloped paper and setting it out in the sun for 20 minutes or so. After that, it’s a simple matter of washing off the unexposed chemicals and letting the newly created blueprint dry.

It’s a simple technique, but also very, very cool. Not exactly practical, given a plotter can spit out an architectural or assembly drawing of any building, vehicle, or device in a few minutes, but just the ticket for art pieces or extremely odd engineers.

Thanks [Sarah] for sending this in.

Talking Bacon Plushie Greets You At The Door

BaconMaterials

The folks over at [gTar] decided to create a motion activated talking bacon plush toy to greet visitors to their office.

They started with a toy called My First Bacon, available from ThinkGeek — it’s a plush toy that exclaims “I’m Bacon!” when you squeeze it. But then they cut him open. We can’t imagine what must have been going through this poor self-aware Bacon’s mind!

The hack itself is quite simple. They are basically replacing the “squeeze” circuit with an IR motion sensor — a PIR sensor from SparkFun to be precise. In addition to that they needed a small inverter IC. This is because the standard talking bacon module requires a positive leading edge signal in order to trigger the audio output, and their PIR sensor drives an output pin low — slap on an inverter IC (they had an old schmitt trigger lying around) and you’re ready to go!

Continue reading “Talking Bacon Plushie Greets You At The Door”

Modular Arduino Based Infrared Thermometer

IRTemperature

[Brian] started out with a clear and concise goal, “allow a regular human to associate an audible tone with a temperature from an infrared contactless thermometer.” With his latest project, the ESPeri.IRBud, he has achieved this goal.

One of our favorite parts of [Brian’s] post is his BOM. Being able to easily see that the IR temperature sensor costs $26 at DigiKey is unbelievably helpful to readers. This specific sensor was chosen because others have successfully interfaced it with the Arduino. Not having to reinvent the wheel is good thing! For the build, [Brian] decided to hook up the IR temperature sensor to a re-purposed flexible iPhone headset wire. Having used headphone sockets to connect to the sensor and speakers, the actual device is quite modular. Hearing this thing in action is quite cool, it almost sounds like old-school GameBoy music! Check it out after the break.

Have you used an IR temperature sensor in one of your projects? Let us know.

Continue reading “Modular Arduino Based Infrared Thermometer”

USB On The ATtiny10

Atmel’s ATtiny10 is their smallest microcontroller in terms of physical size – it’s an SOT-23-6 package, or about the same size as surface mount transistors. The hardware inside this extremely bare-bones; three I/O lines, 1kB of Flash, 32 bytes of RAM, and a reduced AVR core with 16 registers instead of 32. With such a minimal feature set, you would think the only thing this micro would be good for is blinking a LED. You’d be right, but [cpldcpu] can blink a LED with the ‘tiny10 over USB.

The V-USB interface usually requires about 1.5kB of Flash in its most minimal implementation, and uses 50 bytes of RAM. This just wouldn’t do for the ‘tiny10, and although [cpldcpu] is working on a smaller, interrupt-free V-USB, there were still some hurdles to overcome.

The biggest issue with putting code on the ‘tiny10 is its reduced AVR core – on the ‘big’ 32-register core, direct memory access is two words. On the ’10, it’s only one word. AVR-GCC doesn’t know this, and no one at Atmel seems to care. [cpldcpu] worked around this problem using defines, and further reduced the code size by completely gutting V-USB and putting it in the main loop.

It’s not much, but now [cpldcpu] can blink an LED with a ‘tiny10 over USB. If you’re wondering, 96.4% of the Flash and 93.8% of the SRAM was used for this project.