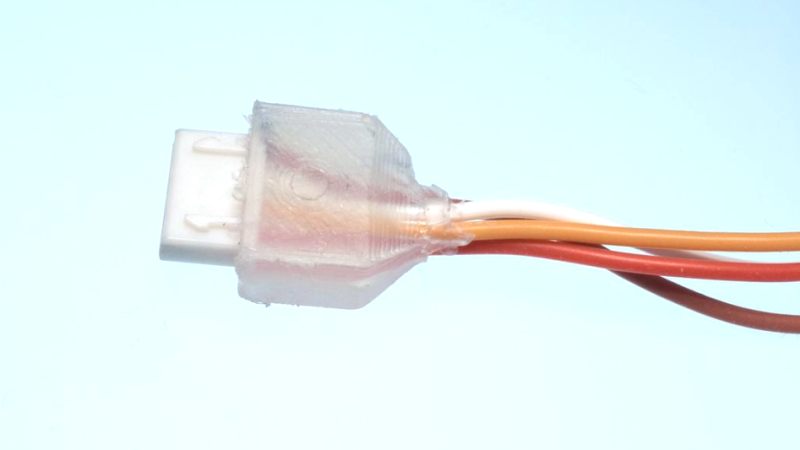
[Daniel Roibert] found a way to add cheap strain relief to JST-XH connectors, better known to hobby aircraft folks as the charging and balance connectors on lithium-polymer battery packs. His solution is to cast them in hot glue, with the help of 3D printed molds. His project provides molds fitted for connectors with anywhere from two to eight conductors, so just pick the appropriate one and get printing. [Daniel] says to print the mold pieces in PETG, so that they can hold up to the temperature of melted glue.
The 3D models aren’t particularly intuitive to look at, but an instructional video makes everything clear. First coat the inside surfaces of the mold with a release agent (something like silicone oil should do the trick) and then a small amount of hot glue goes in the bottom. Next the connector is laid down on top of the glue, more glue is applied, and the top of the mold is pressed in. The small hole in the top isn’t for filling with glue, it’s to let excess escape as the mold is closed. After things cool completely, just pop apart the mold (little cutouts for a screwdriver tip make this easy) and trim any excess. That’s all there is to it.
One last thing: among the downloads you may notice one additional model. That one is provided in split parts, so that one can make a mold of an arbitrary width just by stretching the middle parts as needed, then merging them together. After all, sometimes the STL file is just not quite right and if sharing CAD files is not an option for whatever reason, providing STLs that can be more easily tweaked is a welcome courtesy. You can watch a short video showing how the whole thing works, below.


I would imagine you could do about the same job by pressing a likely looking USB connector into clay and filling that with hot glue.
Clay will melt…
Clay clay, not kids modelling clay, plasticine type.
Hokay, after a quick awareness check, I see the craft scene is nowadays infected with all manner of substances claiming to be clay, when in the past they clearly announced themselves as mineral clay or polymer clay or whatever. I mean a mineral or natural earth clay for this. Possibly the crayola and das brand air drying clays may work, you do not need them to dry though, rewet them and put them away in a tub separate to your main chunk after use. You can reuse but might have small impurities/inclusions now you find unacceptable for some uses so don’t mix it with the fresh stuff. Otherwise, you can make it out of mineral cat litters that don’t include silica gel crystals, recycled newspaper or anything else. It’s a bit of a pain in the ass to thoroughly wet through and mix though.
My mind was on one set of rails yesterday evening, but now it’s not focused on “thing to make moulds for hot stuff” let’s take a minute to think about that polymer clay and how useful it might be….
It has very low shrinkage… https://polymerclayjourney.com/2016/12/27/does-polymer-clay-shrink/
and cures around 135 C in the oven. Initial types were attempts to produce a replacement with non-flammable components, for Bakelite. Bakelite should ring a bell, it was pretty much the ubiquitous polymer insulator for the first 2/3 of the electrical age. So a large amount of stuff that could be done with bakelite, we should suspect would be possible with these clays.
Obviously, one could encapsulate anything that will survive 135C… which means PTFE insulation on your wires (real hard to stick to btw) though I’m wondering if the old school shellacs or braided cotton would cope also. But one could just use bare wire, and rely on the clay to do the insulating. I know hobbyists tend to ignore popcorning risk on ICs and other packaged components, but I get the feels that if you wanted to put them inside clay like this you should low bake the humidity out of them first.
Soldering near it, you’d want to use low temperature solder and be quick. Soldering to put inside it, you’d want a high temperature solder.
One could I guess, press bare wires into the surface of a slab and bake those for a circuit board. Again though, careful with the heat when soldering. People know how to do that right? Most conventional PCBs if you used a hardware store iron and leaned on it, you’d burn your way through.
Anyway right, literal roll your own plug shells, roll out a piece, wrap it around, and either mush in, smooth off and bake the whole lot, or shape it, remove carefully bake then reapply with hotsnot or that ‘poxy stuff.
I love this!
I have some of those super cheap 3,5mm headphone jacks without solder tails, which I soldered directly on.
I tried several times to print a „housing“ so I could make my own uber rugged aux cables. I may try hotglue-molding a housing now.
I used to put those in a section of plastic pen barrel or lid and heatshrink over.
Both is also nice. Once upon a time I hot glued over the reconstructed y-junction on some headphones and slid the heat shrink over top. Then shrinking it melted the hot glue again so a bit of excess came out the ends of the tube, which I just picked off.
This. Find a tapered pen tip (not the usual “stick” if possible) saw the tip off with a razor saw, wire goes out the small end, plug out the fat end. Pot with epoxy. Heatshrink tubing at the wire/pen-tip juncture for flex strain relief. Ignore in service for decades.
I cover the wiring with heatshrink as strain relief and use the PVC jacket from one of the thick coal cable – RG59B/U as holder. A bit of glue to hold that in place. Not pretty as the molded ones but it lasts forever.
Hotglue – the cheap stuff I got have the bad habit of gathering dust and dirt on its outside. It is only good when I have something else on the outside.
yup that’s a good tip also, keeping insulation stripped as a tube off larger cables/wires for strain relief, grommetting or other protection of thinner wires.
Plot twist: they make black colored hot glue sticks.
But clear is cooler.
’twas in the 90s :-P
Real plot twist: they make glitter-filled glue sticks.
Adds that little extra protection you need for high voltage and/or RF applications :-D
“If it’s glowing, don’t touch it”
They make glow-in-the-dark glue sticks?!?
Make any hot glue any color by adding a bit of crayon.
Looks like he only made a connector housing without strain relief. That’s a very hard edge there without any taper for gradual flex. I use hot glue also on my remade strain reliefs, but it only lasts a few months before the material breaks up
The strain that is being relieved here is not bending, but pulling. Thus, this is very good strain relief.
Oh I like this idea. Black hot glue tho +++
I do a similar thing with dip headers/DuPont wires to make a reliable/resiliant custom wire harness without a crimper.
1) Group your wires as you want them (e.g. 5×1)
2) Squirt hot glue to the wires
3) Use baking/wax paper to surround the header
4) Use two flat surfaces to squeeze to a rectangle
(4 is optional since if you do 3 properly you already have the perfect bounding box of the connector)
Using a 3dp mold does reduce the ugliness of the ‘end’ of the casing though.
Thanks, just gave me an idea for custom plugs that are rare/unobtanium… just jam stiff wires in the socket and hot glue cast around them. I guess one could step it up a notch by drilling a small plastic mask plate with the same pattern of holes and cutting a small piece of tin/copper for the shield and bending it to shape.
Glad to have helped.
Fyi, if you need to unstick anything from hoglue (socket/ plastic mask plate in your case) use isopropyl alcohol.
OMG, I came in here to mention the baking paper trick. It’s the only surface that I’ve found hot glue comes off of easily. Seriously, try this.
I also use it for making feet for boxes, for instance. Four globs of hot glue, place on baking sheet, done. Auto-levelling!
I find it comes off insulating tape easily also, and I always keep a few rolls around. I’ve made a good few custom usb cables by hotgluing blobs over the soldered mini usb connector, clipping off the excess, greasing with vaseline and sliding into heatshrink.
Depends on how hot your hot glue is and quality of tape – Insulation tapes i’ve used often soften or melt somewhat with the high temp hot glue and end up bonding rather well – still will be peelable but its not as effortless. Never had a trouble with low temp hot glue sticks with any insulation tape.
But as insulation tape lives in the box with all the soldering gear I tend to use it more often than baking paper. (Baking paper gets used if it was time to go make a cuppa again anyway)
I found that PVC insulation is very poorly wetted by most adhesives and easily detaches during normal use. Flame treatment kinda works but you have to be careful not to toast the wires. My go to solution right now are multiple layers of heat shrink (each layer shorter and shorter) and a stiff clamping strain relief to keep the cable firmly in place.
Used to use something like that layered technique with just insulating tape back in the day. However, insulating tape seems to have changed, at least I can’t get any like the stuff I used to have. Even paying more for it. Just seems to turn into a sticky mess after a couple of years now, whereas things I did with the old stuff are still good.
Per 3M ‘Low temperature hot melt adhesives are applied at 250°F/121°C temperatures, which makes them ideal for bonding electronics, plastics, cloth and other heat sensitive materials. High temperature hot melt adhesives are applied at 380°F/193°C and produce a stronger bond than the low temperature hot melts.’
Both of these temps are higher than the plastic temp of PETG. I would expect the hot glue to deform the PETG.You could just as well 3D print the connector.
It’s not forced in under high pressure and is a small thermal mass, so I would not expect to run into problems unless i) the mold is very fresh off the printer ii) you try to do more than one at a time without allowing the mold to cool. If one wanted to go much larger or produce many quickly, then some kind of ice bath could be arranged.
I think this would work with a silicone too, but the glue does have an advantage of faster setting time.
Pick your silicone with care, generic bathroom silicone releases acetic acid on cure, so it’s not going to be too friendly to contacts or electronics.
I’ve never had an issue with it, other than the noxious vinegar smell the first 48 hours
There are alot of people that make their hotend socks from silicone using 3D printed molds. Check Thingiverse and youtube for details.
My recommendation is DO NOT USE SILICONE OIL as a release agent — or for nearly anything else, for that matter. It’s nearly impossible to clean off, and its low viscosity and tendency to wet stuff means it gets everywhere — especially places you didn’t expect it to migrate to and really don’t want it to be. And NOTHING sticks to it. If you have any hope of that hot-melt sticking to the wire insulation for strain relief, well, if even a tiny bit of that silicone oil gets in there, it won’t. Period.
I’ve been making connectors out of hot-melt for many years, and have used release paper (shiny stuff you peel stickers off of), with good success. Just fold it into the shape you need, slick side in, and hold it with a few wraps of something like masking tape — or even better, some aluminum foil — on the outside. Then hose it full of hot-melt, and as it solidifies, press it into shape. When it’s cool (and not before), the release paper will come right off.
Starting with, say, some male pins, solder the wires to them and stick them through some release paper (make sure you get the shiny side towards the soon-to-be plug) into the proper sockets in the mating connector (that’ll put them all in the right places). Fold up the release paper around the wires and secure it in place. Hose in the hot-melt. Done. If the final product is a bit rough, a carefully-applied heat gun will clean things right up.
In my experience, loctite surpasses silicon oil.
i.e. sticks despite the oil being all over the place
Though there are different types of hot glue, what I see is worthless. Bubblegum sticks better. Holding grille cloth while stretching it across a frame is one good use I have for it where tacks won’t work. I use JB weld on headphone plugs when I rebuild factory molded plugs after they fail. Fail because of non right angle design. It sticks out and the wire gets bent sharply, those “elephant trunk” molded on strain relief things are worse than just having it not there at all. Flex and pull strain are two different things here. Bonding is necessary for pull strain, flex is best dealt with a right angle plug or the wire exiting thru a trumpet bell shaped hole not anything that sticks out like springs or elephant noses.
2 words
putty epoxy
Isn’t that too hard? Hot melt glue flexes, which is probably good for the cables… Also if you make it too thin, the epoxy will crack.
Lots of different grades of 2 part epoxies. Some are very rubbery when set, others brittle as anything – Sculptors ‘Green-Stuff’ is pretty good for cable strain being rubbery enough to bend without cracking but reasonably stiff for example, though if it will react with any of the common cable insulation I don’t know.
One word – Sugru
already did that several times.
I did silicone forms of 3d printed parts and started with hot glue instead of epoxy.
The idea with the clay is nice,
once i did it with salt paste and bake it :D
really cool idea
now finally it is done with 3d printed metal forms and low pressure injection molding (macromelt)
The Chinese use this method on the wiring for the electric scooters my company shares. Sadly if the wire moves around at all the glue gets unstuck or rips in short order and ends up down the wire somewhere. It’s an interesting approach but the main ideas with hot glue is it that you can remove it pretty easily.
Hot-glue actually sticks to PETG very well. I use it not to inject-mold strain relief out of but to fill and glue 3D printed strain relief shut.
Here is a test of various glues on various plastics used in FDM printing: https://www.youtube.com/watch?v=nEgYfLE-RC4
Very interesting. I’ll have to try out hot glue with PETG. Superglue is my standby, but hot glue is much more convenient in a number of ways. Bummer that it didn’t adhere to the PLA. Wonder what’s going on?
I did that on my USB cables with silicone rubber instead of 3D printing: https://twitter.com/_Blamoo/status/1125941145656340480
Some time ago I needed a strain releaf and guidance for some cables for a HF spindle motor.
It’s got a 30phase 230Vac cable, earth wire and 2 tubes for water cooling which should not be cinched.
I twisted the cables together over the whole length (about 2 meters) which works well, they do not untwist.
For the end, I geased up a piece of paper with Vaseline to make it non stickable and made a cone out of it around the cable.
Then I filled the cone with silicone chaulk.
Works ver nice.
nice, as long as your cables will withstand the hot glue.
Some alternatives might be,
– sugru (easy, but expensive)
– self vulcanizing tape (magic stuff)
– sometimes those Chinese cable protectors which you can “screw on”
Good idea! It’s really similar to how I do strain relief for solder ends on cable. I just leave my two part 3D printed mold over it, inject with glue, then wipe the excess off.
FWIW, Polycaprolactone (PCL) melts at 60C and becomes sticky at 70-80C, WELL below the temperature at which even PLA melts.