Arduboy FX Mod-Chip: Now You’re Playing With Power

Traditionally, a forum full of technical users trying integrate their own hardware into a game system for the purposes of gaining unfettered access to its entire software library was the kind of thing that would keep engineers at Sony and Nintendo up at night. The development and proliferation of so called “mod chips” were an existential threat to companies that made their money selling video games, and as such, sniffing out these console hackers and keeping their findings from going public for as long as possible was a top priority.

But the Arduboy is no traditional game system. Its games are distributed for free, so a chip that allows users to cram hundreds of them onto the handheld at once isn’t some shady attempt to pull a fast one on the developers, it’s a substantial usability improvement over the stock hardware. So when Arduboy creator Kevin Bates found out about the grassroots effort to expand the system’s internal storage on the official forums, he didn’t try to put a stop to it. Instead, he asked how he could help make it a reality for as many Arduboy owners as possible.

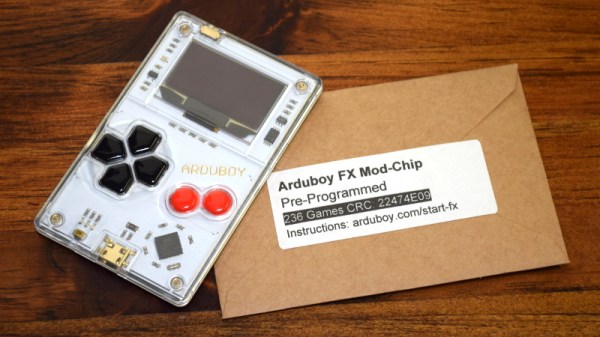
Now, a little less than three years after forum member Mr.Blinky posted his initial concept for hanging an external SPI flash chip on the system’s test pads, the official Arduboy FX Mod-Chip has arrived. Whether you go the DIY route and build your own version or buy the ready-to-go module, one thing is for sure: it’s a must-have upgrade for the Arduboy that will completely change how you use the diminutive handheld.

Continue reading “Arduboy FX Mod-Chip: Now You’re Playing With Power”

Volumetric OLED Display Shows Bladerunner Vibe, Curious Screen Tech

[Sean Hodgins] is out with his latest video and it’s a piece of art in itself. Beyond a traditional project show and tell, he’s spun together a cyberpunk vibe to premiere the volumetric display he built from an OLED stackup. Update: He’s also documented the build.

The trick of a volumetric display is the ability to add a third dimension for positioning pixels. Here [Sean] delivered that ability with a stack up of ten screens to add a depth element. This is not such an easy trick. These small OLED displays are all over the place but they share a common element: a dark background over which the pixels appear. [Sean] has gotten his hands on some transparent OLED panels and with some Duck-Duck-Go-Fu we think it’s probably a Crystalfontz 128×56 display. Why is it we don’t see more of these? Anyone know if it’s possible to remove the backing from other OLED displays to get here. (Let us know in the comments.)

The rest of the built is fairly straight-forward with a Feather M4 board driving the ten screens via SPI, and an MPU-6050 IMU for motion input. The form factor lends an aesthetic of an augmented reality device and the production approach for the video puts this in a Bladerunner or Johnny Mnemonic universe. Kudos for expanding the awesome of the build with an implied backstory!

If you can’t find your own transparent displays, spinning things are a popular trend in this area. We just saw one last week that spun an LED matrix to form cylindrical display. Another favorite of ours is a volumetric display that spins a helix-shaped projection screen.

2:3 Scale VT100 Is A Perfect Pairing For PDP-8/I Replica

When he went shopping for a vintage serial terminal to go along with his reproduction PDP-8/I computer, [Michael Gardi] came down with a bad case of sticker shock. But rather than be discouraged, he reasoned that if his “retro” computer could stand to have modern components at its heart, so could the terminal he used to talk to it. Leaning on his considerable experience in designing 3D printed replica hardware, he’s built an absolutely gorgeous scaled down DEC VT100 terminal that any classic computer aficionado would be happy to have on their desk.

Now to be clear, [Michael] hasn’t created a true serial terminal. Since the faux PDP-8/I is running on a Raspberry Pi, all he needed to do was come up with something that could connect to its HDMI and USB ports. Put simply, he’s essentially just made a 3D printed enclosure for the Pi’s monitor and keyboard. Oh, but what a gorgeous enclosure it is.

Recreating the VT100 in CAD was made more difficult by the fact that [Michael] couldn’t get his hands on the authentic hardware. But of course, that’s never stopped him before. It turns out DEC provided some very detailed dimensions for the terminal in their original documentation, and while comparing them to photographs of the actual terminal did uncover a few key differences, the overall look is spot on. Once the design was done, he reports it took two rolls of filament and more than 200 hours to print out all the parts for the enclosure.

To help sell the authentic look [Michael] tracked down a 4:3 LCD of the appropriate size, and the use of an off-the-shelf portable mechanical keyboard should make text entry a pleasure. For a little fun, he even came up with a themed arcade controller for the VT100 that can be used with RetroPie. The printed logo plate is an especially nice touch, and we’re more than willing to forgive the fact that he had to print it at a larger scale than the rest of the terminal to get all the detail in with his printer’s 0.4 mm nozzle.

On a technical level, this is perhaps the most straightforward replica we’ve ever seen from [Michael]. But even on a relatively simple project like this, his signature attention to detail and craftsmanship is on full display. It’s always a good day when he’s got a new build to show off with, and we’re eager to see what he comes up with next.