Once you make the leap to resin-based 3D printing, you’ll quickly find that putting parts out in the sun to cure isn’t always a viable solution. The best way to get consistent results is with a dedicated curing chamber that not only rotates the parts so they’re evenly exposed to the light, but allows you to dial in a specific curing time. A beeper that goes off when the part is done would be handy as well. Wait, this is starting to sound kind of familiar…
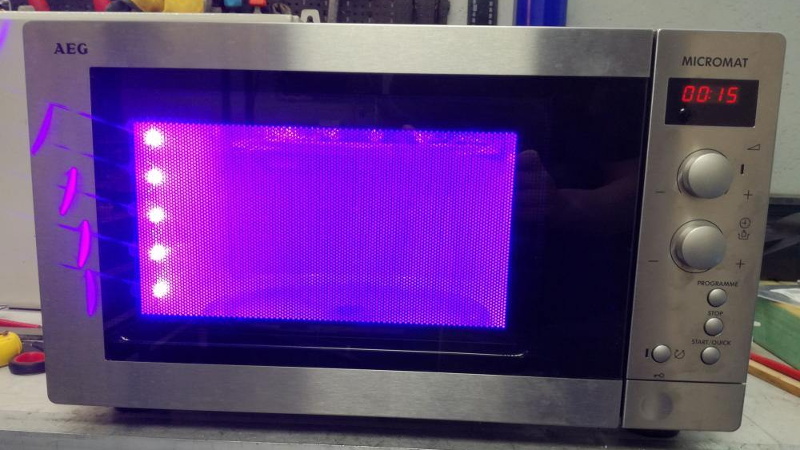
As you might expect, [Stynus] isn’t the first person to notice the similarities between an ideal UV curing machine and the lowly microwave oven. But his conversion is certainly one of the slickest we’ve ever seen. The final product doesn’t look like a hacked microwave so much as a purpose-built curing machine, thanks in large part to the fact that all of the original controls are still functional.
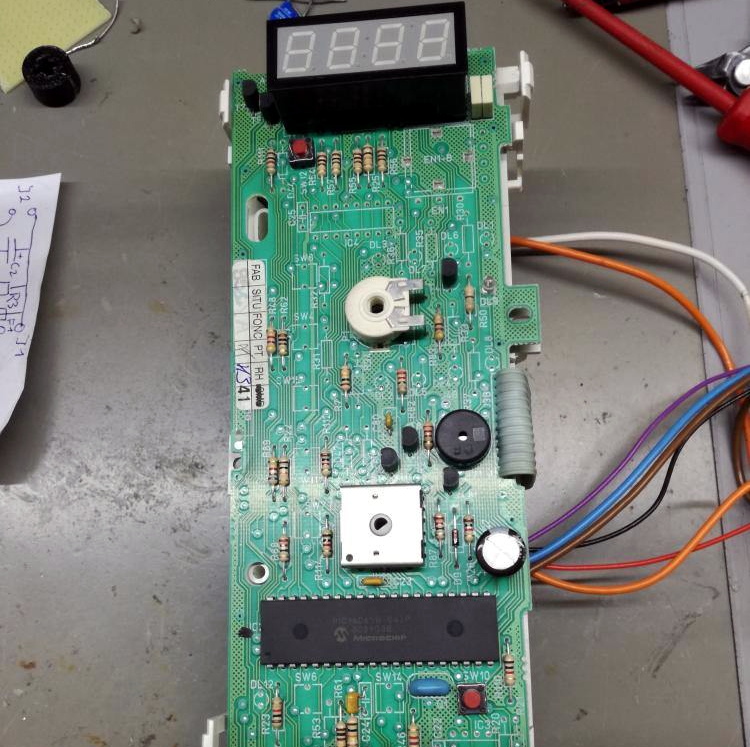 The big break there came when [Stynus] noticed that the control panel was powered by a one-time programmable PIC16C65B microcontroller. Swapping that out for the pin-compatible PIC16F877A opened up the possibility of writing custom firmware to interface with all the microwave’s original hardware, he just needed to reverse engineer how it was all wired up. It took some time to figure out how the limited pins on the microcontroller ran the LED display and read the buttons and switches at the same time, but we’d say the final result is more than worth the work.
With full control over the microwave’s hardware, all [Stynus] had to do was strip out all the scary high voltage bits (which were no longer functional to begin with) and install an array of UV LEDs. Now he can just toss a part on the plate, spin the dial to the desired curing time, and press a button. In the video below, you can see he’s even repurposed some of the buttons on the control panel to let him do things like set a new default “cook” time to EEPROM.
Compared to the more traditional fused deposition modeling (FDM) 3D printers, resin printing requires a lot of additional post-processing and equipment. You don’t necessarily have to gut your microwave just to cure your prints, but you’d be wise to fully consider your workflow will look like before pulling the trigger on that shiny new printer.


why do these videos always need utterly annoying blaring music?!
+1 That, and “paid promotion”, usually makes me immediately hit the back button.
I can relate to both sides since I’ve experienced both sides. I hate videos that are five minutes long (or worse only have five minutes of content, the rest just padding) and have three minutes of advertising. On the other hand I don’t think it’s unreasonable for content creators to accept paid promotions, so long as it’s relevant to their content and is reasonably unobtrusive. Making videos can be grueling on adsense money alone and even with a sponsor often the costs and time spent making the video will work out to below minimum wage anyway. Now this is just my experience (I’m a pretty fish in the youtube ocean), so much larger channels probably have it easier, but I think discrediting a channel just because you see “paid promotion” is pretty heavy handed and punishes those who are honest about advertising revenue.
* should read “pretty small fish”, really wish I could edit my comments
My hopes of that happening is now only epsilon sized.
I just hit the L key, J jumps back and L leaps forward.
The music, I think comes from the “do you want youtube to add some licence-free background music?” .
This is cool. Might need to put some UV blocking material at the front of microwave to protect your eyes.
Good venting too.
Why bother to do anything to the control board? Just remove the magnatron and power the LEDs via the lamp circuit.
You must be new here.
Appropriately named.
Exactly, it seems overkill. Everything is there already…if the voltage isnt matching get a stepdown or a relay to trigger the UV.
That’s not a terrible idea, but you’d need to tap into the door sensor as well; every microwave I’ve owned has turned the internal lights on when the door was open.
Bum off the power signal to the motor driving the rotating plate, perhaps to the coil of a suitable relay?
In cheaper microwaves its a pancake 2wire motor, though I wouldn’t be surprised if some really fancy ones uses a stepper motor to vary the speed.
Damn. Stole my idea.
But the new electronic ones are too complicated! I go shopping at the dump for old ones with wind-up, mechanical timers. They make the best UV curing stations!
I Just bought a little 700W thing for $10 at a local thrift store and wired an LED driver to the turntable motor. Don’t have to deal with the fact that most microwaves cycle the magnetron on and off even on 100% power to prevent overheating, and it’s still interlocked with the door so I don’t scorch my eyes.
Nice job. I can just imagine what he could do with a toaster.