Since the very beginning, the prevailing wisdom regarding consumer desktop 3D printers was that they were excellent tools for producing prototypes or one-off creations, but anything more than that was simply asking too much. After all, they were too slow, expensive, and finicky to be useful in a production setting. Once you needed more than a few copies of a plastic part, you were better off biting the bullet and moving over to injection molding.
But of course, things have changed a lot since then. Who could have imagined that one day you’d be able to buy five 3D printers for the cost of the crappiest Harbor Freight mini lathe? Modern 3D printers aren’t just cheaper either, they’re also more reliable and produce higher quality parts. Plus with software like OctoPrint, managing them is a breeze. Today, setting up a small print farm and affordably producing parts in mass quantities is well within the means of the average hobbyist.

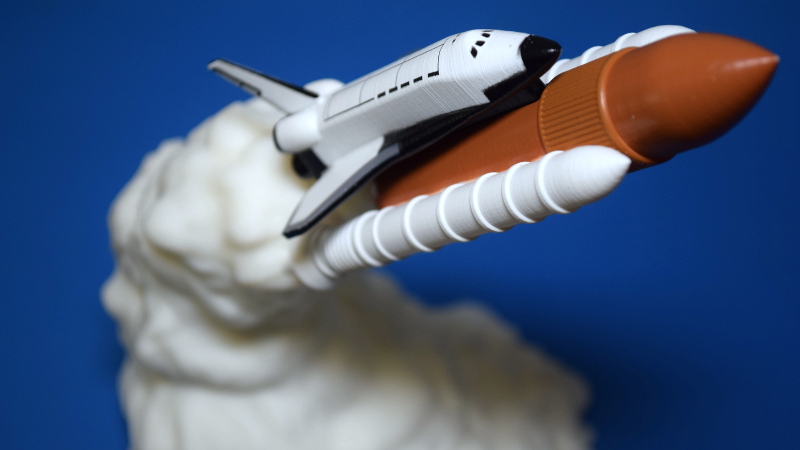
So perhaps I shouldn’t have been so surprised when I started seeing listings for these 3D printed rocket lamps popping up on eBay. Available from various sellers at a wide array of price points depending on how long you’re willing to wait for shipping, the lamps come in several shapes and sizes, and usually feature either the Space Shuttle or mighty Saturn V perched atop a “exhaust plume” of white PLA plastic. With a few orange LEDs blinking away on the inside, the lamp promises to produce an impressive flame effect that will delight space enthusiasts both young and old.
As a space enthusiast that fits somewhere in between those extremes, I decided it was worth risking $30 USD to see what one of these things looked like in real life. After waiting a month, a crushed up box arrived at my door which I was positive would contain a tiny mangled version of the majestic lamp I was promised — like the sad excuse for a hamburger that McBurgerLand actually gives you compared to what they advertise on TV.
But in person, it really does look fantastic. Using internally lit 3D printed structures to simulate smoke and flame is something we’ve seen done in the DIY scene, but pulling it off in a comparatively cheap production piece is impressive enough that I thought it deserved a closer look.
Now it’s always been my opinion that the best way to see how something was built is to take it apart, so I’ll admit that the following deviates a bit from the rest of the teardowns in this series. There’s no great mystery around flickering a couple LEDs among Hackaday readers, so we already know the electronics will be simplistic in the extreme. This time around the interesting part isn’t what’s on the inside, but how the object itself was produced in the first place.
The Star of the Show
I picked the Space Shuttle version of his lamp over the Saturn V because it’s by far the harder of the two to produce. I knew the iconic orbiter, along with its orange external tank and side-mounted boosters, would make for a more difficult FDM print than the cylindrical Apollo rocket. The Shuttle would almost certainly be printed in multiple pieces and glued together, and I wanted to see what kind of build quality could be expected in the worst case scenario.
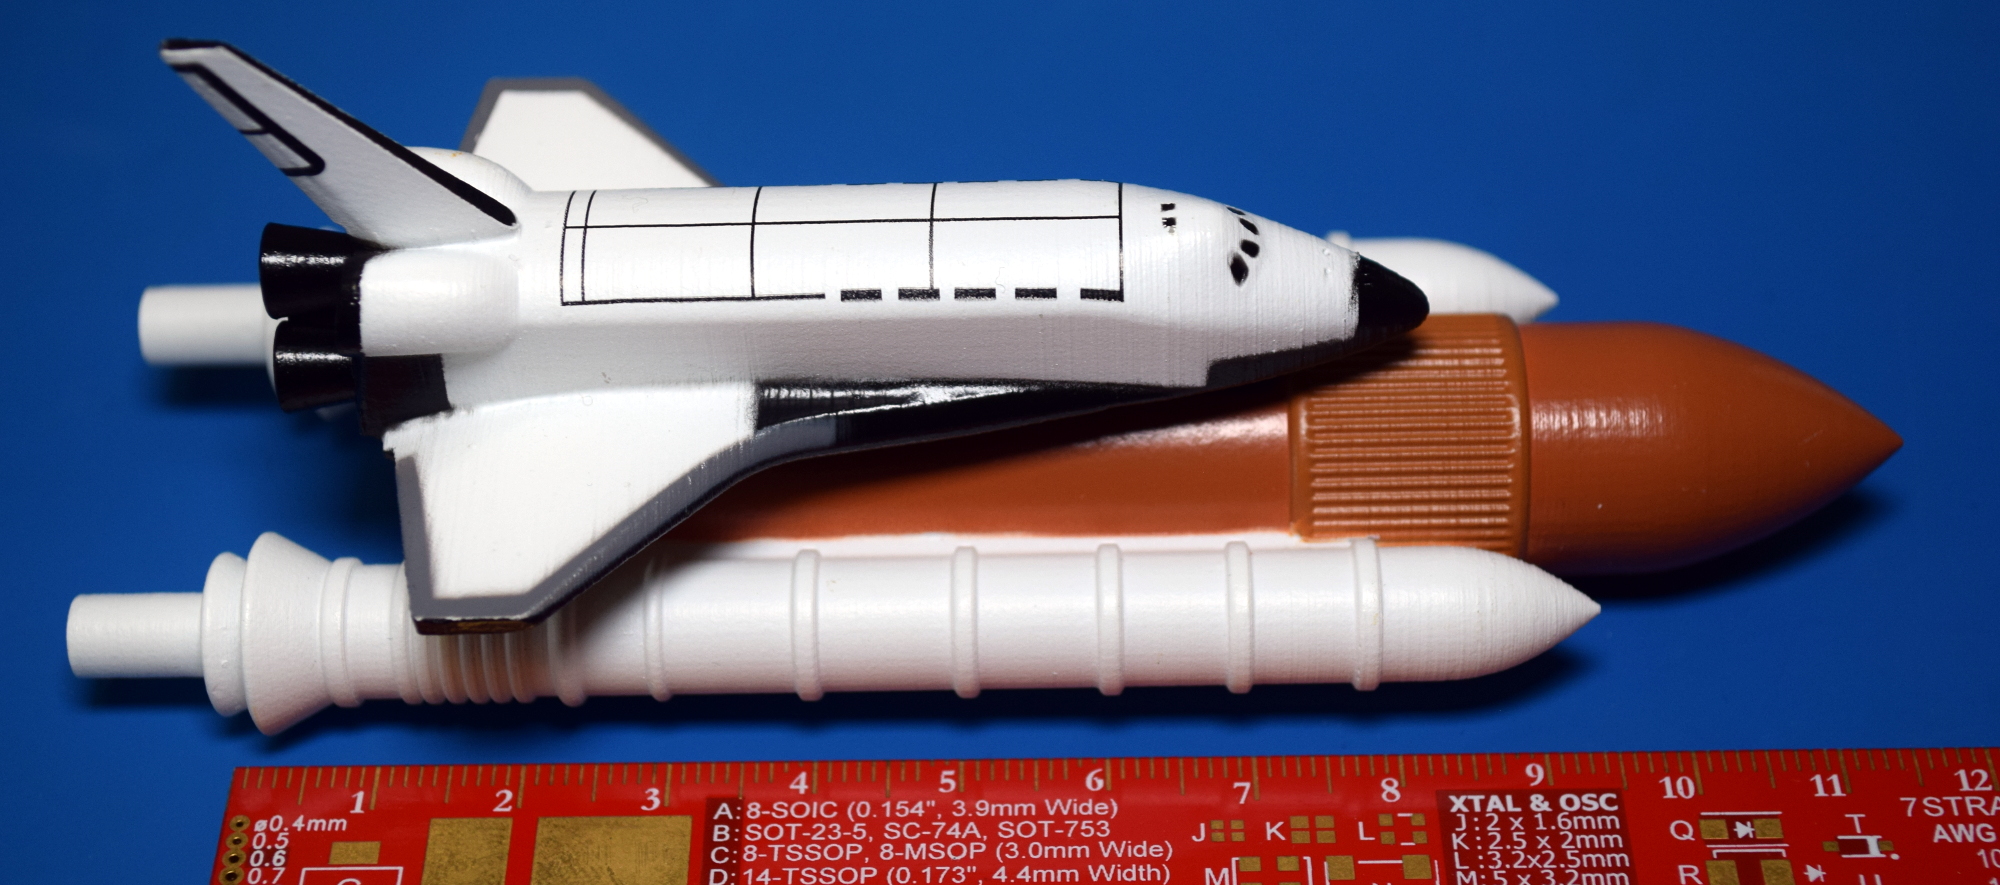
But even upon close examination of the roughly 120 mm (4.7 inch) spacecraft, I have to admit they’ve done a pretty good job. Clearly a lot of finish work went into the piece, especially on the external tank and boosters, but the printer used to produce the Shuttle is obviously pretty well dialed in. You can see faint layer lines on the orbiter itself, but in my experience, they’re always hard to hide on white surfaces. Also note that the windows aren’t just painted on, but are actually tiny indentations in the print surface, as are the RCS thrusters on the nose.
In terms of production, it seems that the orbiter was printed separately from the tank and boosters, and then glued on after the parts had been painted. It’s also clear that all the parts were printed vertically, which is somewhat surprising, as the logical print orientation for the orbiter would be to have it laying flat on the bed.
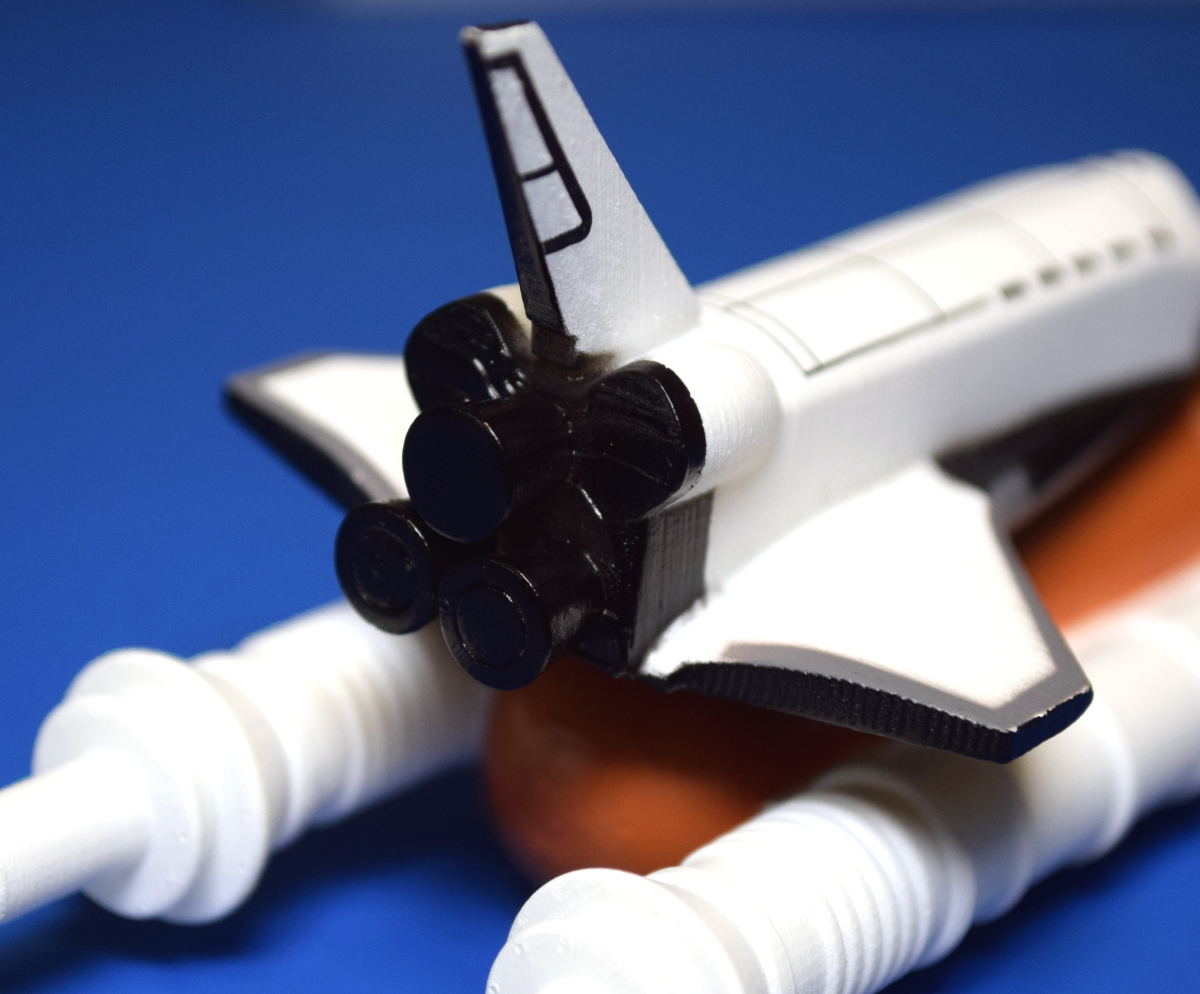
Considerable support material must have been used to print the orbiter vertically, the remnants of which can be seen in the stepped surface on the back of the wings. I’m not sure why they would have taken this more difficult route, though it’s possible they’re printing them vertically to maximize how many can fit on the bed at once.
While the 3D printer owner in me is impressed by the quality of the final piece, the space nerd in me has to say that this isn’t a particularly good rendition of the Space Shuttle. The wingtips are all wrong, there are no OMS thrusters on the back, and the nose looks more like a sad cartoon dog than the legendary spaceplane NASA flew for three decades. Of course, the kid who’s room this lamp would probably end up in won’t know any of that.
Cranking Out Clouds
While the Space Shuttle itself was quite impressive, the plume of PLA it rides on is decidedly less so. Painting the plastic would have reduced the glowing effect, but the downside of leaving it unfinished is that even small surface inconsistencies are obvious. A close examination shows clear signs of under-extrusion, often a hint that the print speed has exceeded the extruder’s ability to melt the required volume of plastic.
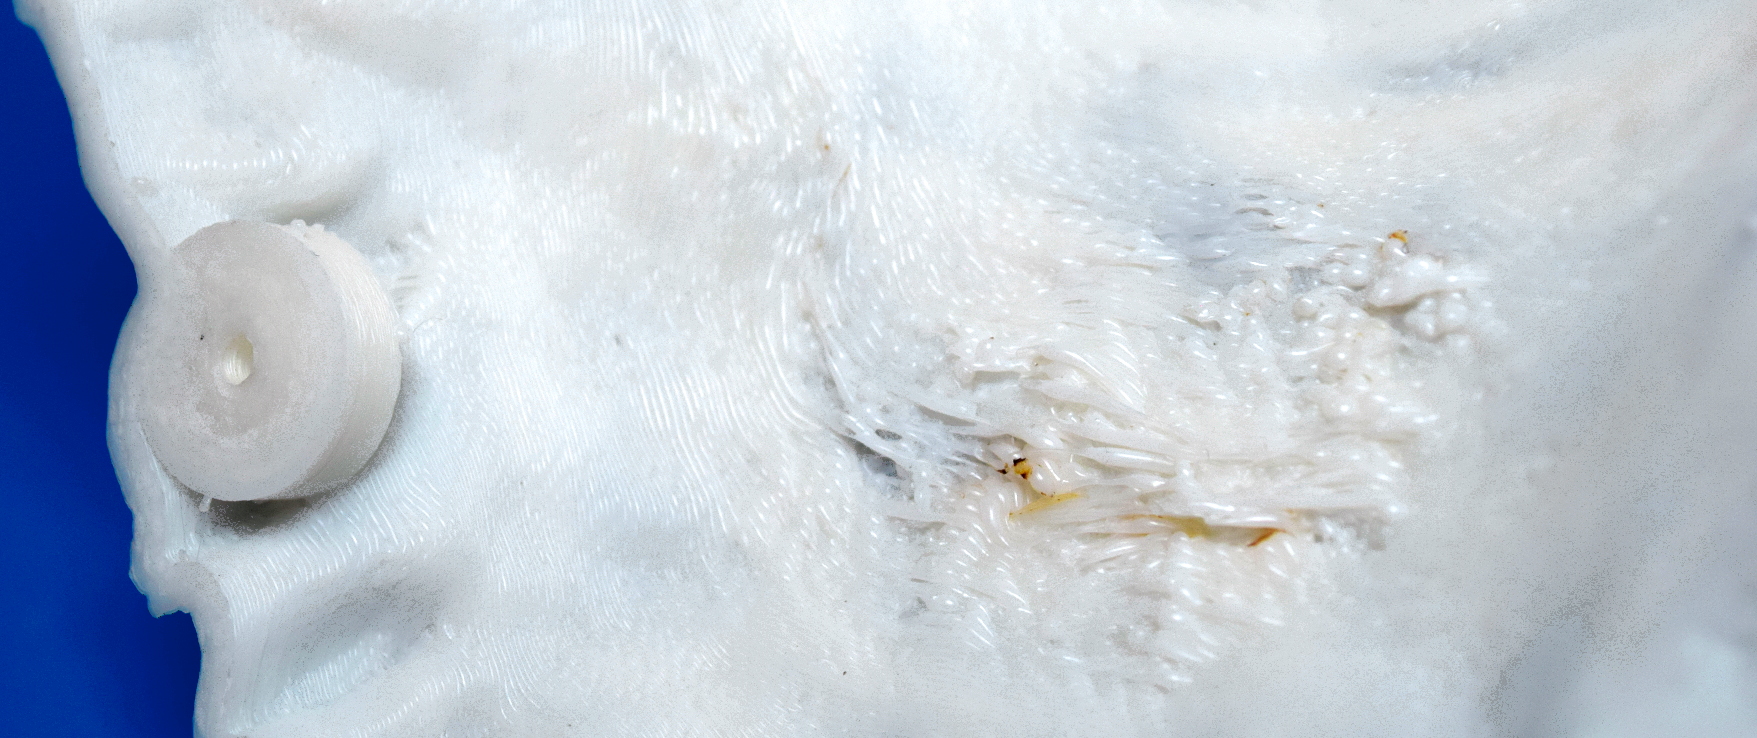
Things are only worse on the inside. The plume was printed without an internal support structure to save time and material, and while that’s worked fine for the most part, there are a few areas where the print came quite close to failing. One patch near the bottom deformed so badly that it looks like it may have been scraping against the extruder, as there’s hints of discoloration and charring.
In general, my impression is that the plumes are being printed at a much faster rate than the Shuttle itself. It could even be that they are printed on a second set of less stringently maintained and calibrated printers, as they don’t need to have anywhere near the detail of the “hero” spacecraft they get mated to.
Lighting the Candle
As you probably suspected, the electronics inside the lamp aren’t anything to get excited about. The small PCB has eight LEDs (four red, four yellow) being driven by an unmarked 8-pin IC, and is hot glued directly to the top of an 800 mAh pouch cell.
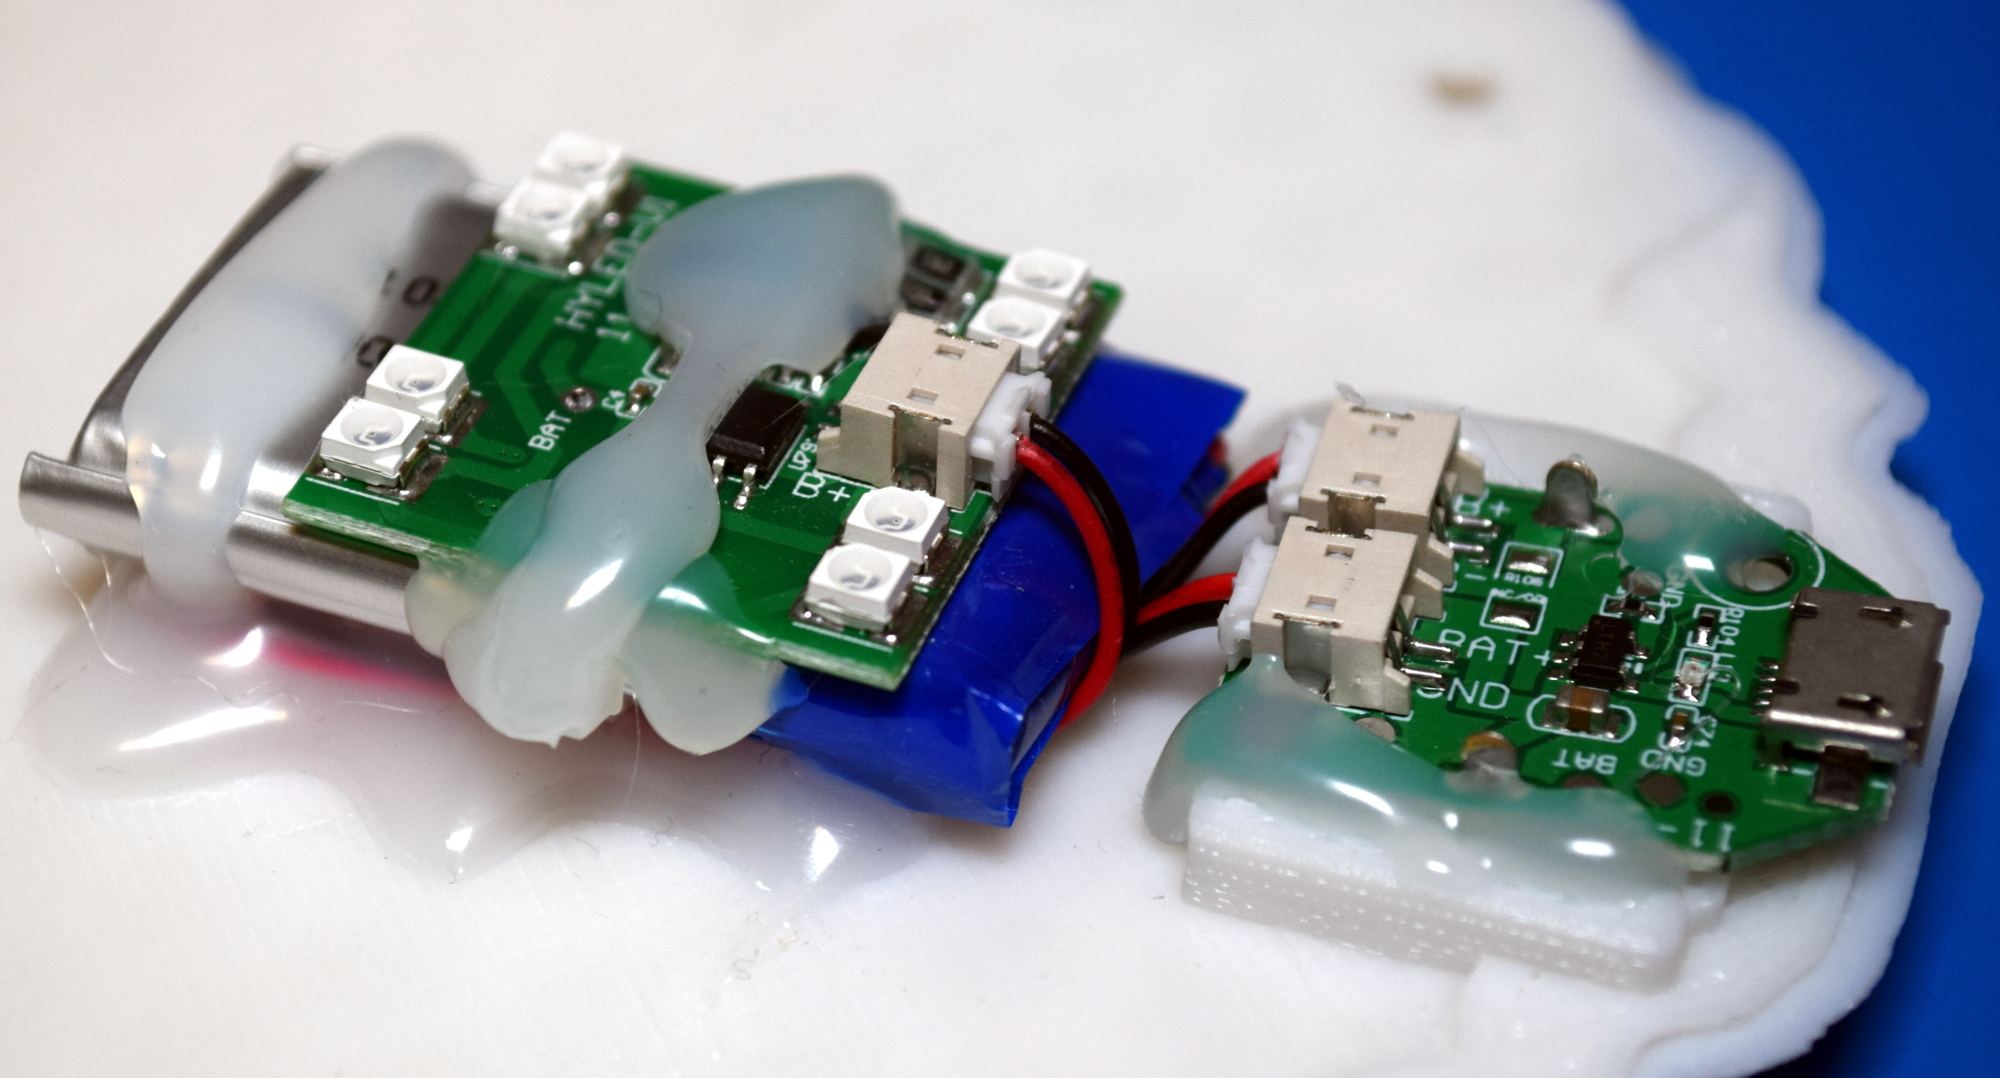
A smaller board is responsible for charging the cell with a standard micro USB cable, and features the LTH7 battery management IC which regular readers may recall we last saw used in the power supply circuit of some very bloated restaurant pagers. The charging module looks like it might be repurposed from some other device, but the one-trick nature of the LED board makes me think it’s purpose built for these lamps.
Money Talks
It seems pretty clear to me that all the parts for this lamp have been produced using standard consumer 3D printers, as there’s nothing here that couldn’t be accomplished on an entry-level Ender 3. But what about the material costs? Well, this particular style of lamp weighs in at approximately 160 grams, and since we know from the included documentation that it was printed in PLA, we can easily calculate some interesting metrics.
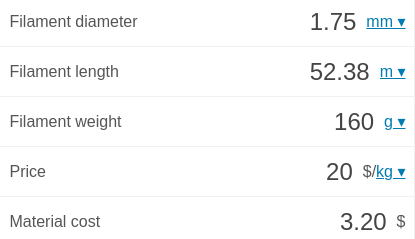
Namely, running each one off consumes slightly north of 52 meters of filament, at a cost of roughly $3.20 USD given current consumer PLA prices of ~$20 per kilogram. While this doesn’t take into account the support material which would have been required when printing the Shuttle, we can also bet that the companies printing these lamps aren’t paying full retail price for their filament. Even with the occasional failed prints skewing the number, it’s safe to say the material cost for each of these lamps is well under $4.
Given China’s infamously low cost of labor, and the minimal cost of the simplistic electronics required to kit them out, there’s quite a profit to be made on each lamp at $30. Such an operation could quickly recoup the cost of the initial print farm, at which point the only ongoing expenses would be a fresh supply of PLA, batteries, and LEDs.
In short, it looks like we were all wrong. Or at least, not imaginative enough to predict the quantum leaps that desktop 3D printing would make in a decade’s time. While it might be a stretch to say that it’s an ideal solution, products like this are proof positive that print farms of consumer 3D printers can not only churn out production-ready parts, but that they can potentially make you a hell of a lot of money doing it.


With that flight path radius it is more of real life accident visualization lamp.
Agreed. But even in stylistic art, that shuttle should at least be rolled.
Seeing how the booserts just slot into the plume I’m sure you could flip the unit 180º so the orbiter is on the bottom
You can, yes. Though the shape of the plume doesn’t really make a lot of sense visually with the orbiter in this position, as there’s nothing behind the main engines.
Well, the main engines never left a plume.
The concept of the “artistic license” is lost on the engineering crowd! ;)
It’s definitely, 100%, without a doubt, you.
I wonder if the shuttle or “cloud” design is something they came up with, or just found floating around online and are (presumably) using without credit to the original artist….
I’m pretty sure I’ve seen this on thingiverse a year or more ago.
I’m no rocket botanist, but shouldn’t the hot stuff be coming from the tail of the flamy parts of the boosters? It looks like the fire got left on the launchpad.
I bought one of these a few months ago for my 5 year old, he loves it.
I was quite impressed by the quality of the print but wished the LED’s had a few different effects.
There’s an incredible amount of empty space inside the plume, it would be interesting to see somebody retrofit the print with more complex lighting and perhaps even some sound effects.
Lack of fire retardants makes using 3D prints for production parts quite difficult in many parts of the world. At least in EU, almost all electronics products should have a UL94 rated plastic for the enclosure.
There are some fire rated ABS filaments, but they smell even worse than regular ABS and are more difficult to print.
The battery went faulty so I switched to direct power from USB. Unfortunately, didn’t remember to take a photo of the original connection and battery pack :'(
Now I want to replace it with a new battery pack with more capacity (around 1500 mAh) and can’t find any information online on how it was connected to the circuit.
Can any one please share how the battery is connected to the board?? And is it a 3.7V 800mAh LiPo?
Will really appreciate your help.
Thanks!!