Most projects around here involve some sort of electronics, and some sort of box to put them in. The same is true of pretty much all commercially available electronic products as well.
Despite that, selecting an enclosure is far from a solved problem. For simple electronics it’s entirely possible to spend more time getting the case just right than working on the circuit itself. But most of the time we need to avoid getting bogged down in what exactly will house our hardware.
The array of options available for your housing is vast, and while many people default to a 3D printer, there are frequently better choices. I’ve been around the block on this issue countless times and wanted to share the options as I see them, and help you decide which is right for you. Let’s talk about enclosures!
Cardboard: Great for Both Enclosures and Proofing PCB Layout
You need something quick and dirty and temporary for a proof of concept or a short-lived project. Why not use some cardboard you have laying around?
Cardboard is easy to work with, and you can rapidly put in holes and slots for your interfaces and connectors. Draw on it, shape it, whatever it takes. Use card stock (like a cereal box) for even higher quality finer dimension work. In the world of rapid prototyping, cardboard is a fantastic option for generating quick iterations that test out usability and rough ideas. It also has a similar thickness to a .062″ PCB, making it quick and easy to print your design, glue it to cardboard, cut it out, and have a temporary substitute to do your mechanical work while you’re waiting for the real ones to arrive by mail.
Plastic Food Containers
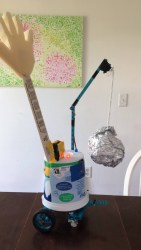
When you need a little more sturdiness or water resistance, reusable plastic food enclosures, including yogurt containers and Tic Tac packaging, can go a long way as well. This high-fiving mobile disco turtle robot was made under the direction of a 5-year-old. The yogurt container holds the batteries, speaker, Arduino, and all the wiring, securing the sensitive parts just enough for this limited-lifetime monstrosity.
Find something roughly the size and shape you need, and trim and drill as necessary. A utility blade is the only tool needed to make a higher fidelity enclosure, and careful application of heat or glue can seal and stick parts together. Unless your aim is a kitsch-y product, you shouldn’t expect to do more than a couple of these, and their durability is limited, so expect that this will last only a little bit longer than cardboard, and better for wetter environments.
Clay/Moldable Plastic
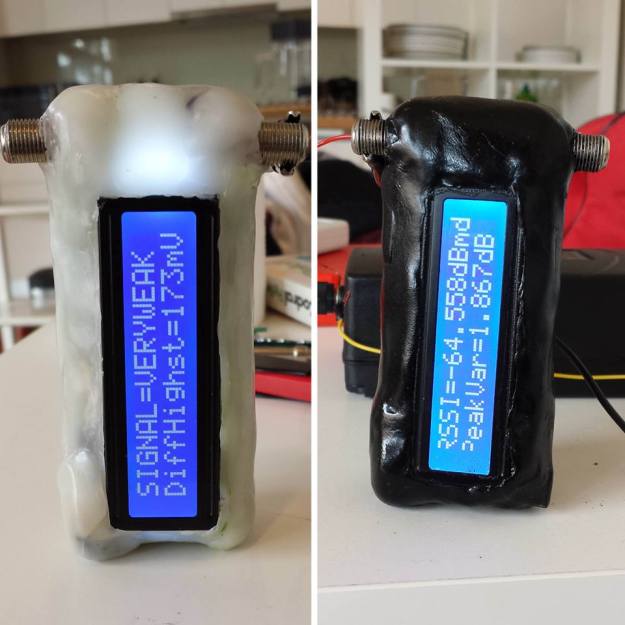
If you have skills with molding and can take a block of material and form it to your vision, then clay might be a good option, or oven-bake polymer (Sculpey). InstaMorph is another tool that consists of plastic that softens at low heat and becomes moldable. It’s available in sheets and pellets and can be softened with hot water or air and worked by hand until it cools.
Use Existing Enclosures
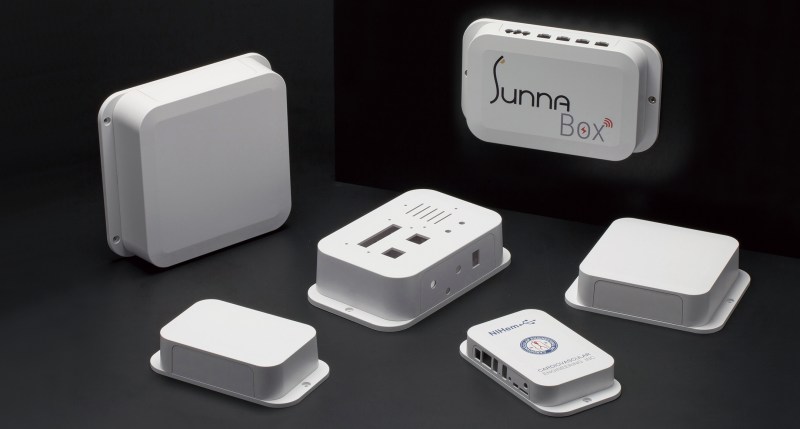
This option doesn’t get enough attention. Existing enclosure are perfect for small volumes, and bridge the gap between prototype and high volume production. Polycase, New Age Enclosures, Takachi, Bud, and Hammond are all places that I have used in the past for enclosures that are injection molded, extruded, or otherwise pre-fabricated, and can easily be modified to suit your exact needs (and no, we’re not being paid to mention any of them).
Once you become familiar with their product lines, you’ll start to recognize their enclosures in other products. You pick out an enclosure of the right size and type, and most of them provide CAD of some form (or at least PDF design drawings with relevant dimensions) and usually even suggested PCB outlines. Order one or a few and you have everything you need for only a couple bucks. When it’s time to take it to production, you can even give these companies drawings of any milling that’s needed, or printing on any face, and they’ll take care of that for you, too, for a small setup fee and per part cost.
3D Printed
There’s no shortage of articles about 3D printing here, and it seems like this is a default choice for people even when faster, cheaper, cleaner-looking options exist.
If your needs extend beyond a box, and you must have some kind of special enclosure to fit a specific shape, or you are trying to make it quickly or miniature, then 3D printing may work. You’ll have to bust out the CAD program of your choice, or find an existing design, and this is one of the things that makes this option less accessible to many, and can be very time consuming. On the plus side, a variety of materials are available, there are services that will 3D print and mail you the part, and many public libraries are even getting in on the 3D printer as a service they offer.
Laser Cut
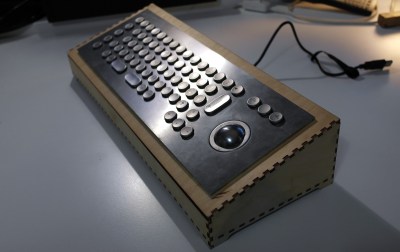
If you have access to it, laser cutting is a decent option as well. Generally these are acrylic or plywood enclosures, though cardboard works well, too, with the edges either interlocking or straight. There are online generators for simple customizable boxes like MakerCase and Boxes.py, and you can modify them after downloading to add your holes and cutouts.
Injection Mold
Injection molds are the industry standard for high volume production, capable of spitting out plastic parts at phenomenal rates and running continuously. They can be designed to exact specifications, and last for anywhere from a few thousand up to millions of parts. The downside is the up-front costs, which can be in the thousands of dollars for basic molds, and millions for really high volume hardened steel with slides and multiple cavities and cooling lines. We’ve covered injection molding in detail, but the primary thing to remember about injection molding is that it’s not for a one-off, and you won’t be able to change your design easily once the tool is cut.
Others: CNC, Casting, and Composite
There are countless other options. You could make your enclosure out of wood or metal in a shop using CNC. There are all kinds of casting techniques, including 3D printing the mold and casting inside the mold, or 3D printing the positive, creating a silicone mold of it, and then casting parts inside the mold. You could put everything in a temporary enclosure and pot it (essentially dump epoxy in to fill it up). You could use a combination of methods to make different parts of your enclosure, or even sub-components. I’ve 3D printed and laser cut brackets for use in an existing enclosure.
Conclusion
Before you jump straight to your CAD software to spend a few hours designing a box and 3D printing it, consider other options that may be faster or cheaper or look better. Of course, this article wasn’t an exhaustive list, but if I missed something significant, mention it below.

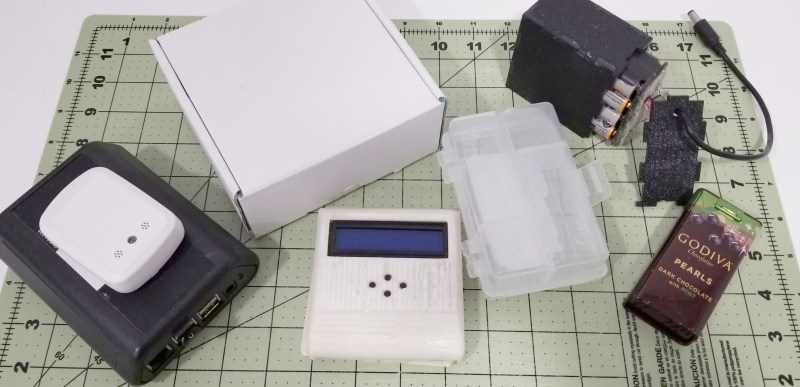


Let’s not forget enclosures that are manufactured for some other purpose and reused. Altoids tins are a popular one for small electronics projects; they’re cheaper than the purpose-made boxes from Hammond and the like and you also get to eat the Altoids. There are many other commercial metal or plastic product containers that can be used in a similar way.
Ammo case instead of a Pelican case…
Last time I was at a secondhand store, I picked up a wooden recipe-card case that looks like it’s about the perfect size to stuff a ham radio PCB into. Will have more details posted when that’s complete. There are so many weird things you can find at thrift stores that look like they might make interesting enclosures.
Index card fileboxes, also suitable for recipes, used to be metal. I recall one transistor transmitter built in one, but it had at least two stages.
Plastic seem to be what they are made of now. The larger size can fit 3.5 inch floppies, thiugh by now not so useful.
I have 5-1/4 inch floppy cases that I repurposed to 3-1/2 inch then to CD cases, and now … waiting for the next media fad. Maybe SSDs.
lol Same.
Half the fun in walking the small mom-and-pop stores thinking of alternative uses.
Tic-tac boxes are also great!
My last project went in a gutted-out ATX power supply case.
Instead of project boxes, I’ve used plastic in-wall junction boxes from the hardware store. Come with nice conduit-sized punchouts, but are easy enough to drill for whatever else you need. Screw-top lid. And reasonably cheap.
This is also my go to solution. The come in plenty of sizes, durable, cheap and very sturdy.
I made a quick and dirty summing mixer once out of some salavged pots and enclosed it in a first-aid kit box. Glorious times.
I have saved all sorts of enclosures and containers for just such future need. It is the gateway to hoarding. Beware…
I can confirm. A few years down the road I’m faced with the reality that all this stuff I “saved” from the trash should have just ended up there in the first place.
That said, confirmation bias has taught me that each time I get rid of something I find a use for it a few days later. In the rare case you find the use for it before pitching it, you will not be able to find it.
I love the cardboard PCB layout trick Bob mentions. I’ve done it with paper and held up the components, but being able to actually place the through-holes and then fitting it into whatever enclosure you’re considering is a brilliant move haven’t tried.
Minimalism costs more, but improves your life.
You mentioned Polycase: they will also machine and screenprint enclosures for you. Not reasonable to do for just one due to setup charges, but if doing a small run it’s worth looking at.
There’s very likely a local sign or vehicle wrap shop in your town: they are a great place to get professional-looking, very durable labels made. Grab the cad file from polycase or hammond, and design your label from that, and give it to the sign shop: you’ll get a sheet of very nice pre-cut labels for a pretty reasonable cost, and fit your enclosure perfectly.
I also have to put in a word for Protocase.com They do custom enclosures, excellent work, very fast, and reasonable pricing. Dimensionally accurate, and excellent finish options. I use them even for one-of parts. You may have seen their work before: they are the folks behind 45drives.com
I’ve got to put one in for Polycase as well – they’ll not only machine openings and do custom pad printing, they’ll do it all from a sample PCB with the appropriate externally accessible components like switches and connectors mounted components and a sketch of the printing in quantities as low as 1 (one). Perfecto for very low quantity build like trade show prototypes and the like.
Combine that with Paul’s label suggestion and you can get something really nice while still having total control and quick turnaround.
i’ve done most of these. before 3d printing, i used to be pretty fancy with my cardboard cases…i’d fold up a custom-sized cardboard box and then i’d fill it with stacked pieces of cardboard with hollows cut in them, kind of like a hollowed out book stash. so it’d snugly hold the pcb without glue, often without any fastener at all, so i could pop it out and work on it some more but it was still durable enough to drag out in the field.
and i have a big bag in the basement of plastic and tin containers that looked promising. i still fish out of there several times a month, but not for project enclosures as often anymore.
when i need a good case, anymore i just 3d print it. but for the pi that sits under the tv, i found myself laying out its dozen-ish connectors in openscad and i realized i just didn’t care that much. to this day, it’s just floating in the middle of a shoebox that i knife-drilled a few holes in the side of. nothing quite like cardboard.
I’ll take a cereal box or similar, open up its seams, then re-assemble it inside-out to use as a mailing box…
(Lots of tape!)
Paper-mache.
There’s also another process that involves CNCing a flat piece of plastic (ABS, say), then “folding” it into shape (via heat bending) and then gluing it together via a chemical weld.
There are professional services like envplastics.com, who I’ve used before and have been happy with their results, but the price might be out of a hobbyists budget but the process is probably pretty accessible, given the right tooling and process.
You can also use a V cutter in abs or polycarb to make a box that folds closed along the v cuts. A dot of methylene chloride makes folding up into a permanent thing and you get nearly clear joints as well.
With a cheap metal brake from harbor freight, inexspensive shears, a printer and a glue stick you can make almost any enclosure you can imagine with a little bit of aluminum sheet from the hardware store.
And don’t forget the use of copper clad circuit board materials for fabbing up small enclosures.
Even written about on here before: https://hackaday.com/2015/06/03/how-to-build-beautiful-enclosures-from-fr4-aka-pcbs/
It’s too bad that modern connectors are so small, many projects will fit in a DB-25 shell. Jam a tiny circuit board between the rows of pins.
You can make all sorts of tough enclosures in all sorts of shapes and sizes using Lego bricks. If you want a Lego enclosure to be permanent you can weld the bricks together with acetone.
little known fact; a beaglebone black is exactly the right size to click into a k’nex roll cage, like it was done on purpose.
Been Done Here Before
https://hackaday.com/2012/09/12/64-rasberry-pis-turned-into-a-supercomputer/
Cap
I make many of my enclosures for quick projects from (scrap) wood. Just screw a few pieces together to form an enclosure, sand off the edges and if you’re feeling well add a little oil and it even lokms half-decent.
heh i sometimes use luan, which is too thin really for screws in the edges, and not really that much fun to glue either…so to hold it together i just drill holes in it and run steel wire (like fence wire) through the holes, kind of a twist-tie approach. never looks even half-decent but always super easy to work with!
I have a box of project cases that I bought from RadioShack over the years.
Still waiting to use any.
(maybe I would have used some earlier if the Project PCBs they sold actually fit in them.
I can’t 3D print ABS without the smell reminding me of dremeling those blue Rat Shack project boxes when I was a kid. That and cancer.
My favorite enclosures right now are small wooden boxes from a nearby chain arts and crafts store (Michael’s). They’re easy to work with, being a relatively soft wood, but feel plenty solid and stiff. My current projects are focused around home automation, so making the cases look good is a major plus. A bit of stain and a couple coats of polyurethane, and they look quite handsome.
It depends on what you need. Tin cans can be useful, but not much panel space, even if you slap a piece of circuit board over the open end. Sometimes you just need protection for a temporary project.I
But cans can be useful for shielding a section, behind a fancier case. Think small cans of pizza sauce.
Or cookie tins that show up around Christmas time.
Mint tins.
If you want a nice looking enclosure from a 3D printer and don’t want to design a new one for every project, there’s a great parametric enclosure on Thingiverse:
https://www.thingiverse.com/thing:1355018
It has many options as to size, vent slots or decoration.
We’ve actually written about this project before, it’s definitely an excellent resource. In hindsight, it probably should have been mentioned in this article.
https://hackaday.com/2018/03/02/printed-it-custom-enclosure-generator/
Cheap wooden boxes of various sizes can be found in the dollar stores, easy to cut, easy to paint and they don’t look half bad.
This is often the hardest part of an electronics project for me. I’ve used cardboard and reused takeout containers many times. I’ve CADded up a fold up box, printed it out full size and cut it out in scrap cardboard using the printout as a template. I’ve also fiberglassed cardboard boxes for other uses and have thought about doing so to make a more permanent/weatherproof electronics project box.
I’ve started to design stuff for 3D printing, but haven’t taken the plunge yet. I love the moldable plastic idea – we have some of that around. I’ll probably try that next.
Obsolete electronics boxes look much better, are sturdy and may have connectors on them.
Often they need a new front panel. But yes, and they may come with a power supply.
I’ve used comouter power supply boxes, covering the front with circuit board.
I’ve recently fallen in love with 5mm Sintra PVC foam board for quick custom enclosures. It cuts, sands, and paints like a dream, and CA glue bonds it together instantly and cleanly. It reminds me of some sort of homogenous, plastic version of balsa wood. I typically use wood screws or very coarse-thread plastic screws to hold lids and PCBs on. It’s soft enough that I’ve also just mounted boards to it by pressing a few header pins into it.
You can whack together a weatherproof, kinda-sturdy box in 10 minutes with nothing more than a square rule, a utility knife, an emery board, and some superglue.
I started using it because it was free scrap from another department, but I’m going to but some more when that supply runs out because it’s just so handy as a prototyping material.
Totally! And it bends nicely if you heat-gun it or stick it in boiling water, for when you need organic shapes.
Also core-flute from election or real-estate signs. It’s a little hard to glue, but I’ve had luck with PU glue (Gorilla in the states), esp if you put some holes in it first — then the glue makes little rivets as it expands. Hot glue works for the quick-and-dirty. I’m sure that there’s a “proper” glue for polyethelyne or whatever it is. Built a waterproof outdoor housing for a Raspi/IR camera and it’s lasted two seasons.
“Also core-flute from election or real-estate signs.”
A.K.A. Coroplast
https://www.coroplast.com
Coroplast! Another beloved material of mine. I’ve never used it for electronics enclosures, but spent a few years building boxes and all manner of things with it at work.
Hot glue has been my preferred adhesive for it in the past, but only because it fit the standards I was following for archival storage. It’s polypropylene so there are a few glues available but I’ve not tried them. I mostly used Chicago screws and Tyvek tape.
Even for home made personal projects, it is good to consider the flammability of the enclosure. Especially for mains powered projects or projects with large batteries, I would use metal enclosure or a premade non-flammable plastic enclosure. A lot of electrical fires stop at the enclosure.
Nothing like the old Bud boxes for a cheap and easy to work all-metal case, as ugly as they may be. Just make sure to use grommets or you’ll be testing that chassis ground in no time.
At first I thought you were talking [writing] about Budweiser boxes. B^)
Instead of these…
https://www.budind.com/
They forgot the masking tape enclosure.
just coat it in hot melt glue
Another good technique for laser cutting, is to build your enclosure in layers of a few mm and then sandwiching it together. A very flexible and fast method, but of course it’s hard to make very thin walls or lots of free-hanging features.
With the lockdowns I didn’t have access to my usual makerspace, so I ended up trying some new things.
There’s an outfit called Evergreen Scale Models that make a kind of polystyrene sheeting; it’s sold in both art supply stores (for architectural models) and the sort of toy/hobby shops that cater to model train enthusiasts. It comes in several thicknesses and various textures. It’s very easy to cut by scoring with an X-Acto knife and bending/snapping on the cut. Using it (with no power tools) I was able to case one project in the sort of layered sandwich manner that laser cut acrylic often gets used for — screws with standoffs on each side of the circuit board to hold the whole thing together. On another project j used a soldering iron as a heating element to form bends in the material, wrapping a sheet into a sort of upside-down U, with controls through one face.
I’m a big fan of the KiCAD 3D STEP export -> Fusion360 or OpenSCAD -> 3d print process, especially if you need the enclosure to be functional for cooling or retaining other components.
Thanks for reminding me. I’ve been looking for a box for my indoor weather station project and now I remembered that I bought a box from AliExpress years ago and they were so cheap that I bought 10 of them. I just went to my junk box and there were the extras.
RadioShack HT-204 Nibbling Tool is your friend. less mess and your wife won’t complaing about the dust and noise.
https://www.youtube.com/watch?v=c03STjTM6wo
I first saw/used a nibbler in Tech school. I had no idea such a wonderful tool even existed.
But it still took me several decades before I bought my own.
Still have mine.
wtf… No mention of duct tape anywhere? For shame! :-D
Sorry for being late to the game, but I developed a method (and open sourced the templates) to create enclosures with professional looking control panels using very affordable* project boxes, and basic tools that almost everyone has: https://github.com/oelgern/box_underlays/wiki
*: This was 4 years ago and I can see that prices of the enclosures have gone up from what’s documented there, but they start as low as just under 4USD for single quantity delivered to North America.
People hinted at using PCBs for enclosure materials, so here’s my nod to using a PCB for the front panel on any enclosure. You can draw up a circuit board in any handy tool like KiCAD, including holes for things likes switches or pots, add any text labeling on there as part of your usual silkscreen markings. You can even add custom graphics like a nicer font for some of the labeling or a “0-10″ curved arc around a pot, by importing graphics into KiCAD and adding them to your silkscreen. You can even make the board edges have rounded corners. Have the boards made in a black solder mask with white lettering (or any solder mask color you wish, as many board makers can do a myriad of colors now). You get a nice 1/16” thick front panel with all the holes and neat labeling and this is SO much cheaper than getting professionally machined front panels. I do this as an “insert” to fit the recesses in Polycase enclosures. It looks like a darn commercially done product.
Or you go the PVC pipe way:
https://youtu.be/PhurDE-WMxU
A bit more work but looks different.