We’re not aware of any authoritative metrics on such things, but it’s safe to say that the Ender 3 is among the most hackable commercial 3D printers. There’s just something about the machine that lends itself to hacks, most of which are obviously aimed at making it better at 3D printing. Some, though, are aimed in a totally different direction.
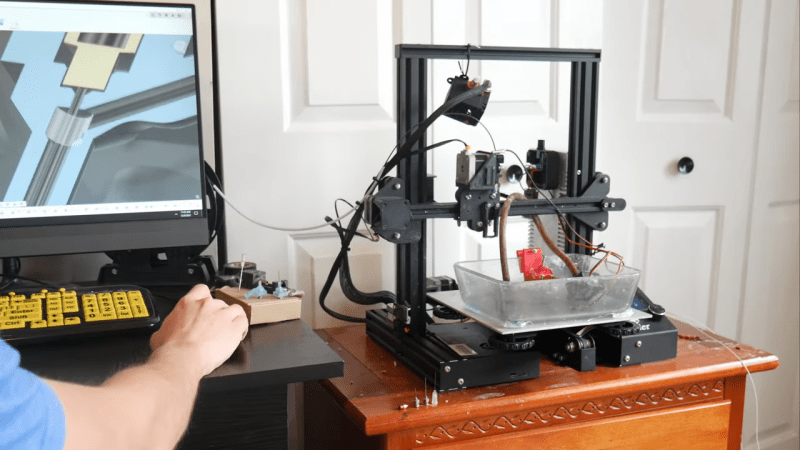
As proof of that, check out this Ender 3 modified for electrochemical machining. ECM is a machining process that uses electrolysis to remove metal from a workpiece. It’s somewhat related to electric discharge machining, but isn’t anywhere near as energetic. [Cooper Zurad] has been exploring ECM with his Ender, which he lightly modified by replacing the extruder with a hypodermic needle electrode. The electrode is connected to a small pump that circulates electrolyte from a bath on the build platform, while a power supply connects to the needle and the workpiece. As the tool traces over the workpiece, material is electrolytically removed.
The video below is a refinement of the basic ECM process, which [Cooper] dubs “wire ECM.” The tool is modified so that electrolyte flows down the outside of the needle, which allows it to enter the workpiece from the edge. Initial results are encouraging; the machine was able to cut through 6 mm thick stainless steel neatly and quickly. There does appear to be a bit of “flare” to the cut near the bottom of thicker stock, which we’d imagine might be mitigated with a faster electrolyte flow rate.
If you want to build your own Ender ECM, [Cooper] has graciously made the plans available for download, which is great since we’d love to see wire ECM take off. We’ve covered ECM before, but more for simpler etching jobs. Being able to silently and cleanly cut steel on the desktop would be a game-changer.


For EDM version: https://hackaday.io/project/181551-silent-cnc-machine-edm-drill (it’s work in progress).
Wow that’s awesome good luck . It’s like a baby wazer
“there’s just something about the machine that lends itself to hacks” maybe it’s the campaigning Naomi Wu did to make it one of the few open source hardware Chinese products at the time. Normally open source shouldn’t be a big deal but apparently the story behind this was unpleasant & a failure politics wise so it’d probably be good to throw some credit just to make sure it’s not erased.
The problem with Naomi Wu is that she’s leveraging Male Gaze to an extreme degree to get paid to pimp stuff for companies (as well as get no shortage of people willing to help her with almost anything), while also claiming that her cartoonish-level body mods and microscopic clothing are somehow feminist.
A female controlling their their own body and wearing whatever they please is, by definition, feminist.
Comments that label the choices a female makes about their own body as cartoonish, their clothing as micro, and which reference a male gaze as a normal are indicative of the continuing, deep need for any and all philosophies which seek gender equality.
Their? “Their” is plural. Use “her” or refer to multiple females.
She is a hacker, but not only for hardware and software, she hacks wetware too from time to time. Those hacked don’t typically like the act of being hacked, whatever type of -ware it is.
I wish I could upvote this comment
At this time nobody in China needs extra attention from the outside.
Spoken like someone who has a narrow perspective
This is really awesome. The only parts I don’t like is that it’s focused around a single machine and there isn’t a repo, just a single zip file download. I certainly hope someone takes this concept and applies to making a cheap, easy to build, generic machine.
This is perfect my ender 3 just lost it’s extruder or filament extruder either way this would be a great repurpose for it.
Didn’t watch the video, but in the README it is written that the electrolyte contains table salt (“Electrolyte concentration should be ~200g/L NaCl”). Passing current trough this will create nasty chlorine gas, won’t it? Also how to dispose the used electrolyte properly? Dumping it in the sink is probably a bad idea, at least if you machined stuff that contains chromium or sth.
Interesting idea but as always be careful and think before doing.
Yes, it does generate chlorine gas, and lye.
https://courses.lumenlearning.com/introchem/chapter/electrolysis-of-sodium-chloride/
baking soda and carbon electrode ? would that work ?
Electrolyte solution can be stored in a plastic canister and allowed to evaporate outside in the summer and then the crystals can be taken to the hazardous receiving area of the local landfill. Also I am not aware of any heavy metals that would contaminate the spoils, though I suppose there may be ions that are toxic, hence the hazardous waste to be extra cautious. Can anyone speak to this?
This sounds so much like how we felt when we did L-Cheapo, and brought laser cutting capabilities to 3D printers in an age where laser modules were either big, expensive CO2 machines or dinky, overpriced 300-500mW diodes. This is AWESOME, and we’re behind you. I’m working on fluid modules for 3D printers, and as usual will open source as much as we safely can. There may be some crosstalk between our two projects.
I’m excited and might look to build one of these up in the new year and start contributing time to this project, should I find enough of it.
You know where to find me. I’m normally a pretty accessible person.
Wow, interesting! And very promising too! Keep up your research path!
Wouldn’t it get much cleaner if you used deionized water instead of making it conductive? It would only cut the steel that it’s effectively (not quite) touching, no flaring.
The machining fluid being conductive is one of the key elements of electrochemical machining.
ECM isn’t to be confused with EDM, Electric Discharge Machining. ECM removes material chemically, EDM removes material using sparks. Both use a fluid, though, and machine very slowly, so they look similar.
To add to this confusion, the above video shows EDM in its intro, while doing ECM later :-)
Even pure water (H2O) becomes conductive when you apply a potential difference(Voltage) across it.
I’ll give it a try.
Pfft. Ender. I did this in 2011 already, long before Ender:
https://reprap.org/wiki/Electrochemical_Machining#A_Study_on_Suitability_for_PCB_Manufacturing
In short: any 3-axis machine is perfectly suitable, as long as it can move very very slowly. Slowly, like 0.05 mm/min or 20 minutes per mm or 1 stepper motor step per second, making the stepper sounding like a clockwork. Getting printer controllers to work fine with such extreme speeds likely needs some trickery. Like teaching firmware a 8 step/mm motor, while it actually has like 200 steps/mm.
Given these extremely low machining speeds, it’s rather boring to watch this type of machining. Still a very exciting technical and reasonably DIY-able setup behind it.
>Like teaching firmware a 8 step/mm motor, while it actually has like 200 steps/mm.
Now that’s a great idea. I’ve had issues running slow enough actually so I would move and pause. But I guess I should try this now.
Does the elecrode wear out quickly?
Ideally there is no tool wear in ECM.
Looking forward to seeing how people will deal with the draft. Options like flip it over are setup intensive, and you loose material due to kerf with increased thickness.. I’m curious what spring passes do in this current setup. I wonder what the effects of water pressure are on this draft. Can you somehow get a cathode behind the syringe to pull the water particles “in”?
I wonder if a frozen electrolytic interface adjacent or around the electrode would address kerf and draft variability.
does anybody has the adapters stl?