Wire ECM built from an Ender 3

Simple Mods Turn 3D Printer Into Electrochemical Metal Cutter

We’re not aware of any authoritative metrics on such things, but it’s safe to say that the Ender 3 is among the most hackable commercial 3D printers. There’s just something about the machine that lends itself to hacks, most of which are obviously aimed at making it better at 3D printing. Some, though, are aimed in a totally different direction.

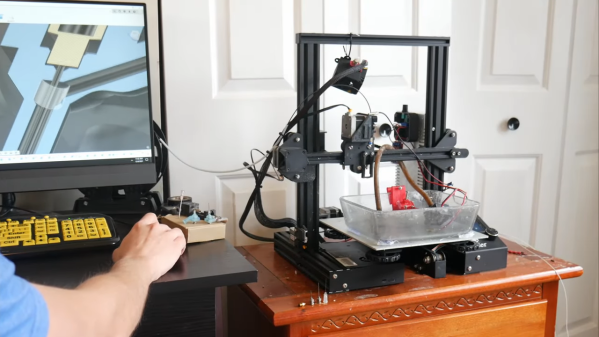
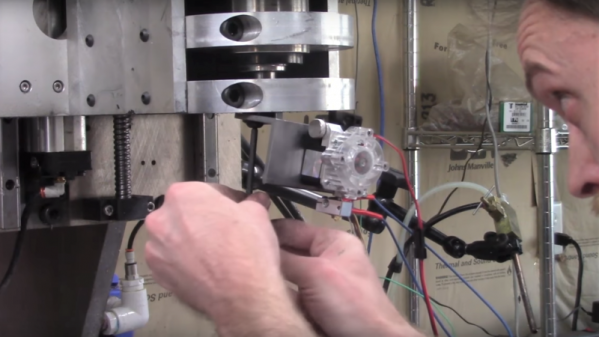
As proof of that, check out this Ender 3 modified for electrochemical machining. ECM is a machining process that uses electrolysis to remove metal from a workpiece. It’s somewhat related to electric discharge machining, but isn’t anywhere near as energetic. [Cooper Zurad] has been exploring ECM with his Ender, which he lightly modified by replacing the extruder with a hypodermic needle electrode. The electrode is connected to a small pump that circulates electrolyte from a bath on the build platform, while a power supply connects to the needle and the workpiece. As the tool traces over the workpiece, material is electrolytically removed.

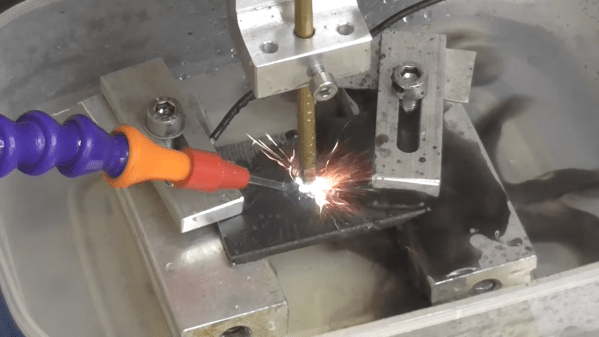
The video below is a refinement of the basic ECM process, which [Cooper] dubs “wire ECM.” The tool is modified so that electrolyte flows down the outside of the needle, which allows it to enter the workpiece from the edge. Initial results are encouraging; the machine was able to cut through 6 mm thick stainless steel neatly and quickly. There does appear to be a bit of “flare” to the cut near the bottom of thicker stock, which we’d imagine might be mitigated with a faster electrolyte flow rate.

If you want to build your own Ender ECM, [Cooper] has graciously made the plans available for download, which is great since we’d love to see wire ECM take off. We’ve covered ECM before, but more for simpler etching jobs. Being able to silently and cleanly cut steel on the desktop would be a game-changer.

Continue reading “Simple Mods Turn 3D Printer Into Electrochemical Metal Cutter”

3D-Printed Tooling Enables DIY Electrochemical Machining

When it comes to turning a raw block of metal into a useful part, most processes are pretty dramatic. Sharp and tough tools are slammed into raw stock to remove tiny bits at a time, releasing the part trapped within. It doesn’t always have to be quite so violent though, as these experiments in electrochemical machining suggest.

Electrochemical machining, or ECM, is not to be confused with electrical discharge machining, or EDM. While similar, ECM is a much tamer process. Where EDM relies on a powerful electric arc between the tool and the work to erode material in a dielectric fluid, ECM is much more like electrolysis in reverse. In ECM, a workpiece and custom tool are placed in an electrolyte bath and wired to a power source; the workpiece is the anode while the tool is the cathode, and the flow of charged electrolyte through the tool ionizes the workpiece, slowly eroding it.

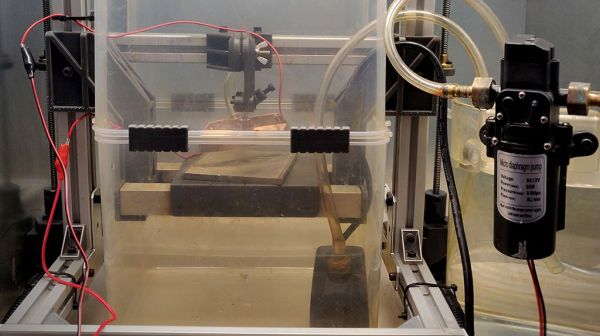
The trick — and expense — of ECM is generally in making the tooling, which can be extremely complicated. For his experiments, [Amos] took the shortcut of 3D-printing his tool — he chose [Suzanne] the Blender monkey — and then copper plating it, to make it conductive. Attached to the remains of a RepRap for Z-axis control and kitted out with tanks and pumps to keep the electrolyte flowing, the rig worked surprisingly well, leaving a recognizably simian faceprint on a block of steel.

[Amos] admits the setup is far from optimized; the loop controlling the distance between workpiece and tool isn’t closed yet, for instance. Still, for initial experiments, the results are very encouraging, and we like the idea of 3D-printing tools for this process. Given his previous success straightening his own teeth or 3D-printing glass, we expect he’ll get this fully sorted soon enough.

Homemade EDM Machine Moves From Prototype To Production

Of all the methods of making big pieces of metal into smaller pieces of metal, perhaps none is more interesting than electrical discharge machining. EDM is also notoriously fussy, what with having to control an arc discharge while precisely positioning the tool relative to the workpiece. Still, some home gamers give it a whirl, and we love to share their successes, like this work-in-progress EDM machine. (Video, embedded below.)

We’ve linked [Andy]’s first videos below the break, and we’d expect there will be a few more before all is said and done. But really, for being fairly early in the project, [Andy] has made a lot of progress. EDM is basically using an electric arc to remove material from a workpiece, but as anyone who has unintentionally performed EDM on, say, a screwdriver by shorting it across the terminals in a live outlet box, the process needs to be controlled to be useful.

Part 1 shows the start of the build using an old tap burning machine, a 60-volt power supply, and a simple pulse generator. This was enough to experiment with the basics of both the mechanical control of electrode positioning, and the electrical aspects of getting a sustained, useful discharge. Part 2 continues with refinements that led very quickly to the first useful parts, machined quickly and cleanly from thin stock using a custom tool. We’ll admit to being impressed — many EDM builds either never get to the point of making simple holes, or stop when progressing beyond that initial success proves daunting. Of course, when [Andy] drops the fact that he made the buttons for the control panel on his homemade injection molding machine, one gets the feeling that anything is possible.

We’re looking forward to more on this build. We’ve seen a few EDM builds before, but none with this much potential.

Continue reading “Homemade EDM Machine Moves From Prototype To Production”

On-Demand Manufacturing Hack Chat

Join us on Wednesday, March 4 at noon Pacific for the On-Demand Manufacturing Hack Chat with Dan Emery!

The classical recipe for starting a manufacturing enterprise is pretty straightforward: get an idea, attract investors, hire works, buy machines, put it all in a factory, and profit. Things have been this way since the earliest days of the Industrial Revolution, and it’s a recipe that has largely given us the world we have today, for better and for worse.

One of the downsides of this model is the need for initial capital to buy the machines and build the factory. Not every idea will attract the kind of money needed to get off the ground, which means that a lot of good ideas never see the light of day. Luckily, though, we live in an age where manufacturing is no longer a monolithic process. You can literally design a product and have it tested, manufactured, and sold without ever taking one shipment of raw materials or buying a single machine other than the computer that makes this magic possible.

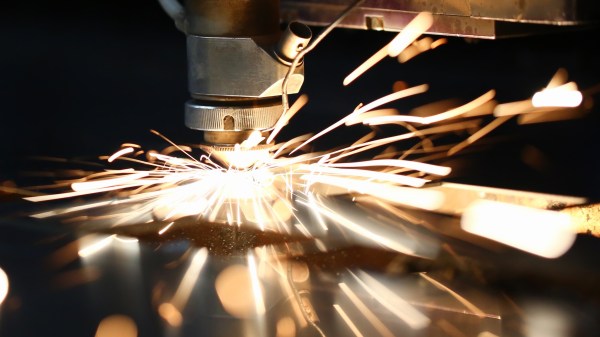
As co-founder of Ponoko, Dan Emery is in the thick of this manufacturing revolution. His company capitalizes on the need for laser cutting, whether it be for parts used in rapid prototyping or complete production runs of cut and engraved pieces. Their service is part of a wider ecosystem that covers almost every additive and subtractive manufacturing process, including 3D-printing, CNC machining, PCB manufacturing, and even final assembly and testing, providing new entrepreneur access to tools and processes that would have once required buckets of cash to acquire and put under one roof.

Join us as we sit down with Derek and discuss the current state of on-demand manufacturing and what the future holds for it. We’ll talk about Ponoko’s specific place in this ecosystem, and what role outsourced laser cutting could play in getting your widget to market. We’ll also take a look at how Ponoko got started and how it got where it is today, as well as anything else that comes up.

join-hack-chatOur Hack Chats are live community events in the Hackaday.io Hack Chat group messaging. This week we’ll be sitting down on Wednesday, March 4 at 12:00 PM Pacific time. If time zones have got you down, we have a handy time zone converter.

Click that speech bubble to the right, and you’ll be taken directly to the Hack Chat group on Hackaday.io. You don’t have to wait until Wednesday; join whenever you want and you can see what the community is talking about.

Additive + Subtractive = One Powerful Machine

It says it right on the title of the video below: it was bound to happen eventually. It’s only natural that somebody would stick a 3D printer extruder on the business end of a CNC machine. The long-awaited convergence of additive and subtractive manufacturing is here.

OK, that may be overstating things a bit, but we think [Chris DePrisco] is on to something here. Given the considerable investment he’s made in his DIY CNC machine, an enormous vertical machining center that looks a little like a homebrew Bridgeport, it was a no-brainer to take advantage of the huge XYZ stage. Mounting the Titan Aero extruder to the quill required some custom parts; fair warning that the video below is heavy on machining, but it’s not the seven hours of video he streamed when he milled the heated aluminum bed. Skip ahead to about the six-minute mark if you want to see the first prints and how he optimized the setup.

As we watched [Chris]’ video, we were struck by the potential for adding 3D printing to CNC milling machines. What we’d like to see is a setup where the spindle and the extruder work together to build more complex parts. Or maybe a tool-changing CNC that can pick up a spindle, an extruder, and maybe even a laser or plasma cutter head. Now that would be a powerful machine!

Continue reading “Additive + Subtractive = One Powerful Machine”

Piana – Musical Synthesis For The Raspberry Pi

For the last 15 years or so, software synths have slowly yet surely replaced those beatboxes, drum machines, and true synthesizers. It’s a loss for old hardware aficionados, but at least everyone with a MacBook is now a musician, amiright?

The Raspberry Pi and Pi2 already have more processing power than a desktop from ’99, so it’s no surprise that all of those classic synths, from a Moog. Yamaha DX, Casio CZ, Linn drum machine, Fairlight, and a mellotron, can all be stuffed into a Pi thanks to the work of [Phil Atkin] and his Raspberry Pi synthesizer.

[Phil]’s efforts to bring audio synthesis to the Pi fall under three techniques: subtractive synthesis, phase distortion synthesis, and sample-based synthesis, something that’s found in everything from Akai MPCs, MacBooks, and that one episode of The Cosby Show. [Phil] is combining all of these techniques into a piece of software that’s capable of running seamlessly on the Pi, giving anyone with a $35 computer a tool that would have been worth several thousand dollars in 1985.

The project is pretty far along, but the recent release of the Raspberry Pi 2 has thrown [Phil] for a loop. On one hand, the Pi 2 is much more capable than the original Pi in terms of hardware, and this lends itself to more sounds and a better GUI. On the other hand, there are millions of original Pi 1s out there that still make for exceptional synthesizers. Either way, [Phil]’s work is a great example of how far you can push the Pi with audio work.

Thanks [Wybren] for the tip. Videos below.

Continue reading “Piana – Musical Synthesis For The Raspberry Pi”