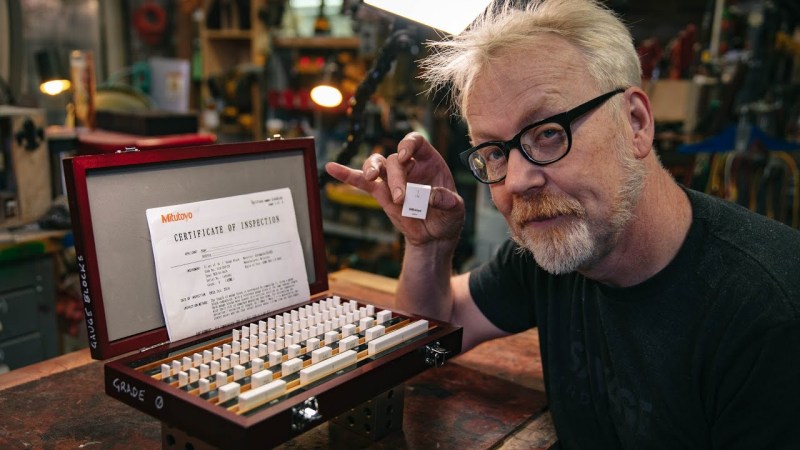
It’s commonly said that the great thing about standards is that there are so many of them. Of course, that’s talking about competing standards. But there’s another kind of standard that you want a lot of: Measurements. Without standard measurements, the Industrial Revolution wouldn’t have been facilitated to the extent it was. The illustrious [Adam Savage] takes a deep dive into the art of measurement in the video below the break, and if you have 45 minutes to spare, you will not be disappointed.
We don’t want to give away any big spoilers, but [Adam] starts out with things we can all relate to if we’ve done any kind of measuring for accuracy: measuring between the given lines on a standard tape measure. From there he goes into calipers and other tools for measurement.
Then, out come the Big Guns. The ceramic blocks so flat that… well you’ll just have to watch it. But the discussion goes deep into nanometers, microns, and jeweled movements.
Whether you’re a machinist or a garage hacker with nothing more than a stick welder and an angle grinder at your disposal, or anywhere in between in any segment of being a maker, this video is for you. [Adam]’s enthusiasm is off the charts in this diatribe, and we have to admit- it’s contagious! We’ve never been so excited about measuring things.
Of course, if you need to measurement tool, you can just build a measurement tool. It’s all subjective, after all.


Resolution and accuracy are not the same thing.
I prefer extremely high accuracy and really low precision. The mean should be match the target value perfectly but the distribution should be a mile wide so that millions of measurements are required to get a decent estimate of the actual value. It helps to use fractional Smoots.
You don’t want to go trying to cut your Smoots into pieces.
Just sayin, DeciSmoots or centiSmoots would be bad.
Yeah, they would really start to smell after a day or two.
With resolution and repeatability, accuracy can be achieved. I recently got a new CNC mill with .001mm resolution, and I do actually see about two and a half movements per .0001″ on a test indicator.
Including backlash? That usually constitutes the major error of its unloaded precision.
Yep, it’ll move .001mm back and forth, and you can watch it on the indicator. Not a hobby grade machine.
Resolution and repeatability will eliminate random errors, but might not eliminate systematic ones. To use an example from the video, if you measure without accounting for temperature it doesn’t matter how many times you measure, the error is still there.
I once got a ticket from a cop who said something to the effect of “you can try to fight this in court, but look how accurate the radar gun is” and pointed to the six or so digits after the decimal point.
I figured it wouldn’t get me anywhere to bring up false precision, the difference between precision and accuracy, and the fact that lots of significant figures on one measurement don’t indicate either one. Police recruitment has a maximum IQ requirement, after all.
That’d be a fun defense. “If we can’t trust the last two digits, who’s to say what the others do!?”
Rumor has it that my math proffesor once got speeding started to defend that the policeman mus have aimed top of the wheel. As we know top point of the wheel moves faster than its center. He brought all necessary math to show it. Officers were so amused that they let him go.
That is true, and Adam definitely should’ve made a distinction, but all of the things he showed – reference surfaces, distances between blocks, heat, etc., fall into the realm of accuracy, not resolution. Those are things that would affect the measurement errors. So I feel his fault is only in terminology, not methodology.
I do like that he said that there is no such thing as a measurement. If that’s all anyone takes away from this video, it’ll be enough.
Fun factoid: If one is using an interferometer to measure gage blocks or similar items a different result is gotten then using similarly precise mechanical systems. This is because mechanical systems interact with the tops of the electron orbits that define the extent of the atoms; the light in an interferometer partly penetrates between the atoms and into the surface of the part before being reflected back.
The closer one looks the less one is completely certain.
and here I was happy with a thousandths of an inch :-)
If you are happy with .001 inch, then you need not worry. It’s the people who worry about nanometers that have a bad day, every day.
A factoud, contrary to popular belief, is something that sounds factual but is not. Unless you are deliberately lying to us, please use the correct term: fact
Merriam Webster defines it as:
1 : an invented fact believed to be true because it appears in print
2 : a briefly stated and usually trivial fact
So both the definition you stated and how Dave used it are correct. He might be better served to use a different word, to ensure the reader understands that the tidbit he relayed is actually true, but he definitely wasn’t wrong to use the word. The second definition is the one that is colloquially correct in my mind.
Perhaps, however; colloquially for which culture? It may be beneficial if we were to keep in mind which of the ‘english’ cultures we are addressing. That is, of course, making the huge assumption that the vast majority of the readers are english speaking natives.
https://en.wikipedia.org/wiki/Factoid
Sadly – word meanings do change and popular belief is, in fact, the cause of that change. Since I cannot edit the original post the suggesting I change it is not helpful.
suggestion.
“Unless you are deliberately lying to us, please use the correct spelling: factoid”
As I understand it, one should measure from the top of the gauge block to the top of the reference flat it’s sitting on. This way, those shifts are in the same direction, and optical and mechanical methods should agree.
I find it slightly frustrating/disappointing. I’d prefer to believe that with instruments precise and subtle enough, that we could measure *exactly*. Instead, we find that there is no *exact*.
There’s probably some kind of zen-style lesson to learn here.
Yep. I think this sums it up:
The weirdness of the universe tends towards the absolute maximum. :)
Or was it: the absurdity of the universe tends towards the absolute maximum.?
But near the absolute maximum, does the difference between “weirdness” and “absurdity” even mean anything anymore?
:)
“But near the absolute maximum, does the difference between “weirdness” and “absurdity” even mean anything anymore?”
Absolutely.
That depends on what you mean by “exactly” or “exact”.
Indeed there is no such thing as *exact* because at atomic scales things like quantum uncertainty starts being a thing. However, for the vast majority of practical applications it’s unlikely you’d ever have to measure below micrometer level. At those scales, optical and mechanical measurements still match and measurements are *exact*
@johnson
Wiktionary [1] doesn’t agree with you. Whereas your definition is included there, three_d_dave’s usage is also perfectly valid.
So please stop yelling at people until you have checked your facts :-)
[1] https://en.wiktionary.org/wiki/factoid
@Johnson wrote factoud, you gave us the definition of factoid.
B^)
Measure with a micrometer. Mark with chalk. Cut with an ax.
Cosine error not mentioned. This is the error due to the dial gauge probe tim not being exactly parallel with the reference surface.
“This old tony” has a video on cosine error: https://www.youtube.com/watch?v=PO-Ab7YfBzY time: 22:30 minutes in.
@Wallace+Owen
timestamped link
https://www.youtube.com/watch?v=PO-Ab7YfBzY&t=1350s
tacking ‘&t=##m##s ‘ on the end lets you link specific times. YT then converts this to seconds,
Thanks.
Recently I compared a couple of new rulers I purchased and…they don’t match:
https://twitter.com/isonno/status/1468047266128687106?s=20
that’s vernier rulers /s
I once compared a Dollar store plastic ruler with a machinist’s ruler.
The 30cm marks were 3mm apart (1%).
This YouTube series about machining starts off by delving into the history of accuracy. Fascinating stuff…
https://www.youtube.com/watch?v=gNRnrn5DE58
Loved it!
Thanks for posting it!
Measure with a micrometer
Mark with a grease pencil
Cut with an axe
Have you been spying on me?
B^)
I would think that extensive confusion about microns and nanometers would warrant some editing so as not to air your confusion in public.
Yeah, both Adam and his editor really dropped the ball here.
I really appreciate his enthusiasm, but some really jarring and easily-avoided errors spoil this one.
Another vote for that. It was like his brain couldn’t cope with the excitement of expounding on a topic he’s passionate about. The lack of linguistic precision was egregious in a video about precision.
I don’t think we can pin it on his editor – there really wasn’t much to work with. I understand he was probably not in the best state of mind to make a video, but I don’t think there was anything the editor could have fixed.
Strange to see the use of oil to demonstrate wringing. You can do that routinely with no oil, even on steel blocks.
In fact, with oil it’s not wringing, just hydrostatic forces. The whole point of wringing together (steel) gauge blocks is that it’s done DRY such that there is no variable thickness liquid film in between the blocks to influence the measurement.
No, a very thin layer of oil is still wringing. Nothing is ever dry as everything has a thin film of water on it. Basically, it is complicated but completely dry wringing is almost never done.
Accuracy and precision are not the same thing.
Exactly. Learning the difference between accuracy, precision, resolution and confidence should be obligatory for all technical educations.
A great paper (in an interesting style that would not be permitted today) on computing with approximate numbers is Daniel B. Delury’s “Computations with approximate numbers” (The Mathematics Teacher, Vol. LI, No. 7, Nov., 1958, pp.521-30; reprinted in Precision Measurements and Calibration, Selected NBS Papers on Statistical Concepts and Procedures, Harry H. Ku, Editor, NBS Special Publication 300 – Volume 1, February, 1969).
In his paper, Delury notes: “Significant numbers are not good numbers to calculate with, because the result of any computation with a significant number is not a significant number… For this reason, people who take their
computations seriously do not use significant numbers, nor do they necessarily state the results as significant numbers.” (NBS, p. 523)
Thank you for the link to – “Computations with approximate numbers” (The Mathematics Teacher, Vol. LI, No. 7, Nov., 1958, pp.521-30; reprinted in Precision Measurements and Calibration, Selected NBS Papers on Statistical Concepts and Procedures, Harry H. Ku, Editor, NBS Special Publication 300 – Volume 1, February, 1969).
Should be an interesting read.
I have had to deal with this throughout my 30 yr career. They call it “human inaccuracies”. It was taught in your first or second yr of electronics school. Pay attention, it IS of significance. If you work on medical devices as my life did, this will make a difference in the world. It is a responsibility. I did finally had to retire…. but those coming into the medical world need to realize calibrations that you sign off on in medically required paperwork are legally considered a statement of fact.
All right, quick poll here: is Adam Savage stoned, or drunk?
Neither.
He’s slightly off kilter because the insight into the nature of measurement hit him at night, causing him to not sleep well and wake up early. He made that video the same day.
He had a revelation that changed his view of the world, and jumped right in to sharing it with other people – to heck with hair, sleep, scripts, camera men, directors, or editors.
Adam Savage is showing you himself at a time when he is still in awe of the insight he just had.
He woke up with that insight, grabbed a few props from his shop, and sat down in front of a camera to tell you about this exciting thought he just had.
He’s not quite awake, but babbling excitedly on adrenaline.
Perhaps he could give us Take Two, with a calm measured delivery, at least a skeleton of a script, some retakes, and the editing out of mistakes?
You are right. Adam does not deserve my snarky comment. I now understand he was neither stoned nor drunk. I apologize.
Measuring is an exercise in futility, for error is certain and fitting is just so so fitting. This one of my favorite sayings.
04-January-2022 “Tested” YouTube video titled “Adam Savage’s Epiphany on the Science of Measurement!”, at 35:46, link here:
https://youtu.be/qE7dYhpI_bI?t=2086
Adam Savage says: “…the advantage that the steel gage blocks have is that … I don’t need to do any adjustment for temperature in the room (when measuring a steel target).
I think that’s wrong. The only way to ignore temperature is if your tolerances permit it or if the gage or end block and the measurement target have exactly equal and opposite coefficients of thermal expansion. That’s never the case.
By the way, “gage block” is classic spelling for “gauge block” in much of the U.S. literature on metrology, but not always. Today, I think the two can be used interchangeably in the U.S.
He’s saying that since they are more or less the same material they should shrink and grow a similar amount when at the same temperature. To any precision that’s going to matter to a prop maker he’s probably about right. However if you really need to worry about those differences you ought to look at your climate control over all (refer to “foundations of mechanical accuracy” and your local standards labs/tooling rep.
Measurements are typically taken comparatively using a dial indicator. You find the combination of blocks that match the height of the object being measured. If the block and objects are the same material _and at the same temperature_ then any thermal expansion applies equally to both and thermal expansion can be ignored.
However, there are many grades of steel and they don’t all have the same thermal coefficient of expansion. Also, many modern precision components are manufactured from aluminium, magnesium or titanium alloys, none of which you’d typically choose to make gage blocks from. So you’re kinda right too. You’d need to use each coefficient in turn with each temperature to determine what the actual result is. The assumption is that both block and object are the same temperature and then the coefficients can be simply divided and then multiplied by the difference between that temperature and 68F.
That brings me back to my earlier emphasis – that assumption can be flawed. Touching gage blocks puts body heat into them. Air currents in the room can affect blocks and objects differently. A 200lb object at about 98F standing about a foot away radiates contextually significant heat. Even the lights can affect readings. Master calibrations are performed in rooms with extremely tight thermal controls, where lights are left off as much as possible (and presumably today all LED), by people wearing thermally reflective lab-coats and gloves, and using plastic tongs to handle the blocks who then allow enough time to pass before taking the reading that any heat introduced has dissipated.
The change in length of a 1″ piece of steel at 60F and at 80F is ~ 0.00013″, and aluminium about double that. People trying to work within a few thousandths of an inch on small components just need to keep their environments comfortable and they can essentially ignore worrying about thermal expansion. Those working in tenths need to pay attention.
One of my best random purchases was a 15 cm precision machinists square. They come in grades, certified to max deviation across the total span, and shorter ones like mine are available cheap(ish) these days.
It’ was a revelation how many things need to be square, and when they are, how much better life is. Drill press, table saw, spindle of CNC router, hell even my chop saw is absurdly (needlessly?) square now, nevermind the horrible slop in the motor/spindle.
IMO, get a good square and a nice flat surface before you get various measuring blocks. Distance between anything more than two points is undefined until the surfaces are parallel.
Yes, a differential measurement would (in theory) allow you to cancel that error out. I suspect that you’d need the flat surface to be made of the same material as the gauge block though.
That brings up the elephant in the room – who has a surface flat enough to allow that difference between optical and physical measurements to be reliably observed? I doubt the best ceramic gauge blocks surfaces are _that_ flat. Essentially, anything less than a perfect plane of atoms would lead to variations that would mask it.
Does he just have bad blocks?
I can’t remember the source, but I read somewhere reliable that wringing has been shown to be atomic in nature, and not related to vacuum. Good blocks will wring together regardless of material – it’s just easier to keep them good if they aren’t rusting. :)
Vacuum could have been a factor in his demonstration. It’s impossible for us to know to what degree – it’s possible that no wringing at all happened.
Maybe over at “The Action Lab”?
https://www.youtube.com/watch?v=Z5XOk1oMFh0
Every time I see anything about gauge blocks I am tempted to immediately order a set.
Then I realize that I’m not really at that point yet where I could use them.
And here’s Adam Savage even saying the same about himself!
The best thing to do is get a beat up set of abused old gauge blocks.
Gauge blocks are useful for TONS of things once you aren’t worried so much about harming them.
Need a clamping shim? Temporary component in a woodworking jig? Levelling a large project on a concrete floor during assembly? Need to know how wide a gap is?….. The list is endless.
I prefer the square-with-hole pratt and whitney style.
Which reminds me of a similar thing: In film production there are things called “apple boxes”, that are essentially imprecise practical gauge blocks that are stacked together to adjust the difference in eye height between actors in a shot. The basic apple box is 20″ x 16″ x 8″, and there are half, quarter, and eighth (or ‘pancake’) boxes to get you all the way down to one inch increments. They’re just wooden boxes, big enough to stand on, and you don’t worry about scuffing them, because that’s what they’re made for.
Sounds like what you are both looking for are not gague blocks, but “123 Blocks” (or 246 blocks when larger, or 10-20-40 or 20-40-80 blocks for metric). These are specifically made for setup purposes, have plenty of smooth and tapped holes, but are still available in ground-to-match sets for moderate precision work.
In our mechanical lab, we have been using AttoCubes, which can measure displacements with an accuracy of about +/- 30K *picometers*… which to put into reference, is about the width of 100 cesium atoms across. For those not in the know, it’s a laser system (because OF course it is, lasers are the end all in measurement) that bounce off a retroreflector, and back to the beam exit, and the time difference is measured and compared to the speed of light (pretty sure that’s how that works). We use four beams to measure tip/tilt and define a plane, and yeah, they’re crazy expensive 😭