A decade ago, I was learning Linux through building projects for my own needs. One of the projects was a DIY CCTV system based on a Linux box – specifically, a user-friendly all-in-one package for someone willing to pay for it. I stumbled upon Zoneminder, and those in the know, already can tell what happened – I’ll put it this way, I spent days trying to make it work, and my Linux skills at the time were not nearly enough. Cool software like Motion was available back then, but I wasn’t up to the task of rolling an entire system around it. That said, it wouldn’t be impossible, now, would it?
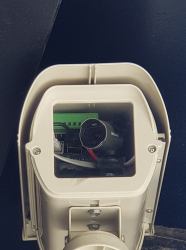 Five years later, I joined a hackerspace, and eventually found out that its CCTV cameras, while being quite visually prominent, stopped functioning a long time ago. At that point, I was in a position to do something about it, and I built an entire CCTV network around a software package called MotionEye. There’s a lot of value in having working CCTV cameras at a hackerspace – not only does a functioning system solve the “who made the mess that nobody admits to” problem, over the years it also helped us with things like locating safety interlock keys to a lasercutter that were removed during a reorganization, with their temporary location promptly forgotten.
Being able to use MotionEye to quickly create security cameras became quite handy very soon – when I needed it, I could make a simple camera to monitor my bicycle, verify that my neighbours didn’t forget to feed my pets as promised while I was away, and in a certain situation, I could even ensure mine and others’ physical safety with its help. How do you build a useful always-recording camera network in your house, hackerspace or other property? Here’s a simple and powerful software package I’d like to show you today, and it’s called MotionEye.
Help => About

Motion is a powerful daemon for handing video streams on Linux in a security camera-like fashion – it does things like detecting movement and recording video clips when it happens. However, it’s a commandline daemon, and it doesn’t have a graphical interface comfortable enough for user-friendly camera image work. MotionEye is a Python package that wraps around Motion, providing a web interface for you to manage your cameras, but more importantly, a treasure trove of quality-of-life features.
MotionEye is reasonably easy to install – it just needs a few packages on your OS and a few Python dependencies, and you can set it to autostart using things like systemd. Then, point your browser at its web interface, and you’ll be presented with all that MotionEye offers, accessible using your desktop OS and your phone alike. There’s also Docker images if you like your software contained! From there, you can start exploring the features.
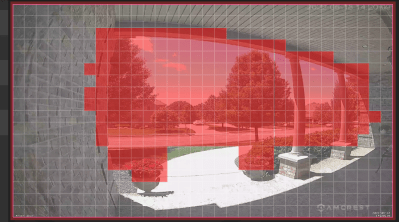 For instance, motion detection can be annoying to set up when dealing with GUI-less tools – sometimes there’s areas in your picture that change all the time, but you don’t consider these areas meaningful for motion detection purposes. MotionEye lets you quickly set up a motion mask through the web interface, that the Motion daemon then uses to filter motion events at their source, with as little overhead as possible. It also presents you with options like hardware encoding, something you could otherwise miss among the manuals.
For those of us who don’t want to set up some kind of local storage, or just would like movement notifications pushed to their phone, MotionEye can use a myriad of picture and video upload ways that depend on online services – email, Google Drive, Dropbox and so on. It also lets you set up commandline hooks on motion event start and end, which you can then use for various automation tasks – I’ve personally used these hooks to graph motion events using matplotlib, as a means of visualizing hackerspace attendance data for automation purposes.
There’s limitations, of course. For instance, just like Motion it’s based on, MotionEye doesn’t have audio support – though you can use MotionEye hooks with an external audio recording script to splice sound into the clips recorded. If you have cameras with different aspect ratios, MotionEye won’t always show them in a neat grid, though I have solved that through CSS hacking in the past. However, it’s still a mighty powerful package in terms of what you can do.
MotionEyeOS – Out-Of-The-Box Experience
You don’t have to have a distro preinstalled, either. MotionEyeOS is a small SD card image with MotionEye and everything you need to make it function, built with help of Buildroot. Just flash the image to a MicroSD card, provide wireless credentials or plug an Ethernet cable. After setting MotionEyeOS up, it will automatically pick up all the cameras it finds, including the CSI-connected Raspberry Pi Camera if one is found. It’s not limited to Raspberry Pi, to be clear – there’s releases for Odroid, NanoPi, BananaPi, OrangePi and Pine46 boards, too.
MotionEyeOS uses read-only storage for the system by default, and I’ve found it to be incredibly resilient to power outages, as of course, if you don’t enable local recording, it won’t ever write anything except settings changes to the SD card. Since the image is so small, I’ve used some leftover 512MB cards for the boards I set up. It’s so handy for single-purpose cameras, perhaps its only problem is that hasn’t yet been updated for boards like Zero W 2, but there are custom builds by MotionEye community members!
In the default configuration, MotionEye will record onto your main storage device available – using your root filesystem in case of standalone MotionEye install, and in case of MotionEyeOS, that will be an automatically created partition taking up all the space not occupied by the MotionEyeOS core. Given you’ll likely run it off an SD card plugged into your Raspberry Pi, it would make more sense if you connected a USB HDD or SSD instead, and if you’re setting multiple cameras up, a network-connected storage device would be even better. Which brings me to the next point!
DVR-Ready, Too
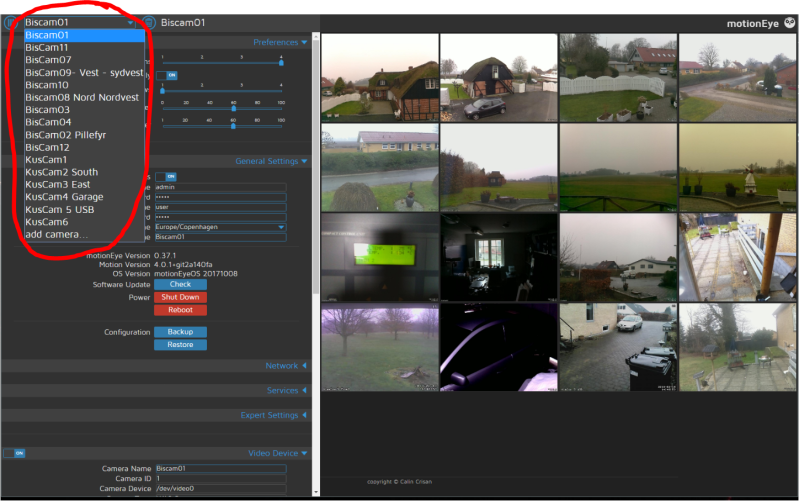
MotionEye isn’t just for camera-equipped devices – you can build a DVR with it. For that, install MotionEye on a reasonably powerful computer with a couple of large cheap hard drives and then have it grab video from network cameras, whether MotionEye-based ones or Chinese IP cameras connected to an Internet-less subnet. With such a setup, you don’t have to do motion detection or storage on the camera itself – which lets you use cheap Raspberry Pi boards, like even the original Model B, and small SD cards with no fear of video file corruption if power is cut in the middle of a write.
In the aforementioned hackerspace, I’ve had a bunch of Raspberry Pi-connected cameras in various corners, some powered by MotionEyeOS and some with MotionEye added alongside the software that was already running on them for enabling various hackerspace features. Our DVR platform was an industrial DN2800MT mainboard with on it and two SATA HDDs in software RAID1 – I didn’t have hardware encoding, as the N2800’s iGPU drivers were subpar on Linux, but CPU was good enough to work with 8 cameras of various resolutions at a time.
You don’t have to use a separate DVR, either. You can have MotionEye cameras, and then set up MotionEye as a non-recording camera viewer on some computer, perhaps, even your personal laptop – letting you view and configure all cameras from a single place. This way, you get a dashboard with all cameras and no extra hardware required. You’ll find that MotionEye is flexible beyond the scenarios I’m telling you about, but this is a decent overview of what you can get done.
Help Out, Stay Safe, Stay Equipped
Now, MotionEye is one of these projects that a lot of people hold dear, but that doesn’t get enough developer attention at the moment, since the main developer has stepped down two years ago. Due to the value it provides, the community remains lively and helpful, but the codebase could use some people willing to delve into it. The code is pretty maintainable, but there’s a myriad of TODOs to take care of – just a few that I’ve noticed are working through the kinks of the Python 3 port, integrating new Raspberry Pi firmware into the builds, reworking the Buildroot integration, fixing Google Drive integration, and going through all the small issues that have accumulated.
 You might already have a usecase in mind, but don’t forget to check your local laws! You might not be allowed to run a camera willy-nilly, or with certain things in its field of view. However, a sticker with “video recording is being performed” might be enough for where you are. One could also argue that, if the camera is on your property, it has a right to be there and perform all the features that a camera does. On the other hand, it wouldn’t be wrong for a guest to be intimidated by a camera in your living room – as such, adjust accordingly.
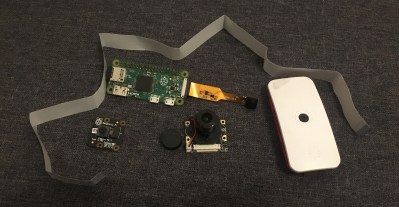
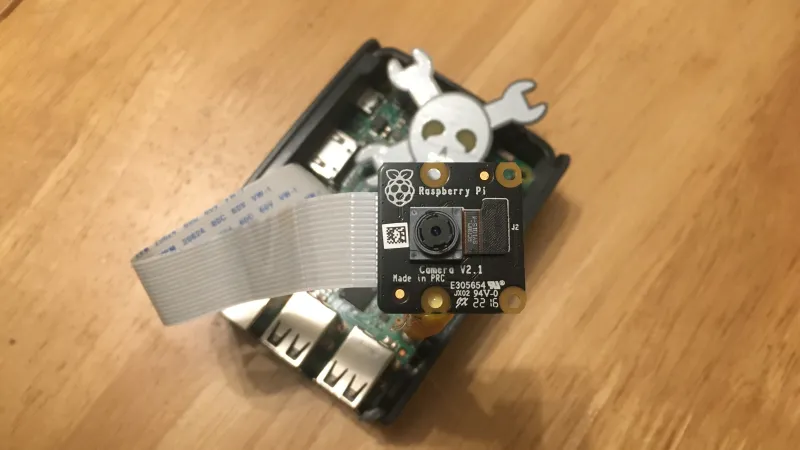
You likely have a spare Raspberry Pi Camera or two, and now you know what you can do with one. Who knows what you could build – after all, we’ve even seen MotionEye-powered Halloween decorations! Next time, I’d like to tell you more about securing your Linux-powered camera network, specifically, using point-to-point Wireguard tunnels on your LAN – making sure that even WiFi-connected cameras of yours can’t be snooped on.



Have RasPi inventory started to recover? I’ve held off on a few things (such as an OctoPi) build because they seem perpetually out of stock
From comments, I thought everyone else had Pis lying around in the junk box.
No, I’ve been trying to get some reasonably priced Pi’s for months. I’d like to have a PiKVM and build a couple of cameras like this. It sounds like the stock problems aren’t going to go away for at least the next 12 months.
Unfortunately, the out of the box experience with any would-be competitors running Armbian isn’t great and it’s hard to find viable alternatives.
Nope, I shucked a Pi400 and printed a nice long case for it. If you don’t mind a looooong Pi it works well.
I just wish someone could find a way to break out the CSI-2 interface to a RasPi compatible header on those.
That would make for a great HaD article.
Looks like there are some Compute Modules in Germany:
rpilocator.com
My neighbors and I want to build something like this to curtail street racers and the catalytic converter thieves. I want to use PI Zero 2W’s. Anybody try setting this up to record license plates?
Pi cameras are not up to the task, sadly.
I haven’t tested this myself, but previous articles suggest it can.
https://hackaday.com/2020/02/26/now-you-can-be-big-brother-too-with-a-raspberry-pi-license-plate-reader/
https://www.hackster.io/news/diy-license-plate-scanner-built-with-a-raspberry-pi-2ab17a015bea
MotionEye is nice, but check out PikrellCam here:
https://billw2.github.io/pikrellcam/pikrellcam.html
or on github.
It has a nice web interface, runs everything, including motion processing on the pi, and can do pre/post capture timings, etc.
it can do multiple motion detection areas, weights, etc.
I used to use this before I got a real cheap wyzecam. I don’t particularly like wyze, but unlink blink, they have an sd card slot, are cheap, and don’t really require a subscription to be useful.
I really hope hobbyists can start identifying viable RasPi alternatives. Anything based around a Rockchip offering is priced as high as second-hand Pi’s are going for. The ones based around an Allwinner chip are more reasonable and might be a viable alternative if there was better software support (though Armbian is getting quite good).
A consistent problem with any alternative is camera support. Very few of the Allwinner chips have a CSI port. They are using an ancient ‘parallel’ camera interface. It may make sense for their set-top box origins but it makes them not great for camera-based SBC projects.
The RockChip boards generally seem to support CSI-2 but drivers seem to be a big issue here. It sounds like a big source of issues are their ISPs and the software needed to run them.
Personally, I’m messing with an Orange Pi PC and a OV5640. While I’ve gotten the custom device tree overlay I need to get the driver to load, I can’t really work with the camera as something still seems broken.
It makes me really appreciate the RasPi ecosystem but also makes me want an SBC ecosystem based on relatively open specs a bit like in the PC world. I’d like software to ‘just work’ most of the time.
I did this, following an Instructable at first and later just rolling my own solution. Works fine, but the Pi’s I used proved to not do particularly well in summer heat. Finally just sprung for a commercial-grade unit with a decent interface and the ability to dump directly to my home SAN.
Itried this, but you need to also think about it filters and illumination for CCTV. And weatherproofing I settled on cheap ip cameras and a box running zoneminder. Pain to set up but just bombproof reliable. Ikilled a few pis with weather and or metal dust from the workshop
Does ZoneMinder intercept the cheap phones from calling back to the CCP mothership?
No , tho I tested quite a few different cheap cameras and found some that were “silent” if it really bothered me that someone in China was watching the front door of my workshop there already on their own physical router so isolation would be trivial.
Zoneminder can’t help poor network design. Put the cameras on an isolated network. ZoneMinder runs on pi too.
Motioneye is fantastic but running it on a pi with multiple cameras is asking for a bad time. A much better alternative is either use the dockerized version in home assistant or run it as a docker container standalone. I just bought one of those x99 motherboards and xeons from aliexpress and that system works well as my plex, motioneye and home assistant system.
Bonus points for running proxmox and setting all these services up as containers which makes backup WAY easier.
Tried Motioneye and even MotioneyeOS, but had a horrible time trying to get Logitech Webcams (2 models) to be detected correctly.
I tried mothioneyeOS on the pi and pi zero and found it just couldn’t handle it. Video was laggy and jerky, even the saved ones.
Went to https://elinux.org/RPi-Cam-Web-Interface and haven’t looked back.
Exactly, MotionEye is very slow and laggy. RpiCamWeb is way better and can do GPIO as well.
For a home based system this looks pretty neat
excellent blogpost