Australia’s Steady March Towards Space

The list of countries to achieve their own successful orbital space launch is a short one, almost as small as the exclusive club of states that possess nuclear weapons. The Soviet Union was first off the rank in 1957, with the United States close behind in 1958, and a gaggle of other aerospace-adept states followed in the 1960s, 1970s, and 1980s. Italy, Iran, North Korea and South Korea have all joined the list since the dawn of the new millennium.

Absent from the list stands Australia. The proud island nation has never stood out as a player in the field of space exploration, despite offering ground station assistance to many missions from other nations over the years. However, the country has continued to inch its way to the top of the atmosphere, establishing its own space agency in 2018. Since then, development has continued apace, and the country’s first orbital launch appears to be just around the corner.

Continue reading “Australia’s Steady March Towards Space”

The Lowly Wall Wart Laid Bare

Getting a look at the internals of a garden variety “wall wart” isn’t the sort of thing that’s likely to excite the average Hackaday reader. You’ve probably cracked one open yourself, and even if you haven’t, you’ve likely got a pretty good idea of what’s inside that sealed up brick of plastic. But sometimes a teardown can be just as much about the journey as it is the end result.

Truth be told, we’re not 100% sure if this teardown from [Brian Dipert] over at EDN was meant as an April Fool’s joke or not. Certainly it was posted on the right day, but the style is close enough to some of his previous work that it’s hard to say. In any event, he’s created a visual feast — never in history has an AC/DC adapter been photographed so completely and tastefully.

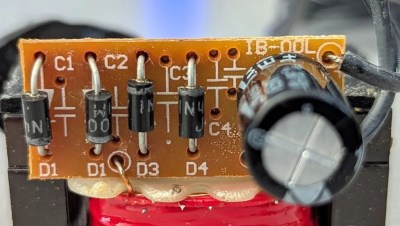
An Ode to the Diode

[Brian] even goes so far as to include images of the 2.5 lb sledgehammer and paint scraper that he uses to brutally break open the ultrasonic-welded enclosure. The dichotomy between the thoughtful imagery and the savage way [Brian] breaks the device open only adds to the surreal nature of the piece. Truly, the whole thing seems like it should be part of some avant garde installation in SoHo.

After he’s presented more than 20 images of the exterior of the broken wall wart, [Brian] finally gets to looking at the internals. There’s really not much to look at, there’s a few circuit diagrams and an explanation of the theory behind these unregulated power supplies, and then the write-up comes to a close as abruptly as it started.

So does it raise the simple teardown to an art form? We’re not sure, but we know that we’ll never look at a power adapter in quite the same way again.

A Toothbrush Hacked, In Three Parts

It’s official, we’re living in the future. Certainly that’s the only explanation for how [wrongbaud] was able to write a three-part series of posts on hacking a cheap electric toothbrush off of AliExpress.

As you might have guessed, this isn’t exactly a hack out of necessity. With a flair for explaining hardware hacking, [wrongbaud] has put this together as a practical “brush-up” (get it?) on the tools and concepts involved in reverse engineering. In this case, the Raspberry Pi is used as a sort of hardware hacking multi-tool, which should make it relatively easy to follow along.

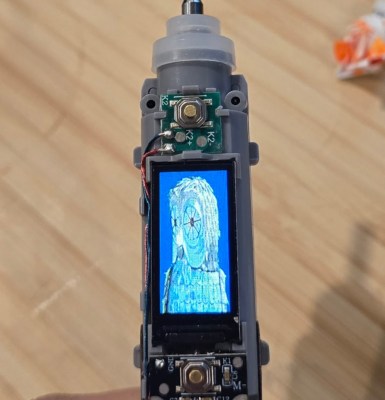
Modified image data on the SPI flash chip.

The first post in the series goes over getting the Pi up and running, which includes setting up OpenOCD. From there, [wrongbaud] actually cracks the toothbrush open and starts identifying interesting components, which pretty quickly leads to the discovery of a debug serial port. The next step is harassing the SPI flash chip on the board to extract its contents. As the toothbrush has a high-res color display (of course it does), it turns out this chip holds the images which indicate the various modes of operation. He’s eventually able to determine how the images are stored, inject new graphics data, and write it back to the chip.

Being able to display the Wrencher logo on our toothbrush would already be a win in our book, but [wrongbaud] isn’t done yet. For the last series in the post, he shows how to extract the actual firmware from the microcontroller using OpenOCD. This includes how to analyze the image, modify it, and eventually flash the new version back to the hardware — using that debug port discovered earlier to confirm the patched code is running as expected.

If you like his work with a toothbrush, you’ll love seeing what [wrongbaud] can do with an SSD or even an Xbox controller.