Getting a look at the internals of a garden variety “wall wart” isn’t the sort of thing that’s likely to excite the average Hackaday reader. You’ve probably cracked one open yourself, and even if you haven’t, you’ve likely got a pretty good idea of what’s inside that sealed up brick of plastic. But sometimes a teardown can be just as much about the journey as it is the end result.
Truth be told, we’re not 100% sure if this teardown from [Brian Dipert] over at EDN was meant as an April Fool’s joke or not. Certainly it was posted on the right day, but the style is close enough to some of his previous work that it’s hard to say. In any event, he’s created a visual feast — never in history has an AC/DC adapter been photographed so completely and tastefully.

[Brian] even goes so far as to include images of the 2.5 lb sledgehammer and paint scraper that he uses to brutally break open the ultrasonic-welded enclosure. The dichotomy between the thoughtful imagery and the savage way [Brian] breaks the device open only adds to the surreal nature of the piece. Truly, the whole thing seems like it should be part of some avant garde installation in SoHo.
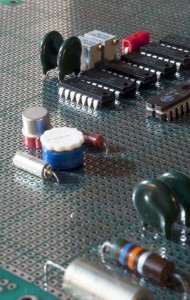
After he’s presented more than 20 images of the exterior of the broken wall wart, [Brian] finally gets to looking at the internals. There’s really not much to look at, there’s a few circuit diagrams and an explanation of the theory behind these unregulated power supplies, and then the write-up comes to a close as abruptly as it started.
So does it raise the simple teardown to an art form? We’re not sure, but we know that we’ll never look at a power adapter in quite the same way again.