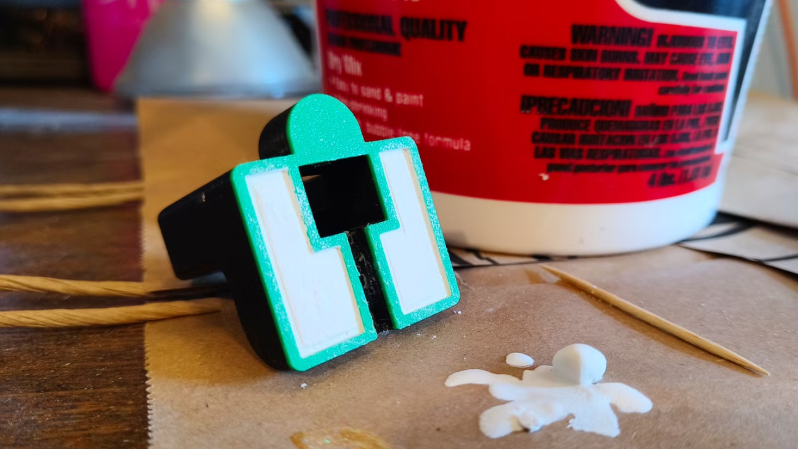
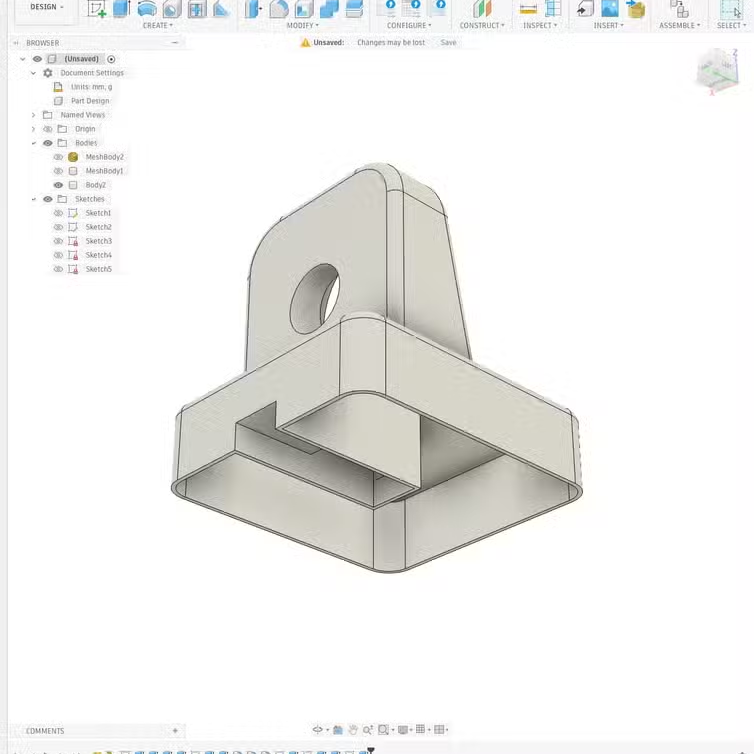
Sometimes it’s useful to add extra mass to a 3D print, and [Joe Fedewa] shared a simple and effective technique that uses plaster of Paris. Rather than pause the print and insert hardware or weighted bits inside, he designed the base as hollow. Not in the sense of zero infill, but in the sense of modeling a cavity into the open bottom of the object.
After the print is complete, he mixes the dry plaster with water until it creates a thick but pourable mixture. Then the object gets turned upside-down and the cavity filled. In about an hour, it will have set up enough to be handled and worked.
Plaster of Paris has a good heft to it, but more importantly it can be made perfectly presentable thanks to being very friendly to post-processing. Any rough spots can be easily sanded and the whole bottom smoothed, so one doesn’t even need to cap it off. Completely cured plaster can be sealed with a clear coat for a more durable finish, if desired.
This basic concept has been used in other ways, such as reinforcing prints with concrete to yield parts solid enough to make tools out of. But using plaster of Paris not just to add mass, but specifically to create a presentable surface that doesn’t need covering up is a neat and highly economical adaptation of the idea.
Other methods of adding mass to a 3D print include inserting metal balls or chunky nuts, bolts, or other hardware, but this method doesn’t require pausing prints to insert things. Nor does it require sealing off or capping the print, messing with goopy epoxies or resins, or spending a lot of money — making it a good one to keep in mind in case it comes in handy someday.


I blended some tungsten powder I had left over from another project with BambuPoops to make some roly poly toys for my kids. I printed the toy in two parts the figure and the demisphere base designed to fit together. I added a bevel to both parts so after I filled the base with the HeavyPLA blend I could use my 3dprinting pen to “glue” them together with PLA.
I’ve been sticking stainless bolts and epoxy in for years 🤷
a few year sago, there was a hackaday article like this about using concrete to add rigidity / solidity to 3d prints, and at the time there were some comments that identified the obvious structural problem of having a rigid / brittle / heavy substance encased in plastic. It’s one of those composites that tends to combine weaknesses instead of strengths. And since that time, i’ve paid attention as i’ve seen a few lamp bases disintegrate into dust as the concrete in them has acted as the hammer used to destroy the plastic bladder that was holding it. So even in mere ballast situations, i have come to have a poor opinion of it.
not so much trying to poo on this project as just pointing out that it’s surprisingly difficult. i wonder if plaster of paris has a better chance of surviving in this context than concrete does. at any rate, i’ve been surprised how resilient plaster is to movement and impact.
I’d think this process would benefit from having a mechanical element to it, as well. For example, a slight draft angle to the voided area, some very low % triangle infill, etc, just to give the plaster something to grab onto and break it up from a single mass into multiple sections that could hold together better – kind of like reinforcement in concrete.
I’m sure it’s ultimate longevity would depend on the use case, and I don’t see plaster of Paris holding up well in an (even mildly) abusive environment.
I had a similar though. The expansion rates of plastics are much higher than plaster, concrete or steel.
Design should not rely on the two staying bonded.
The version of this I’m quite fond of is to make a separate printed insert which gets filled with the rigid mass. The insert is done in vase mode so it’s relatively quick to print, and you can stick it into the void in the main part with hot glue, which provides a slightly flexible interface so the plastic of the main part isn’t quite so rigidly attached to the brittle mass.
An extra trick is that you can standardise the shape and size of the inserts so you’re not CADing up something new each time, potentially printing and filling them in advance. If you like you can also orient them so that the outer surface of the insert is plastic rather than plaster/cement/whatever, so you get a better look and can probably get away without sealing the surface of the filler.
There’s an obvious trade-off in that you can’t quite get as much mass in this way: standardised shapes mean you’re not taking advantage of the full volume available; non-standardised shapes would still lose a bit to the liner; and it’s a bit more work overall. But the results are better to my eyes, and in my experience it’s rarely critical to fully maximise the mass of the filler. Plaster or cement are so much more dense than something printed at 10-15% infill that almost anything will usually do the trick.
Good point! I have a bedside table lamp from IKEA (Espressivo, long since out of production), with an old-fashioned heavy transformer in the base. I converted it to LED with a small SMPS but kept the transformer as counterweight. Over the years the plastic tabs holding the transformer have broken, as have the plastic rounds for the screws that hold the base and top together. I have glued the base and top together with hot glue and that seems to dampen it enough that no further breakage has occurred since.
Maybe encasing the weight in something mildly elastic might offer a solution. So first add in a layer of silicone rubber and then pour in the cement/lead shot/whatever…
Anyone trying this should note plaster expands as it cures, in bulk maybe 2%. It also holds water in it and if it got warm enough to dry out it would lose a decent bit of mass. But for light duty projects it should work fine.
Don’t overlook non-shrink grout. Stronger than cement and plaster.
I made some stands for tools on my electronics workbench. I weighed them down by embedding three M12 coupler nuts with an M12 bolt in it for extra weight. It does take op some space, but it gives the part a nice weight.
This was an “old trick” as per my almost 85 year old father to weigh down model railroad scenery
Ps “chunky nuts”
I recently had to weigh down a batch of USB-connected prints so they sat on a desk without sliding about. “Chunky nut” territory. Self adhesive wheel balance weights (and rubber feet) from the Bezos Bazaar worked well for this scenario.
Coins. 1p and 2p pieces are cheap and consistently sized. They are also pretty useless for their intended purpose these days.
Boy, isn’t that going to confuse the archeologists in 2,000 years time… :)
Liquid urethane would probably be ideal. Cures in 10-30 seconds. Has a durometer rating so it can absorb some impact as well.