
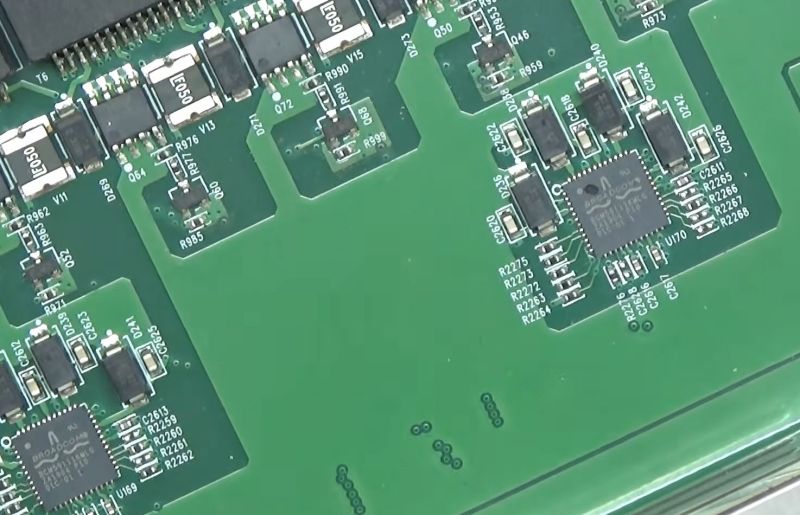
After saving a £300, 16-port Ubiquiti network switch from getting tossed into the trash, [Buy It Fix It] got the honor of trying to repair it. With four ports and their associated PoE function having some major issues it looked like it might take some debugging, but after taking the lid off, the cause seemed rather obvious.
One of the Broadcom BCM5911 controller chips had a rather suspicious chip of the plastic packaging missing, with additional probing of connected components showing that numerous MOSFETs and a diode having had their proverbial guts blown out and were shorted as well. Whatever happened to some connected Ethernet device would appear to have left a serious trail of damage that nearly wrecked the entire switch.
The biggest challenge here was probably to find a replacement for the Broadcom IC, as this isn’t an IC that stores like Digikey or Mouser stock any more. Fortunately it was still available for sale over at AliExpress for £1.84, with the usual caveat that it could be salvage, fake, a factory reject, etc. In this case it appears that it was a legit Broadcom IC, with the four affected ports springing back to life including powering a PoE camera.
With a total cost of about £5 plus the time invested it wasn’t a bad deal to save a pretty nice PoE switch with 16 Ethernet and 2 SFP ports.












My best repair was 4 professional video switchers (£1000 each) repaired by replacing some TVS protection diodes costing pennies. They were tiny components on a 16-layer board with a lot of thermal mass, so not an easy repair, but very satisfying.
Sorry, a bit of missing context for my comment – they were similarly destined for the trash, had obvious magic smoke exit marks, and finding the components took a while.
My favorite that I have pulled off like half a dozen times is reviving old discarded Roombas that do the “circle dance”. The bot spins around in place instead of driving forward. In every case it turned out to be a single dead LED costing pennies.
Old Roombas navigate using just “bump” sensors. The sensor is just a LED, a light sensor, and a plastic tab that pushes between them when the bot bumps against a wall. When the LED burns out then the bot thinks it is bumping against a wall and spins around trying to escape.
And here was i, expecting that drilling an extra hole would fix this thing..
i would never put this much effort into a repair :) but i want to share a repair that went well recently
a plug-in LED clock (nominally, an alarm clock) failed. no lights, a lot of heat both at the clock and its 5V wall wart. the wall wart still supplied 5V unloaded, but dropped to 1.5V @ 1.5A when connected, so seems like a short in the clock. i plugged it in and felt up all the components on the clock’s PCB until i burned my finger on a SOT-23 with a part number corresponding to a PNP transistor. i noticed it was part of a circuit that seemed to have been cut-and-pasted twice on the board. i followed the traces and one copy of the circuit went to the volume control knob and the other copy went to the brightness control knob. i guess it’s some sort of generic adjustable power regulator block.
the one that was hot went to the volume control, which i didn’t need because i don’t se the alarm function. so i simply removed the hot component. and now the clock works again :)
i only do repairs if it’s low-hanging fruit so i was pleased to see a win…felt like i had a string of losses, devices where the failure was ultimately inscrutable to me.
A sensible solution, but I’d just have to add the transistor to my next parts order so I could finish the repair properly at a later date.
well i never actually diagnosed it :)
so i don’t know if the transistor failed shorted or if another failed component was the actual cause