An Arduino With Better Speech Recognition Than Siri

The lowly Arduino, an 8-bit AVR microcontroller with a pitiful amount of RAM, terribly small Flash storage space, and effectively no peripherals to speak of, has better speech recognition capabilities than your Android or iDevice.  Eighty percent accuracy, compared to Siri’s sixty.Here’s the video to prove it.

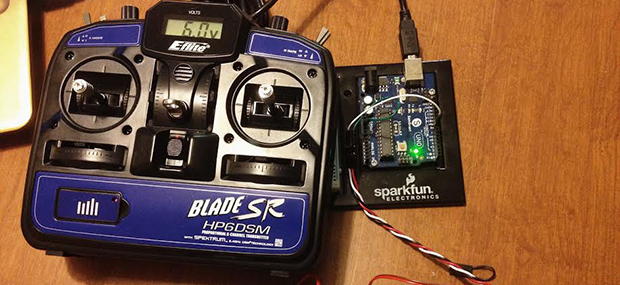
This uSpeech library created by [Arjo Chakravarty] uses a Goertzel algorithm to turn input from a microphone connected to one of the Arduino’s analog pins into phonemes. From there, it’s relatively easy to turn these captured phonemes into function calls for lighting a LED, turning a servo, or even replicating the Siri, the modern-day version of the Microsoft paperclip.

There is one caveat for the uSpeech library: it will only respond to predefined phrases and not normal speech. Still, that’s an extremely impressive accomplishment for a simple microcontroller.

This isn’t the first time we’ve seen [Arjo]’s uSpeech library, but it is the first time we’ve seen it in action. When this was posted months and months ago, [Arjo] was behind the Great Firewall of China and couldn’t post a proper demo. Since this the uSpeech library is a spectacular achievement we asked for a few videos showing off a few applications. No one made the effort, so [Arjo] decided to make use of his new VPN and show off his work to the world.

Video below.

Continue reading “An Arduino With Better Speech Recognition Than Siri”

Using The Wii U Controller With Everything

It’s been just a bit over a year since the Wii U was released along with the extremely impressive Wii U controller. With a D-pad, analog sticks, accelerometer, gyroscope, magnetometer, camera and 6.2 inch touchscreen, this controller is ripe for a million and one projects ranging from FPV quadcopters and robots to things we can’t even think of yet. At this year’s Chaos Communication Congress, [booto], [delroth], and [shuffle2] demonstrated how they cracked open the Wii U controller’s encryption allowing for Wii U controller ’emulation’ and giving us full documentation on how the whole thing works.

The guys started on their reverse engineering journey by dumping all the flash chips found on the controller’s board. In those binary blobs, they found Nintendo used a truly ingenious way of obfuscating the WiFi keys used to connect the controller to the Wii: rotate left by three. To be fair to Nintendo engineers, it was secure until someone figured it out.

Connecting the controller to a PC over WiFi is only half the battle, though. Initial information from the Wii U launch suggested Nintendo used Miracast for all the I/O between the controller and the console. This isn’t the case; instead the video, audio, camera, and button input are non-standard but very simple protocols. The hardest to break into was the video display for the touchscreen, but the guys discovered it’s pretty much H.264. After getting around some Nintendo weirdness, it’s possible to display video on the controller.

The guys have put together a small, extremely alpha library that comes with all the demos, documentation, and reverse engineering information. There’s a large wish list of what this library should include, but now that the information is public, it might be the time to pick up a Wii U.

Video of the talk below, here’s the presentation slides, and a demo of emulating a Wii U game pad on a PC.

Continue reading “Using The Wii U Controller With Everything”

Fubarino Contest: Splash Screen On System Reset

logo

Here’s a Fubarino contest entry for all those homebrew computer nuts out there. [Danjovic] modified an NTSC/PAL display adapter to show an ASCII version of the Hackaday logo when his board first boots up.

The build is based on [Daryl Rictor]’s Video Display Adapter intended for use with homebrew computers, microprocessor projects, and any other minimalist digital setup that needs an NTSC or PAL video display. It’s a surprisingly simple circuit, made of a few logic ICs and an ATmega8.

[Danjovic] modified this video display adapter with an easter egg: if one pin on the ATmega8 is shorted when the board is powered on, a neat Hackaday splash screen is displayed for several seconds before falling back to the stock display of a blinking cursor. [Dnajovic] converted the ASCII Hackaday logo with the help of a short Python script and loaded it onto the AVR with a small firmware change.

Video of the boot screen in action below.


This is an entry in the Fubarino Contest for a chance at one of the 20 Fubarino SD boards which Microchip has put up as prizes!

Continue reading “Fubarino Contest: Splash Screen On System Reset”

Fubarino Contest: Hackaday On An RC Heli

tx

[SF Tester] (his real name, honestly, with a brother who does QA for Blizzard) recently picked up a Blade SR remote control helicopter. Compared to the cheap coaxial helicopters you can pick up from eBay or Amazon for $30, this heli is a huge step up, but it does have one weakness – it comes with its own transmitter, and binding it to [Tester]’s shiny new DX9 transmitter is a pain.

The initial attempt at getting the proper values from the stock transmitter into his big-boy transmitter originally consisted of taking the stock transmitter, some servos, attaching them to homebrew protractors, and reading out the values of each axis manually. That’s a brute-force method of improving his new toy, so [Tester] sought out a better method.

The solution came via Arduino’s pulseIn() command. By connecting the stock receiver to an Arduino, [Tester] was able to precisely read the values coming from the stock transmitter and import them into his very fancy Spektrum DX9 transmitter.

Every Fubarino contest entry needs an easter egg, so when the value of the pulses coming from the stock transmitter is exactly 1337 microseconds, the Arduino spits out Hackaday’s URL to the serial console. Cleverly hidden, and a great way to improve an awesome heli. We can’t ask much more than that.

There’s no direct link for this, but you can literally see the code in the image after the break.


This is an entry in the Fubarino Contest for a chance at one of the 20 Fubarino SD boards which Microchip has put up as prizes!

Continue reading “Fubarino Contest: Hackaday On An RC Heli”

Apple And Raspberry Pis

A2Pi

Deep in the bowels of the Internet there are some crazy people who have a wish list for what the next Apple II should look like. The capabilities of this dream machine of 80s retrocomputing is generally said to be something with a 32-bit CPU, a UNIX OS, modern graphics, and networking. This sounds a lot like a Raspberry Pi, so [Dave] built an Apple II to Raspberry Pi adapter card.

Having a Pi talk to an Apple II over a serial connection doesn’t really give either machine the full capabilities of the other. To fix this issue, [Dave] wrote two pieces of software. The first is a UNIX daemon that listens to the Apple II on a serial port connection, handling the Apple II keyboard connection. The second piece of software is a ProDOS disk image file running on the Apple II. With these two pieces of software, [Dave] can run the Apple on the Raspi, or run the Raspi on the Apple, sending files and data back and forth with no problem.

Aside from providing a strange and awesome Apple II to UNIX interface, the Apple II Pi also has a lot of advantages that might not be readily apparent. An Apple II compact flash adapter can be used as an internal hard drive for these pieces of classic apple hardware, and the Uthernet Ethernet card for the AII brings networking. Both of these devices are absurdly expensive compared to the component cost of the Apple II Pi, and what they bring to the table can be easily copied by the Apple II Pi.

The Apple II Pi is just a simple double-sided board with a few resistors, a cap, header, a 7404 inverter, and a communications chip that’s $5 for quantity one. If you already have a Raspi hanging around your workbench and want to soup up an Apple II with some crazy hardware capabilities, you really can’t do better than getting one of these Apple II Pi boards. Now if we could only find the board files…

Video of the Apple II Pi below, showing off all the awesome capabilities of a Pi-powered Apple. Thanks [Itay] for sending this one in.

Continue reading “Apple And Raspberry Pis”

Fubarino Contest: FPGA Pong

pong

For [Eric]’s entry for our Fubarino Contest, he went down to very low-level hardware and created Pong on an FPGA.

[Eric] used a Basys 2 FPGA board to create this virtual, logic gate version of Pong. Output is via the VGA port, multiplayer and an AI player is implemented, and all the required mechanics for Pong – collision detection, button and switch input, and score keeping are also in this project.

The Fubarino contest requires an easter egg, of course, so when the score for the left player reaches 13 and the score for the right player reaches 37 (get it? 1337?), the previously square ball turns into an extremely pixeley version of the Hackaday logo. The Hackaday URL is also displayed, thanks to [Eric]’s FP(V)GA module for displaying text on his FPGA board.

The improved Pong ball and URL only appears when the scores are 13-37, making this an extremely well-hidden easter egg. Video of [Eric] demoing his Pong below.


This is an entry in the Fubarino Contest for a chance at one of the 20 Fubarino SD boards which Microchip has put up as prizes!

Continue reading “Fubarino Contest: FPGA Pong”

Fubarino Contest: Hackaday In Your Soldering Iron

Solder

Besides a coffee pot, the most important tool on the electronic tinkerer’s workbench is the soldering iron. Surprisingly, though, we haven’t seen many people build their own soldering stations. [Pjkim] did, and went so far as to include an easter egg for our Fubarino contest.

A few years ago, [Pjkim] received a free Soldering Iron Driver from Dangerous Prototypes. This awesome kit provides everything you could want out of a soldering iron – USB and serial data logging, a 2×16 display, compatibility with a whole bunch of solder tips, and it’s completely reprogrammable.

[Pjkim]’s task for the Fubarino contest was to put an easter egg somewhere in the soldering iron. He did that by having the Hackaday URL display when the iron is ready for use. This isn’t the only firmware modification, either: the new firmware also debounces the button presses and adds auto repeat.

If you’re looking for some code, [Pjkim] put everything up on the Hackaday forums. There’s also a video showing off the easter egg available below.


This is an entry in the Fubarino Contest for a chance at one of the 20 Fubarino SD boards which Microchip has put up as prizes!

Continue reading “Fubarino Contest: Hackaday In Your Soldering Iron”