[dafonso] purchased a nice 1500W smoker but was somewhat dismayed that it only had one cooking temperature. To compensate he designed his own PID control system which allows him to set the cooking temperature digitally. At the heart of the system is a PICAXE 18 micro which switches the smoker on and off using a solid state relay. Rather than testing the 110V system on the smoker itself (which would have been a pain indoors) he used a lamp instead. To see if he was getting the correct temperature he taped his thermocouple to the light bulb and let the PID switch the lamp on and off. Also be sure to checkout his video which does a good job of explaining how he was able to solder the surface mount components required for the control board.
Author: Chris Nelson25 Articles
Update: Microtouch The 8-bit Ipod Touch
It looks like [rossum] and [Ladyada] have teamed up and been busy working on the microtouch. Since we covered it last year its had a few minor improvements like an upgrade to the ATmega32u4 microprocessor and some new software. The new and improved microtouch also features an accelerometer as well as some software to go along with it. Plus its now for sale on adafruit for about a quarter the price of an ipod touch (just in case you don’t feel like making your own).
For the unaware the microtouch is a lightweight AVR based ipod touch. It comes with a bootloader which allows you to download your “apps” to the microtouch without the need for an AVR programmer. While it may lack some of the computing power and features of the ipod touch (like music), the microtouch is definitely appealing for its open hardware/software and easy to use touch screen.
Exploding An AVR
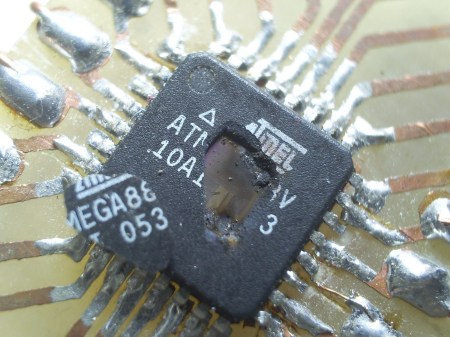
Unfortunately [manekinen] wrecked a couple of AVRs during his tinkering. Not letting this get him down he decided to blow them up to see what would happen. In exchange for their precious magic smoke the AVRs revealed a good portion of their silicon die.
While the details are a little sparse it seems like he hooked them up to a high (and possibly reverse) source to blow open the chips casing. From the pictures it looks like he was able to reveal some of the flash or SRAM (the big multi colored rectangles) and what could possibly be the power supply. Be sure to checkout the videos after the break for some silicon carnage.
Sparkfun Free Day Recap
It looks like the dust has finally settled with sparkfun’s free day. They managed to give away $150,541 to users and $22,988 to charity. The general idea is you could ether take $10/year you’ve been a sparkfun customer, or take a 10 question quiz and earn $10/correct answer plus some money for charity. It looks like some technical difficulties prevented people from taking the quiz until free day had been under way for a couple of hours. Once they managed to fix the problem the money went pretty fast, eating up the last $40,000 in about 5 minutes. So did anyone manage to get anything good? Be sure to checkout sparkfun’s recap video after the break for more details.
DIY Ultrasonic Range Finder For $5
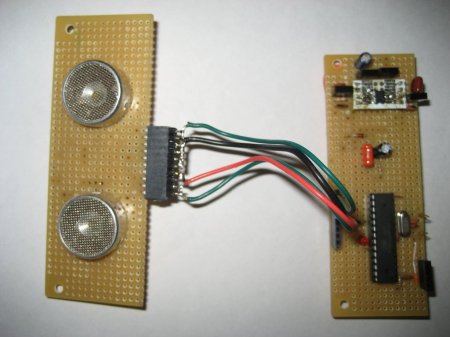
After finding some ultrasonic transducers online for a dollar each [Kerry Wong] decided to create an ultrasonic range finder. The result is much like parallax’s PING))) sensor but much cheaper. His post is not only a good way to save some money, but also does a good job of explaining how ultrasonic sensors work. The transmit circuit is essentially an H-bridge, much like what you would use to control a motor. To listen to the returning echo he uses a pair of high gain/low noise op-amps to filter and amplify the signal. The board he uses to test the range finder (not included in the cost) is an ATMega328 running the Arduino boot loader. He also provides lots of example code to boot.
Turning Music Into A Light Show
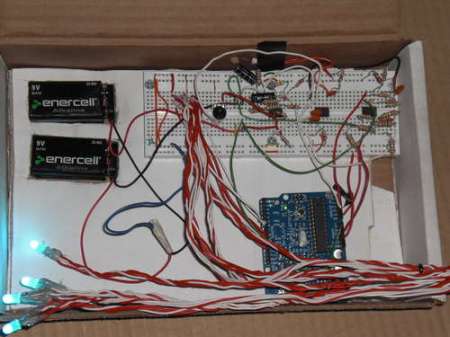
[nickinoki] Made a light show using some amplifiers and an arduino. First he created a microphone circuit based around a LM386 Audio Amplifier. After amplifying the output of the microphone a second time, he uses three bandpass filters to block all but a few desired frequencies from reaching the arduino. By only letting a few frequencies through the arduino is able to determine if the song is louder at higher or lower frequencies. Then using the three analogue inputs he created a scheme for generating the light show on an arduino. While he was unable to achieve the exact target frequencies with his bandpass filters they worked well enough to allow him to successfully generate the light show.
Kodak ZX3 Teardown And Tetris
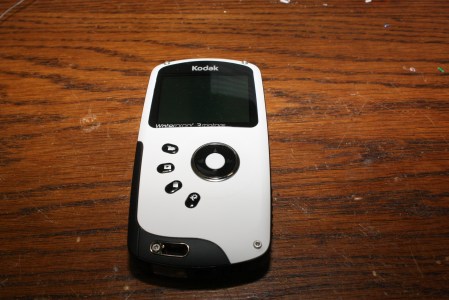
[Sprite_TM] was given a Kodak ZX3 to play with by a forum he moderates. The Kodak ZX3 is a waterproof HD camcorder in a cell phone / mp3 player form factor. After opening up the camcorder, he did some poking around with a scope and was able to locate a serial port on the board. It quickly became apparent that the system uses a proprietary kernel called PrKernelV4 rather than an open source alternative. Not letting the proprietary kernel get him down, he exploited the system by simply modifying a file called “autoexec.ash” on the sd card. He now has a Tetris clone easily launched from a previously unused menu icon. See it in action after the break.