Lightweight Haptic Gloves With Electro-Osmotic Pump Arrays

Now that we have decent VR goggles, the world is more desperate than ever for a decent haptic interface for interacting with computers. We might be seeing a new leap forward in this wild new haptic glove design from the Future Interfaces Group at Carnegie Mellon University.

Feeling different surfaces in VR is possible using this technology.

The glove gives each fingertip and thumb a small haptic pad. The pads are driven by electro-osmotic pumps, which are effectively solid-state. They use electricity to move fluid to create small dimples on the pad to provide haptic feedback to the user. The pads have 20 pixels per square centimeter, are quick and responsive, and can deform up to 0.5 mm in less than half a second.

The lightweight and self-contained electro-osmotic pads mean the haptic system can be far lighter and more practical than designs that use solenoids or other traditional technologies. The device is also high resolution enough that a user can feel pressure from a surface or the edges of an object in VR. If you watch the video, some of the demonstrations are quite revolutionary.

We’ve seen some other great haptics projects before too, like these low-cost force feedback gloves. Video after the break.

Continue reading “Lightweight Haptic Gloves With Electro-Osmotic Pump Arrays”

Roboticized 3D Printer Has Been Developing Shock Absorbing Structures For Years

Imagine you want to iterate on a shock-absorbing structure design in plastic. You might design something in CAD, print it, then test it on a rig. You’ll then note down your measurements, and repeat the process again. But what if a robot could do all that instead, and do it for years on end? That’s precisely what’s been going on at Boston University.

Inside the College of Engineering, a robotic system has been working to optimize a shape to better absorb energy. The system first 3D prints a shape, and stores a record of its shape and size. The shape is then crushed with a small press while the system measures how much energy it took to compress. The crushed object is then discarded, and the robot iterates a new design and starts again.

The experiment has been going on for three years continuously at this point. The MAMA BEAR robot has tested over 25,000 3D prints, which now fill dozens of boxes. It’s not frivolous, either. According to engineer Keith Brown, the former record for a energy-absorbing structure was 71% efficiency. The robot developed a structure with 75% efficiency in January 2023, according to his research paper.

Who needs humans when the robots are doing the science on their own? Video after the break.

Continue reading “Roboticized 3D Printer Has Been Developing Shock Absorbing Structures For Years”

Almost Breaking The World Record For The Tiniest Humanoid Robot, But Not Quite

Did you know there is a Guinness World Record for the smallest humanoid robot? We didn’t either, but apparently this is a challenge attracting multiple competitors. [Lidor Shimoni] had a red hot go at claiming the record, but came up ever so slightly short. Or tall.

The former record holder was measured at 141 mm, so [Lidor] had to beat that. He set about building a humanoid robot 95 mm tall, relying on off-the-shelf parts and 3D-printed components of his own design. An ESP32 served as the brains of the operation, while the robot, named Tiny Titan, got big flat feet to make walking relatively stable and controlled. Small servos were stacked up to actuate the legs and create a suitably humanoid robot to claim the title.

Sadly, [Lidor] was pipped to the post. Some procrastinating in finishing the robot and documentation saw another rival with a 60mm robot take the record. It’s not 100% clear what Guinness requires for someone to take this record, but it seems to involve a robot with arms, legs, and some ability to walk.

Sometimes robots are more fun when they’re very small. If you’re developing your own record-breaking automatons, drop us a line won’t you?

Turning An ATX PSU Into A Variable Bench Supply

Bench power supplies can sometimes be frustratingly expensive and also kind of limited. If you’re enterprising and creative, though, you can create your own bench supply with tons of features, and it doesn’t have to break the bank either. Do what [Maker Y] did—grab an ATX supply and get building!

ATX power supplies work as a great basis for a bench power supply. They have 12 volt, 3.3 volt, and 5 volt rails, and they can supply a ton of current for whatever you might need. [Maker Y] decided to break out these rails on banana plugs for ease of access, and fused them for safety, too. But the build doesn’t stop there. [Maker Y] also added a buck-boost converter to provide a variable voltage output from 1 to 30 volts for added flexibility. As a nice final touch, the rig also features a pair of USB A ports compatible with Quick Charge 3.0, for keeping smart devices charged while working in the lab.

[Caelestis Workshop] also designed a fully enclosed version if you prefer that style. Check it out on Instructables.

No matter which way you go, it’s a pretty simple build, with a bunch of off-the-shelf parts tossed together in a 3D printed housing. Ultimately, though, it’s got more functionality than a lot of cheap off-the-shelf bench supplies. You can build it just about anywhere on Earth where you can get cheap eBay parts via post. Continue reading “Turning An ATX PSU Into A Variable Bench Supply”

Filming The Eclipse From 80,000 Feet

Watching an eclipse from the ground is pretty fun. Depending on where you live, you might even get a decent view. But what if you wanted a truly unique vantage point? You could replicate the work of [Tarik Agcayazi] and [kemfic], who set about filming the recent eclipse from an altitude of 80,000 feet.

That’s what the eclipse looks like from 80,000 feet.

The duo didn’t rent a high-performance aircraft from the US military. Instead, they relied on a high-altitude balloon carrying a glider with a camera payload. The idea was for the balloon to go up, and have the camera capture the eclipse. Then, it would be released so that it could glide back home in controlled flight. However, time constraints made that too hard. Instead, they simplified to a parachute recovery method.

The project video covers the development process, the balloon launch itself, and of course, the filming of the eclipse. High altitude balloon launches are stressful enough, but having a short eclipse as a target made everything even more difficult. But that just makes things more exciting!

The project builds on earlier work from the duo that we discussed back in 2017.

Continue reading “Filming The Eclipse From 80,000 Feet”

Mechanical 7-Segment Display Looks Clean

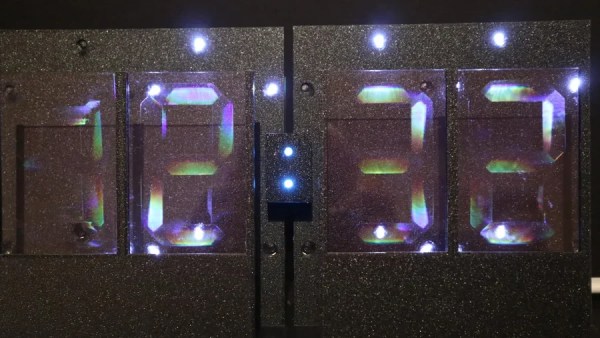
[Jens] wanted a subscriber counter for his YouTube channel. He could have gone with a simple OLED, LCD, or LED display, but he wanted something more tactile and interesting. So he built a mechanical 7-segment display instead!

Currently, [Jens]’s channel is in the four-digit subscriber range, so he planned to build a four-digit display. He started by searching for existing projects in this space, and came across the designs of [shiura] on Thingiverse. [shiura] had a 3D printed cam-driven 7-segment digit that runs on a single servo motor. Once armed with four of the digits, he hooked them up to a Pi Pico W to drive them all with four servo outputs. The Pico W is responsible for querying the channel subscriber count online, and updating the display in turn.

It’s a neat build, and [Jens] learned some things along the way—like how Super Lube seemed to ruin filament for him. Ultimately, the build came good, and it looks great. We’ve seen some other mechanical 7-segment builds before, too!

Continue reading “Mechanical 7-Segment Display Looks Clean”

Ribbon Cable Repair Saves Touch ID

Some might consider a broken ribbon cable to be unsalvagable. They’re delicate and fragile as can be, and sometimes just fussing with them further is enough to cause additional damage. However, with the right set of skills, it’s sometimes possible to achieve the unthinkable. As [Master Liu] demonstrates, you can indeed repair a broken ribbon cable, even a tiny one.

The video concerns a ribbon cable linked to a Touch ID fingerprint sensor from an Apple device. It’s common to break these ribbon cables when repairing a phone, and doing so causes major problems. The Touch ID device is paired with the host phone, and cannot easily be replaced. Thus, repair is justified if at all possible.

The repair involves scraping back the outer coating on the two sections of ribbon cable to reveal the copper pads underneath. The copper is then coated with flux and solder to prepare them to be rejoined. Ultra-fine strands of wire are used to join the individual traces. Then, the repaired section is coated in some kind of sealant or epoxy to hold the joint together and protect it from failing again. The theory is easy, it’s just the execution that’s hard.

Ribbon cable repair is becoming one of our favorite topics of late. Sometimes you just need a steady hand and the guts to have a go. Video after the break.

Continue reading “Ribbon Cable Repair Saves Touch ID”