Crafting Ribbon Cables For Retro Hardware

Building a modern computer is something plenty of us have done, and with various tools available to ensure that essentially the only thing required of the end user is to select parts and have them delivered via one’s favorite (or least expensive) online retailer. Not so with retro hardware, though. While some parts can be found used on reselling sites like eBay, often the only other option is to rebuild parts from scratch. This is sometimes the best option too, as things like ribbon cables age poorly and invisible problems with them can cause knock-on effects that feel like wild goose chases when troubleshooting. Here’s how to build your own ribbon cables for your retro machines.

[Mike] is leading us on this build because he’s been working on an old tower desktop he’s calling Rosetta which he wants to be able to use to host five different floppy disk types and convert files from one type to another. Of course the old hardware and software being used won’t support five floppy disk drives at the same time so he has a few switches involved as well. To get everything buttoned up neatly in the case he’s building his own ribbon cables to save space, especially since with his custom cables he won’t have the extraneous extra connectors that these cables are famous for.

Even though, as [Mike] notes, you can’t really buy these cables directly anymore thanks to the technology’s obsolescence, you can still find the tools and parts you’d need to create them from scratch including the ribbon, connectors, and crimping tools. Even the strain relief for these wide, fragile connectors is available and possible to build into these projects. It ends up cleaning up the build quite nicely, and he won’t be chasing down any gremlins caused by decades-old degraded multi-conductor cables. And, even though [Mike] demonstrated the floppy disk drive cables in this build, ribbon cable can be used for all kinds of things including IDE drive connectors and even GPIO cables for modern electronics projects.

Continue reading “Crafting Ribbon Cables For Retro Hardware”

The hairclip-embedded tool being used on a Tiger 99x game console, clipped onto a spot where the plastic ribbon meets the LCD panel itself, heating it up

World’s Smallest Hair Straightener For Fixing Old LCD Ribbons

[Stephen] writes to us about an LCD repair tool he has created. We’ve all seen old devices with monochrome LCDs connected by thin film, where connections between the PCB and the LCD have deteriorated and the LCD would no longer show parts of the picture. This is a connection heating gadget, that [Stephen] affectionately dubs as World’s Smallest Hair Straightener, made specifically to bring cool old tech back to life.

A resin-printed mold houses a coil of Kanthal wire, easy to source and simple to make. He reuses a hair clip as a housing for the heating element, which also provides pressure needed to squish the film-printed conductive traces into the LCD as the adhesive melts. High-temperature epoxy brings the two together, and with a variable power supply, this tool successfully brought an old Tiger 99x handheld back to life.

This hack was made possible, in part, because of [JohnDevin Duncan] in Hackaday comment section sharing his experience on repairing LCD ribbons back in 2015, giving valuable insights on the problem that we initially thought would be solve-able with a soldering iron. The knowledge shared was distilled by [Stephen] into a tool that we all can now use when we encounter a device we really, really want to revive.

Last time we covered this topic, quite a few hackers popped up with their stories and suggestions. Old game console fix stories are a staple here on Hackaday, a few pop to mind – this high-effort trace repair of a water-damaged GameBoy cartridge, a badly designed NES cartridge socket reinvention, and this GameBoy LCD sunburn damage restoration guide.

40% Keyboard Build Is 100% Open Source

[Blake]’s interest in building keyboards happened naturally enough — he was looking for a new project to work on and fell into the treasure chest that is the mechanical keyboard community. It sounds like he hasn’t built anything but keyboards since then, and we can absolutely relate.

This tidy 40% ortholinear is [Blake]’s third build, not including macro keebs. It’s based on an open source case and plate from Thingiverse, and uses an Arduino Pro Micro running the popular QMK firmware to read input from 47 Gateron blues and a rotary encoder.

We particularly like the double rainbow ribbon cable wiring method [Blake] used to connect each row and column to the controller. It looks beautiful, yes, but it’s also a great way to maintain sanity while programming and troubleshooting.

Keyboard builds can look daunting, even at 40% of standard size. But as [Blake] discovered, there are some really good guides out there with fantastic tips for hand-wiring in small spaces. And now there is another well-written guide with clear pictures to point to.

Looking to split from the standard rectangle form factor but don’t know what to go with? Divine your next clacker with this split keyboard finder.

Thanks for the tip, [jrdsgl]!

Steady Hand Repurposes Cheap SSD Modules

For hackers, cheap (and arguably disposable) consumer hardware makes for a ready supply of free or low-cost components. When you can walk into a big box store and pick up a new low-end laptop for $150, how many are going to spend the money to repair or upgrade the one they have now? So the old ones go to the bin, or get sold online for parts. From an ecological standpoint our disposable society is terrible, but at least we get some tech bargains out of the deal.

Case in point, the dirt cheap 32 GB eMMC SSDs [Jason Gin] recently scored. Used by Hewlett Packard on their line of budget laptops, he was able to snap up some of these custom drives for only $12 each. Only problem was, since they were designed for a very specific market and use case, they aren’t exactly the kind of thing you can just slap in your computer’s drive bay. He had to do some reverse engineering to figure out how to talk to them, and then some impressive fine-pitch soldering to get them plugged in, but in the end he got some very handy drives for an exceptionally low price.

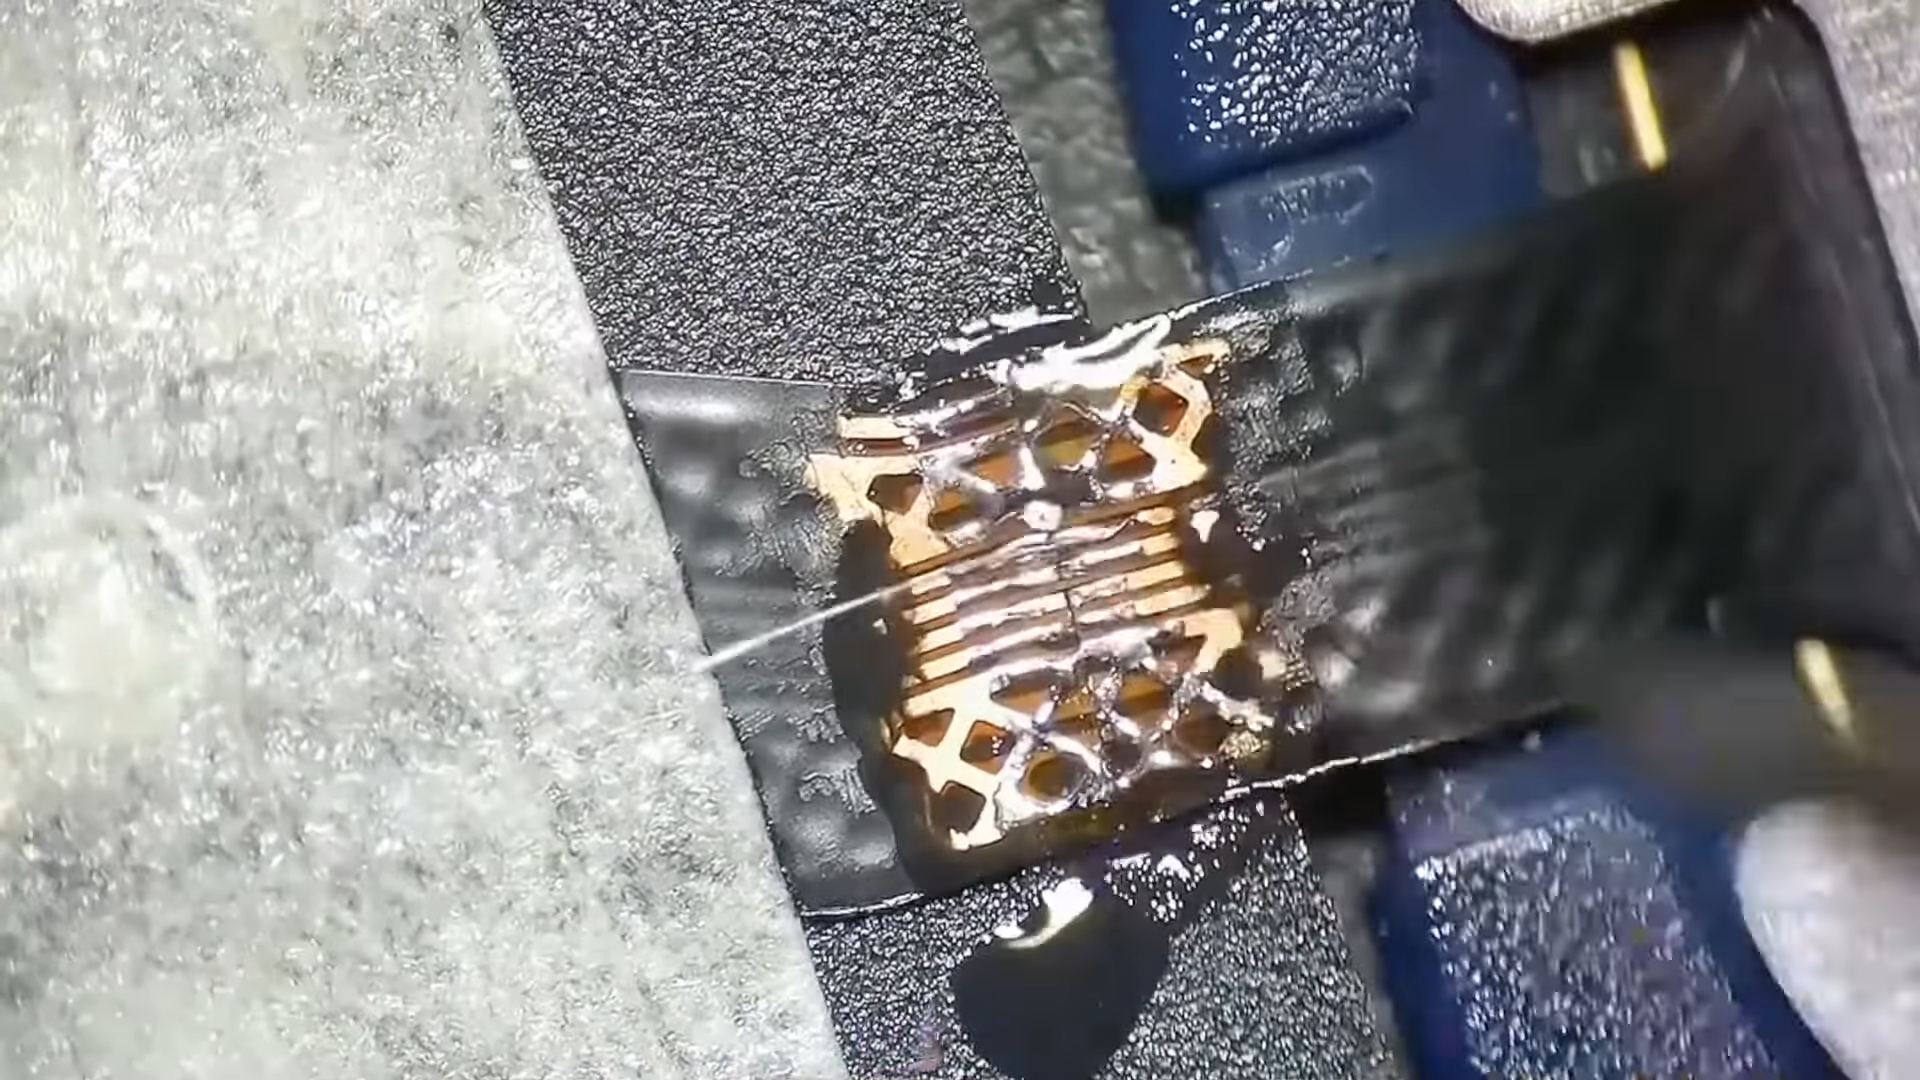
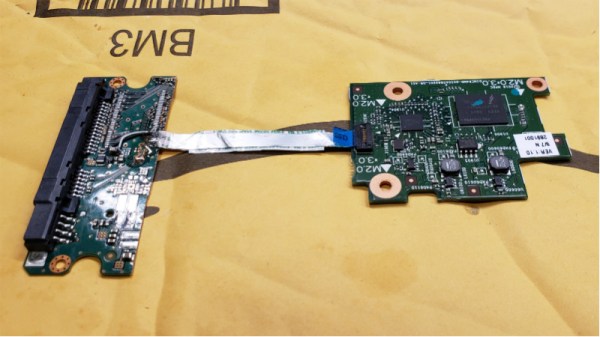
[Jason] starts by figuring out the drive’s pinout using the cornerstone of the hacker’s electronic toolkit: the multimeter. By putting one lead on an obvious ground point such as the PCB’s screw holes, you can work through the pins on the connector and make some educated guesses as to what’s what. Ground pins will read as a short, but the meter should read power and data pins as a forward-biased diode. With a rough idea of the pin’s identities and some luck, he was able to figure out that it was basically a standard SATA connection in a different form factor.

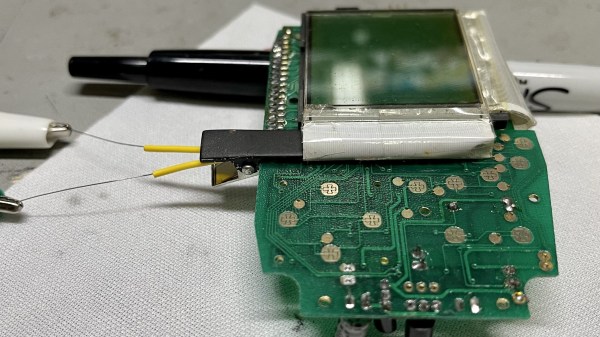
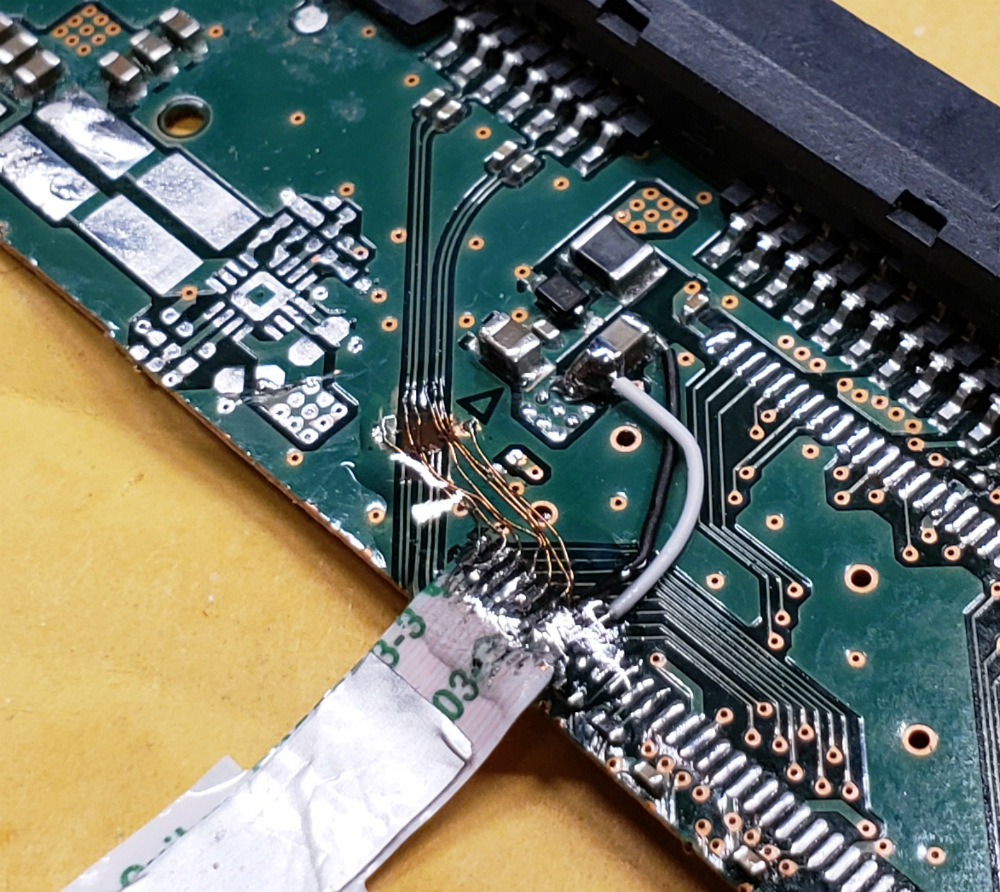
To actually hook it up to his computer, he pulled the PCB off of a dead SATA hard drive, cut it down to size, and was able to use fine magnet wire to attach the conductors in the drive’s ribbon cable to the appropriate pads. He sealed everything up with a healthy dose of hot glue to make sure it didn’t pull loose, and then ran some drive diagnostics on his cobbled together SSD to make sure it was behaving properly. [Jason] reports the drive isn’t exactly a speed demon, but given the low cost and decent performance he still thinks it’s worth the work to use them for testing out different operating systems and the like.

[Jason] seems to have something of an obsession with eMMC hacking. Last time we heard from him, he was bringing a cheap Windows tablet back from the dead by replacing its shot eMMC chip.

Ghetto Ribbon Connector

[Marcel] was trying to shoehorn a few new parts into his trusty Nexus 5 phone. If you’ve ever opened one of these little marvels up, you know that there’s not much room under the hood to work with. Pulling out some unnecessary parts (like the headphone jack) buys some space, but then how to wire it all up?

[Marcel] needed a multi-wire connector that’s as thin as possible, but he wasn’t going to go the order-Kapton-flex route. Oh no! He built one himself from masking tape and the strands from a stranded wire. Watch the video how-to if that alone isn’t enough instruction.

Continue reading “Ghetto Ribbon Connector”

Any-size SIL Connector Kit

any-sized-SIL-cable-kit

Etching and populating a board is childs play compared to finding connectors which link several components. But Hackaday alum [Ian Lesnet] and his crew over at Dangerous Prototypes have come up with a solution that makes us wonder why we haven’t seen this long ago? They’re prepping an any-size ribbon cable kit.

So lets say you do find the type of connector you want. You need to cut the ribbon cable to length, crimp on the connectors, then seat those connectors in the housing. We’ve done this many times, and being cheapskates we use needle-nose pliers instead of buying a proper crimper. This solution does away with that grunt work. The kit will ship several different lengths of ribbon wire with the connectors already placed by machine. This way you peel off the number of connectors you need, select the proper house size and plunk it in place. Also in the kit are several lengths of male, female, and male/female jumper cables you can peel off in the same way.

Now what are we going to do with the rest of the spool of ribbon cable sitting in the workshop?

Hackaday Links: January 2, 2012

The worst computer keyboard, ever

[Gerardus] found an old BBC Master Compact computer for $15. The only problem is the computer didn’t have a keyboard. It’s not a problem if you can make a keyboard out of an old breadboard. It’s not a Model M, but it works.

Emergency ribbon cable repair

[Thomas] works in a hospital. One night, a piece of equipment went down because of a bad ribbon cable. Doctors were yelling at him to get the equipment up and running so out of frustration, he took stapler to the cable. It held up until a replacement arrived. Check out these pics: one and two.

Nobody remembers Little Nemo: Adventures in Slumberland

Here’s [Alan]’s gigantic Nautilus art car with a huge mechanical iris. Just watch the video and be amazed. We won’t hazard a guess as to how much money went into all that brass and copper, but we can confirm an Arduino controls the iris. Check out the build page.

Light up street art

[Grissini] put up an instructable for a light box that displays [Bansky] street art. We’d go with some RGB leds and a [Keith Haring] motif, but more power to ya.

A theater wind machine

This wind machine was built by [Willaim] for his High School’s choir concert. It’s basically a concrete form tube with plastic lids taped on and a piece of pipe serving as an axle. The machine makes a wind noise with the help of some nylon pants.