More POV Fan Message Hacking

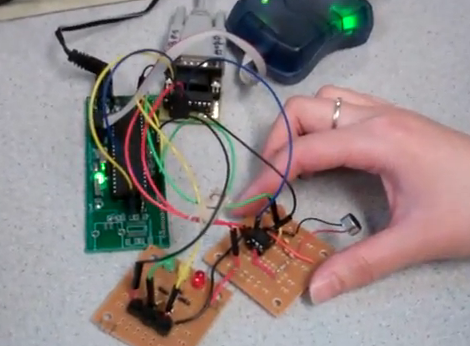
[Zach’s] company is all about the safety and to reinforce those ideals they handed out POV display fans to each employee. “Being Safe is Cool”, get it? Gimmicky… yes, but now [Zach’s] got a tiny little POV fan to hack. Although he may not have known it, this isn’t the first time we’ve seen this hardware. These fans were handed out as a promotion at Black Hat a couple of years ago and prompted some reverse engineering action. The message is stored on an EEPROM and there’s even a female programming header that makes it easy to write reflash it with your own messages if you know how to craft the data.

This is where the two products diverge. The older project uses a serial connection and PonyProg to dump and data. [Zach] first tried using his Bus Pirate to dump the data but after having no success he grabbed his Arduino and managed to get the job done. Once the message encoding protocol was worked out, he wrote a sketch to flash the EEPROM. So if you can get your hands on one of these the work has already been done. See [Zach’s] custom messages in the video after the break.

But we’d like to see this taken to the next level. How about a wall-mounted device that waits for something, like an incoming email or tweet, then spins up the fan to display it?

Continue reading “More POV Fan Message Hacking”

Vowel Recognition Using An ATmega644

[Youchun Zhang] and [Annie (Wei) Dai] found a way to differentiate vowel sounds using an ATmega644 as their final project for a microcontroller design class. Voice recognition is not out of the ordinary, but most of the time it uses a computer, smart phone, or specially designed hardware. This implementation uses an ATmega644, a microphone connected via an op-amp, and a few buttons. In the demonstration after the break you’ll see that they’re outputting status data to Putty via an RS232 connection, but that’s just so you can see what’s going on inside the chip. It’s what’s doing all of the hard work.

In order to tell the difference between vowels, the waveforms of each sound were analyzed using MATLAB during the research phase. That analysis allowed the team to assemble data for each sound that contained the peaks least often found in the other sounds. Now the microcontroller analyzes incoming sound, comparing it to that data set. The analysis is snappy, happening in real-time thanks to the team’s use of the Fast Walsh Transform. It turns the sound into a set of square waves and presents them as a 64 bit sample. The result can be used as a password protection scheme, but as far as we can tell this doesn’t key to just one person, anyone who knows the vowels of the password can use it.

Continue reading “Vowel Recognition Using An ATmega644”

Making Oscilloscopes From ARM Development Boards

If you’ve got an ARM development board gathering dust in the corner of your shop, perhaps you could repurpose it as an oscilloscope. [Arend-Paul Spijkerman] was able to use an mbed and LPCXpresso as the hardware end of an oscilloscope. He didn’t use a standalone screen as a display, instead opting to push the scope readings from the hardware to a computer for display. This was greatly simplified by using StampDock as a basis for the GUI.

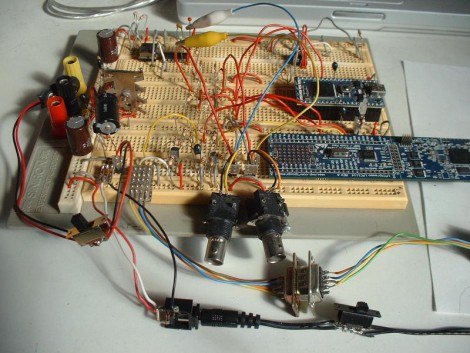
His circuit diagrams calls for an RS-232 connection for the LPCXpresso but not for the mbed. We’re not quite familiar enough with the mbed to know why, but perhaps those in the know can clue us in by leaving a comment. The probe connections are quite simple, each made up of a voltage divider and a pair of diodes. But the breadboard above looks much busier because it has two oscilloscope circuits built on it, and there’s a 10 MHz clock and a 4040 ripple counter which were used to provide a test signal.

Milling Curves Into Mirrors And Glass

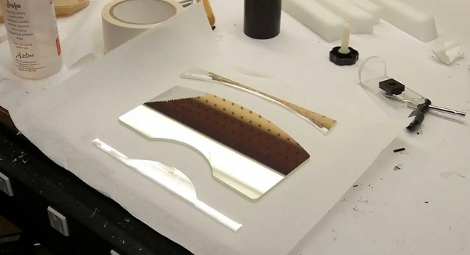
[Ben Krasnow] is working on  a project that uses an extremely expensive specialty mirror. He needed to cut curves into it, taking care not to chip or shatter the material. He’s found a reliable way of doing this with a CNC mill and is sharing his methods.

The material he’s working with is a cold mirror; it reflects visible light while allowing infrared light to pass through. He had to custom order it, breakage is not acceptable. [Ben] explains that the biggest risk when milling glass is the clamping method used. He built his own jig and uses shims, rather than clamps, to secure the material along the X and Y axes. It is held down on the Z axis using a bar of acrylic spanning from one side to the other with rubber feet on the bottom.

A diamond burr cutter does the work, spinning at 3000 RPM. [Ben] recommends moving the head at the slowest rate possible in order to give the cutter time to do its work. And of course the material needs to be kept cool by pumping cutting fluid across it. As he shows in the video after the break, what you get is a piece of glass that comes out with clean and smooth edges.

In case we’ve sparked your curiosity, this mirror will be used during an MRI scan. The patient looks at a monitor reflected in the mirror at a 45 degree angle. At the same time, an infrared camera records the patient from the other side of the mirror to monitor where they are looking.

Continue reading “Milling Curves Into Mirrors And Glass”

Go Ahead, Let The Kids Play With Your Digital Camera… After Some Additions

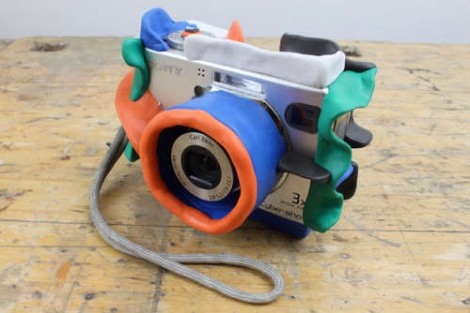
Would you throw this camera around on pavement and trust that it wouldn’t get broken? We have a hard time believing it too, but that’s exactly what happens in the video after the break. The colorful add-ons are pieces of Sugru creatively positioned to help protect the camera. From what we’ve seen this adds quite a bit of shock absorption, letting the normally delicate hardware bounce and roll. After all, the stuff is made from Silicone.

It doesn’t look like the protection is meant to be removed from the camera, although we have seen Sugru used for that in the past so this method may be adaptable. A mistake was made during the project which prevented to battery compartment from being opened but it turns out you can peel the stuff of the camera later on, so this isn’t a completely permanent transformation.

We’d wager the camera component to be most concerned with is the LCD screen. We’ve got one that cracked without any plausible cause to point to. But if you’re just reinforcing the device to hand to your kids, who cares if the LCD doesn’t work? It kind of makes it like a film camera again if you have to take all the pictures and then wait to use a computer to “develop them”.

Don’t forget, if you don’t have Sugru on hand you can try mixing your own.

Continue reading “Go Ahead, Let The Kids Play With Your Digital Camera… After Some Additions”

Paddle Controller For GPU Overclocking

[Fred] likes to squeeze every cycle possible out of his graphics card. But sometimes pushing the clock speed too high causes corruption. He figured out a way to turn a knob to adjust the clock speed while your applications are still running.

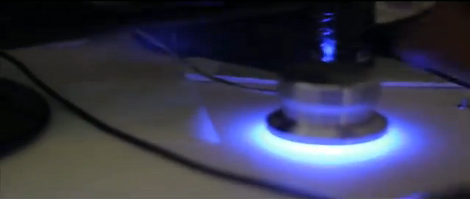
The actuator seen above is a Griffin Powermate 3.0. It’s a USB peripheral which is meant to be used for anything you can imagine. [Fred] uses an AutoHotKey script that he wrote to capture the input from the spinner, process that information, then adjust GPU clock speed in the background. Since the clock on his ATi Radeon 5800 can be adjusted using the AMD GPU clock tool, it’s an easy choice for this application. Now better graphics are at the tips of his fingers. See for yourself in the video after the break.

Of course if you don’t want to shell out for the fancy hardware you could always build your own paddle controller.

Continue reading “Paddle Controller For GPU Overclocking”

More FrankenKindle Progress

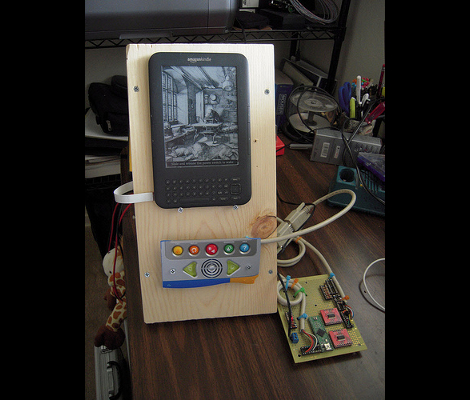
[Glenn] sent us an update on his FrankenKindle project. You might remember this hack from back in July. [Glenn] is modding the device to make it easier for his sister, who has Cerebral Palsy, to use.

The latest revision adds a case for the hardware. The silver button pad is what remains of the V.Reader (a children’s toy), having had the screen portion hacked off. The case provides a stable base for the reader and buttons, holding them at a nice angle for easy use. There’s just a bit of cable routing that needs to be finished to protect some fragile connections. The picture above does show the circuit board to the side, but there is a place for it around back.

In the video after the break [Glenn] mentions that the response to keypresses is a little sluggish. Sure, some of this is Kindle’s own delay when refreshing the ePaper display. But we can’t help but think the code running on the Teensy could also be optimized. We’ve asked him to post his code if he wants some tips, so check back and help out if you can.

We do have one feature suggestion for him. The Kindle keyboard no longer functions because that flat cable coming out the side is what connects to it. It’s quite easy to add a PS/2 keyboard port to a microcontroller. That would be a nice addition to the FrankenKindle as it would make things like shopping for books a bit easier.

Continue reading “More FrankenKindle Progress”