Antique Light Bulb Organ

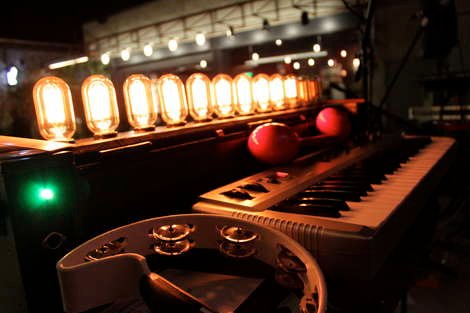
Add a retro light show to any MIDI instrument with this Antique Light Bulb Organ, twelve 30 watt antique style light bulbs correspond with the 12 notes in an octave with a simple on or off action. The organ is also monitoring the pedals, so the lights will stay on as you use the sustain. Add in the natural slow reaction time of a light bulb and the effect is quite nice.

Along with MIDI instruments , you can also connect to a PC via USB allowing for remote control either with MIDI or OSC. On the hardware end there is a Atmega324P board that handles communication, user input and of course the lights. To switch the 120v AC current required by the lights twelve Sharp PR36MF22NSZF isolated solid state relays were wired up to some screw down light sockets also fitting the retro theme.

Lastly everything is placed in a nice fold up wooden cabinet, perfect for those long road trips to prevent breakage, but it also makes a nice place to put your keyboard while on stage.

Join us after the break for a quick music video that features this good looking light organ.

Continue reading “Antique Light Bulb Organ”

Bubble Display

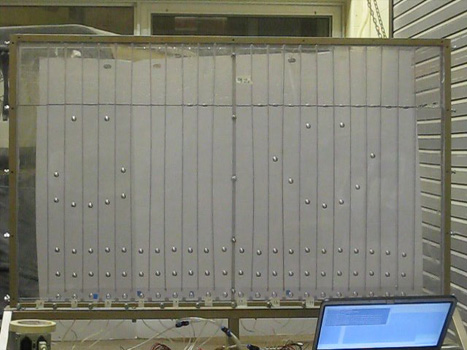
As hackers we have come up with some pretty wild and unique ways to display data, but that never stops us from creating even wilder ways such as this Bubble Display. Inspired by a Hackaday article called Liquid Display the bubble display started out as a one column lexan tank so the team could check out different liquids, and build methods, which gave them the opportunity to test out their wet/dry vacuum in the basement as well.

After the leaks were solved in the prototype, different fluids were tried out to see what would work best,  glycerine (though the most expensive out of the 3 items tested) gave the best performance in how the bubbles rose to the top, and the uniformity of each individual bubble.

The final tank design features (24?) channels to keep bubbles from interacting with each other and are fitted with some Parker A005-C23-2P pneumatic valves hooked up to a standard air compressor. Electrically it’s pretty standard, with the solinoid driver stuff all run by a PIC18F4455 clocked at 48MHz.

Software wise the device has 3 modes, one mode allows users to enter text or simple bitmaps from a computer using a homebrew GUI written in Visual Basic, there is also a demo loop for when you still want to show it off, but there is not someone there to constantly bang data into it, and finally a live keyboard mode which acts as a bubble music visualizer when there is a keyboard connected via MIDI. Check all 3 out in a short video after the break.

Continue reading “Bubble Display”

Lower Cost Arduino Cell Shield

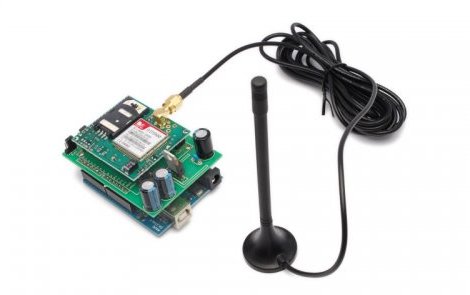
People love putting their Arduinos in interesting and remote places. while it may be possible, it may not be practical to run out and collect data from the devices. That is where this GSM / GPRS shield comes in handy.

Based around the SIMCom SIM900 that puts this device on the lower end of the price scale, (49 Euro for the module, ~60 Euro for the module mounted on a breakout board, or around 85 greenbacks) makes this module an interesting target for anyone wanting to add cell phone connectivity to a project.

To take this a step further [Boris] whipped up a nice shield PCB for the Arduino and Arduino like footprint users to make connections between the 900’s breakout board and the Arduino layout a snap. Electrically its just wires, and a LM317.

Video Experimenter Shield

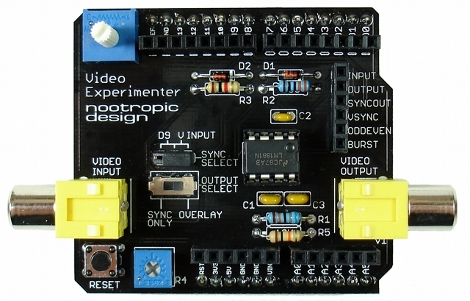
People always want to do more with less and the Video Experimenter Shield is no exception. Consisting of an LM1881 video sync separator, a handful of passive components, and a stylish PCB in the standard Arduino shield footprint.

The board features simple but useful controls and features, a removable jumper allows you to select a sync source, either from incoming video or the Arduino, a potentiometer to adjust the analog threshold, and there is a convenient signal breakout header.

Software is an enhanced version of the popular TV out library and allows you to start off with video graphics overlay, closed caption decoding, a simple gun game, and basic, but still effective frame capture, and computer vision. Of course, there are all sorts of other fun and amusing experiments that start to pop in mind once you check out a quick demo video after the break.

Continue reading “Video Experimenter Shield”

Virtual Serial Bridge

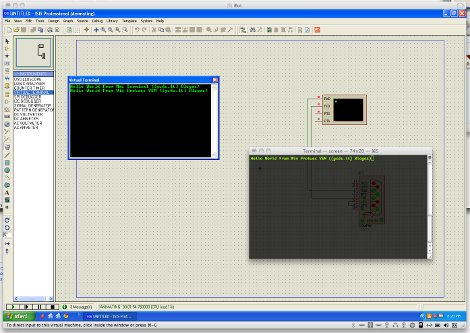
When you are running emulators or virtual machines it may be sometimes handy to be able to connect a serial port from the guest machine to the host machine. [Aurimas] had that issue, and also had a fun fix for that using 2 USB <> Serial adapters, but as you can imagine that is not a ideal solution, enter the Virtual Serial Bridge.

Digging around Vmware it was found that the support for what he needed was there, but not really used. A little addition of a few lines to the guest OS vmx file and configuring the socat multipurpose relay package. Though the instructions revolve around the Mac platform as the host and Windows as the guest socat and Vmware you can probably mix it up with any software that uses the serial port and a *x or windows host.

Autonomous Paintball Sentry Gun

What is the best thing about making a computer program that targets and kills anything that enters its sight? Why giving it a weapon, of course! No, we are not talking for real, but the next best thing, an Autonomous Paintball Sentry Gun.

The autonomous part of the device comes from a pc on the sideline and is fed input though a standard webcam. The feed is ran though a processing script where, once accustomed to the background has the option to fire at anything it sees moving, or a nice point n click manual mode.

The Arduino part is in a the role of driving the servo motors for X/Y movement and a trigger and is powered by a fist full of D cell batteries to give plenty of time for fun. Also, be sure to check out our other sentry guns, one using Microchip PIC, and another sporting a super compact computer running Ubuntu

Paper Mechanical Iris

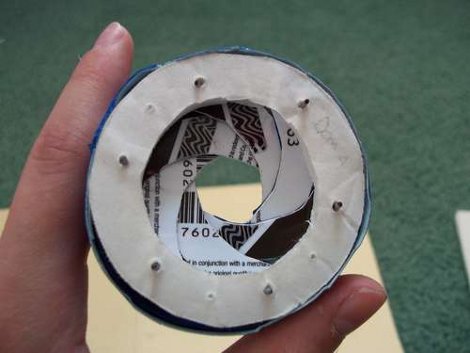
This functioning mechanical irs is made from paper templates, foam core poster board, old credit / gift / etc cards, paper clips and masking tape. First, patterns are designed and multiples are printed and laid out to make the 10 parts needed. Two rings are cut out of foam board and a third ring is cut into wedges to form a cam mechanism on top of one of the other two rings.

Twelve shutters are then cut from the credit cards, and small pieces of paper clip are glued to each end and both sides. One side rides the cam mechanism the other side is punched through the final ring.

We found it to be an interesting project that should be pretty easy for just about anyone to replicate (now that its all figured out for us), and besides, you never know when you might stumble across a small box of hotel key’s with a defunct pizza parlor’s advertisement on the back.