Solar Hot Dog Cooker Does It With Parabolic Mirrors

For a university project [Adam Libert] decided to make his very own parabolic hot dog cooker. Now, we must say, this is a project that could probably be cobbled together in a weekend from scraps, but since it was for a lab, [Adam] decided to go all out — complete with a perfect laser cut frame.

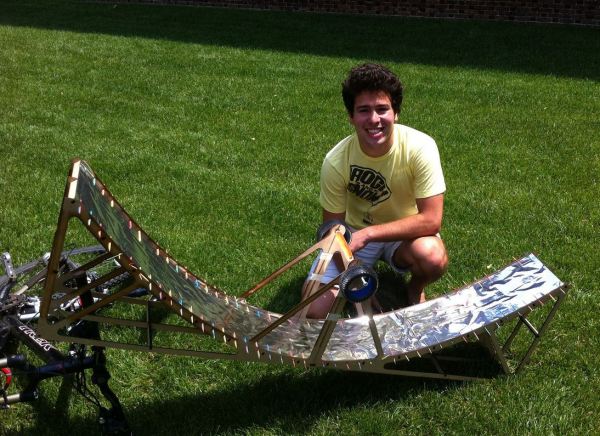
The objective of the lab was to design a project that can use solar radiation to accomplish a task, and being partial to hot dogs, the hot dog cooker was a natural choice. He designed the parabolic mirror to focus 1/5th of a square meter of sunlight directly at a hot dog. To do this, he laser cut the frame out of MDF, and using tinfoil, toothpicks, and poster paper, assembled the mirror. The whole thing cost less than $5 (ignoring laser time) and can be setup in a matter of minutes.

He determined the heat output of the cooker to be around 10W at the hot dog, which means he was able to bring the hot dog to 150°F in about 10 minutes — which was surprisingly close to his original calculations, because let’s face it, tin foil is hardly an ideal mirror.

Interested in other solar cookers? Why not cover a satellite dish in foil tape? Or if you want a quicker-cooked-hot-dog, why not plug it directly into the wall?

Fun With Wooden Balls

DCIM135GOPRO

Have you ever found the need to make your own wooden balls for a project? To be frank, we haven’t either! But seriously — how would you do it? Well, lucky for us, Hackaday Alum [Jeremy Cook] has experimented with a few different methods.

He was originally inspired by this video from [Philip Stephens] who makes them completely by hand using a hand-made hole saw. Not wanting to spend hours making a ball, he thought about ways to automate it — well, kind of.

His first attempt was to use a mill and a rudimentary rotary index table consisting of a wood clamp — Hold a wooden dowel in place, hole saw halfway through, rotate in the clamp, repeat times infinity. Eventually you’ll be left with a wooden ball whose sharp edges you can just break off. Not very satisfied with this method, he discovered a Reddit thread on making wooden balls with a rather ingenious method… Stick around after the break to see how.

Continue reading “Fun With Wooden Balls”

All-Terrain RC Car Has More Torque Than Your Grandpa’s Wheelchair

20131225_123421

[Charles] and his brother have been members of their school’s FIRST robotics team for many years, and using some of the knowledge they acquired during it, they have put together this awesome all-terrain, super over-powered, RC car — and soon to be robot.

It’s built like a tank using 1″ square steel tubing and custom corner brackets made of 1/8″ thick steel. Heavy duty U-bolts hold the over-sized 5/8″ axles, and everything is driven using #35 roller chain. A large 12V sealed lead acid battery powers two CIMs (FIRST Robotics motor) with the AndyMark CIMple gearbox — these give the car tons of torque, and it can even do wheelies!

The really cool part of this project is the method of remote control. He’s using a regular old Xbox controller that an Arduino Uno listens to through a USB host shield and the original Xbox USB receiver. Simple, but totally effective.

The project is not yet complete, and he’s planning on fully equipping it with lights, a larger battery, a roll-cage, a camera system, and some kind of manipulator tool. Check out the test drive video after the break!

Continue reading “All-Terrain RC Car Has More Torque Than Your Grandpa’s Wheelchair”

Capacitance Measurement With The Arduino Uno

CapTestBoard1

Have you ever found the need to measure the capacitance of a capacitor? No multimeter handy (for shame)? Well, as it turns out you can actually measure capacitance using your Arduino Uno, with no external components, and only ~20 lines of code.

[Jonathan Nethercott] does an excellent job explaining a capacitance test circuit which uses a reference capacitor to calculate the unknown capacitance. He further explains that, with the Arduino Uno, you can remove the reference capacitor from the circuit, and simply use the stray capacitance present in the board and microcontroller, which can be calculated. This results in the test circuit being as simple as plugging in your capacitor to pins A0 and A2. Continue reading “Capacitance Measurement With The Arduino Uno”

Snapchat Person Verification Defeated In <100 Lines Of Code

out

[Steven Hickson] woke up this morning to an article about the new person verification system Snapchat has implemented. Thirty minutes later he cracked it to be solved by a computer, in less than 100 lines of code (GitHub).

First a little background. About a month ago, 4.6 million Snapchat users had their information compromised by a security hole. In an attempt to bump up security, Snapchat has implemented a new person verification method to ensure new accounts aren’t created by computers.

The method? Picking out a white ghost from a series of nine images. Kind of like a cute, less annoying Captcha. The problem? It’s a terrible way to prove you are a person. It took [Steven] only 30 minutes to write a program that uses simple thresholding, SURF keypoints and FLANN matching to find the ghost. In his tests, he’s found the ghost with 100% accuracy. He also muses that there is an even more efficient way to do it, he was just too lazy to do it.

Nice try Snapchat.

Interactive Globe Is Awesome For Google Earth

projector

Time to brush up on your Portuguese if you want to learn how to build your own interactive globe! Or we guess we could use Google translate…

This project was originally presented at Campus Party 2012: an annual, week-long technology festival running 24 hours a day that features LAN parties, a hackathon, conferences, and more. It all started back in 1997 in Madrid, Spain. Today, there are now Campus Parties being held in Brazil, Colombia, Mexico, the USA, Ecuador, and Germany.

The team that created it—[Araujo, Barmak, Teo, Duprat, and Silva]—has now decided to give back to the community and share a tutorial on how make your very own. The globe uses a short throw projector, a mirror, a series of infrared lights, a modified PS3 Eye camera, and an acrylic dome with projector screen paint on the inside. The touchscreen works by the IR light being reflected off of your hand on contact, which is then picked up by the PS3 Eye camera that has had its IR filter removed.

Unless you can find a suitable acrylic dome, it is, unfortunately, rather expensive to make. They had to have one manufactured. Stick around after the break to see how it works!

Continue reading “Interactive Globe Is Awesome For Google Earth”

Make Me A Drink, Drinkmo.

[Cabe Atwell’s] latest project is a work of art. Let us introduce the Drinkmotizer: a Raspberry Pi Drink Mixing Robot.

As [Cabe] says, almost every engineer has a drink-mixing robot on their project todo list. We’d probably have to agree; they’re functional, cool, and useful at parties.

You need the Drinkmotizer at your party… At some point, dexterity for drink mixing is lost at a gathering.

Drinkmo is your designated, sober, mixologist.

Your enabler.

Your friend.

Drinkmo works by rotating a long leadscrew that moves the mixing glass from bottle to bottle. The entire setup is made using aluminum extrusion, and is by nature, completely expandable. On the top shelf are gravity fed shot dispensers, controlled by 12VDC car lock actuators. The chaser station (at the end, on the right) works differently. The chaser bottle is actually pressurized by a paintball gun tank and dispensed using a solenoid valve. We hope he’s got a pressure regulator in there, considering the pressure capacity of paintball tanks can range from anywhere from 1000-3000PSI!

The entire system is controlled by a Raspberry Pi running Raspbian, and [Cabe] is using Tkinter for the GUI of the program. He’s got tons of info on the original forum post linked above (including the schematic!), and if you stick around after the break, there’s a very well produced video of Drinkmo in all its glory.

Continue reading “Make Me A Drink, Drinkmo.”