Class Up Your Next Party With The Drink Making Unit 2.0

drink_making_unit_20

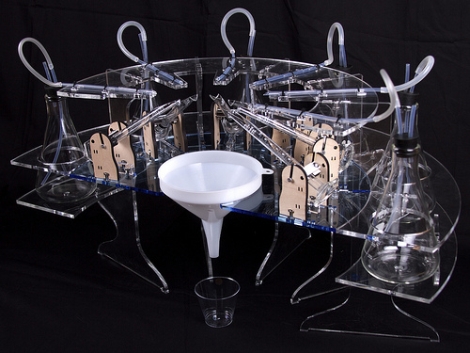
The crew over at [Evil Mad Scientist Laboratories] has been hard at work preparing for the Barbot 2011 cocktail robotic exhibition. This year, they are packing some serious drinking fun with the Drink Making Unit 2.0. The predictably named follow-up to last year’s wildly popular Drink Making Unit doubles the mixing capability with six, rather than three fluids, and provides a visually stimulating drink mixing experience.

While they are similarly named, the new unit has been completely redesigned since last year. No longer are they relying on breast pumps to move the alcohol along. Instead, they are using compressed air to dispense fluids from wash bottles which were constructed from laboratory beakers. The fluids are measured in specially altered graduated cylinders that are designed to tip over and release their contents when the appropriate amount of alcohol has been poured. These cylinders are designed to mimic the movement of Japanese garden fixtures called “deer chasers”, tipping back and forth solely powered by the ingress and egress of liquid.

The dispenser’s control panel houses an ATmega164, which orchestrates the entire operation. It interfaces with the LED driver boards that make up the display via SPI. The micro controller is also tasked with monitoring when the graduated cylinders tip their libations into the dispensing funnel, which is done using IR LEDs and photogates.

It’s a great looking machine, and while there isn’t any drink mixing video as of yet, we can’t wait to see it in action.

DIY Breathalyzer May Be The Hit Of The Party

Okay, this may not be saving any lives, but it makes for a fun novelty at your next rager. Most Breathalyzers aim to keep you from driving when you’ve had too many. The Squidalyzer encourages party-goers to drink more and more by treating a high blood-alcohol-content with great fanfare. An Arduino, a gas sensor, and Processing all come together for this hack. A television interface tells you when to blow into a cup which houses the sensor, and gives a reading of what it measures. Blow higher than the last guy and you’ll break the record. Watch the demo after the break to see the fun [Geoff] had with it. And remember, friends don’t let friends solder drunk.

Continue reading “DIY Breathalyzer May Be The Hit Of The Party”

Audio Controlled Party Lights

[Thibault Brevet] wanted his own party lighting that pulsed and faded along with the tunes. He ended up building a system based on an Arduino and a PC running Processing. The output from a mixing board is fed into a PC and measured by the Processing script. From there, the calculated light levels are sent to the Arduino to address the LEDs via the control board seen above. [Thibault] built four LED modules that each have two 4-channel LEDs (red, green, blue, white) separated by a few feet. This means 32 PWM signals are necessary to drive the system. To get there, he utilized a pair of TLC5940 16-channel PWM chips, which function like cascading shift registers but have some fantastic current limiting and dot correction features. Take a look at the demo after the break to see what he’s accomplished.

The TLC5940 is a popular choice for driving RGB LEDs, and would be a nice part to use if you decide to make yourself a Ping Pong LED Wall.

Continue reading “Audio Controlled Party Lights”

Build A Confetti Cannon For Your Next Party

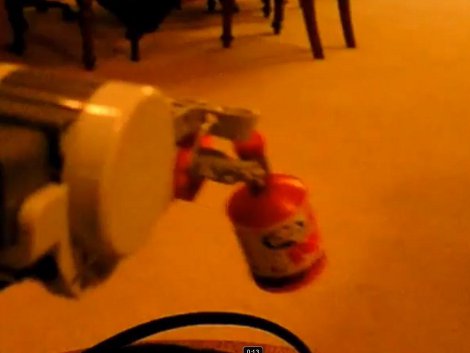
[Scott] built a confetti canon to spice up the party. It’s pneumatic and re-purposes a fire extinguisher as the air tank. He had a refillable extinguisher that used water instead of chemical retardant. After emptying the water and ensuring all of the pressure had been release he swapped the hose and nozzle for a sprinkler solenoid valve. Securing the extinguisher’s actuator lever with a pipe clamp holds the internal valve open, leaving the solenoid to control the pressure release. This way the canon can be fired electronically, or manually.

This type of solenoid valve is a popular choice with pneumatic canons. We suppose you could even adapt this for use as a T-shirt cannon.

[Thanks BoBeR182]

2010 Ninja Party Badge

Wired took a look at this year’s Ninja Party badges. We were giddy about all the goodies involved in last year’s must-have badge that served as an invitation to the party. It was tailor-made for hacking, including an on-board disassembler. This year’s details are still a bit sparse but the offering is more along the lines of a market-ready product. The badges come in hand held gaming format, with a d-pad and two buttons. They can connect wirelessly with each other and with hidden base stations, allowing participants to fight in the digital realm for LED-indicated achievements. The teaser is tantalizing and we can’t wait to hear details about the real/digital gaming adventure soon to unfold.

New Year’s Party Favor?

[Infernoz] built a POV display to help ring in the new year. There is a low component count; an ATtiny26, DIP switch, power switch, CR2032 battery and holder, pin header, 8 LEDs, and a pull-up resistor. The board is single sided without any jumpers that we can see. He’s moving the display by swinging it on a rope but the PCB is the perfect shape to attach to a fan. We love these blinky displays and if you’ve got some parts this makes a great party favor for New Year’s Eve. Check out the video after the break.

Continue reading “New Year’s Party Favor?”

Ninja Networks Party Badge

ninjabadge

UPDATE: The director’s cut of the story

While coverage of the official Defcon badge has been pretty heavy, there was a badge that was far more exclusive and talked about way more. For the last ten years at Defcon a group of hackers known as Ninja Networks hosted an invitation-only party for selected attendees. For the 2009 event, [cstone] and [w0z] created an electronic badge which acted as the ticket to the party. The badge is based around an 8-bit Freescale microcontroller (MC9S08QE8) which drives 10 individual 16-segment HIOX-format LED displays. Continue reading “Ninja Networks Party Badge”