Long Exposure Thermal Photography

For apparently inexplicable reasons, the price of thermal imaging cameras has been dropping precipitously over the last few years, but there are still cool things you can do with infrared temperature sensors.

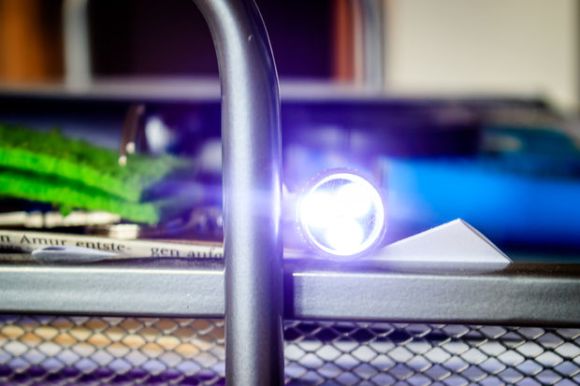
A few years ago – and while he was still writing for us – [Jeremy] came across an absurdly clever thermal imaging camera. Instead of expensive silicon, this thermal camera uses a flashlight with an RGB LED, a cheap IR temperature sensor, and a camera set up to take long exposures. By shining this flashlight/IR sensor around a dark room, a camera with a wide-open shutter can record color-coded thermal images of just about anything.

Since then, an interesting product appeared on the market. It’s the Black & Decker TLD100 Thermal Leak Detector, and it’s basically an infrared thermometer and LED flashlight stuffed into one neat package. In other words, it’s the exact same thing we saw two years ago. We’d like to thank at least one Black & Decker engineer for their readership.

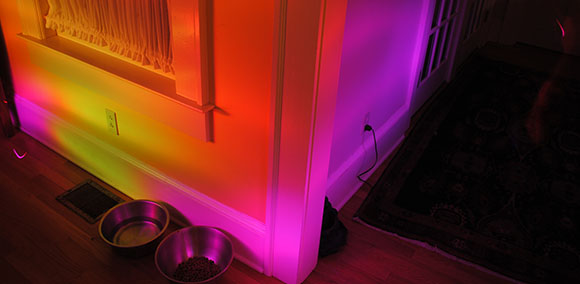
[Jeremy] took this cheap, off-the-shelf leak detector and did what anyone would do after realizing where the idea behind it came from. He set up his camera, turned off the lights, and opened the shutter of his camera. The results, like the original post, don’t offer the same thermal resolution as a real thermal camera. That doesn’t mean it’s still not a great idea, though.

Making Manual Lens Flares With A Few Simple Parts

DIY Lens Flare

If you’re an aspiring film maker hoping to be the next [J.J. Abram] with a mild (severe?) obsession with lens flares, then this Instructable is for you!

Modern camera lenses are designed to prevent lens flare, but sometimes, just sometimes, you want a cool lighting flare in your video. Of course you could add them in post production, but that’s kind of cheating, and if you don’t have expensive video editing software, not very easy to do either.

Now you could just throw a super bright LED flashlight on set and hope for the best, but you’ll never get that cool Star Wars or Star Trek blinding purple line… unless you add something on your camera to help scatter the light! [Jana Marie] has figured out just how to do that. Continue reading “Making Manual Lens Flares With A Few Simple Parts”

HackPrinceton: Piano Stairs!

princeton piano

It was Hack.Princeton this weekend and [Bonnie] and [Erica] threw together this great interactive portable piano!

The setup is very simple using six LED flashlights, and six photoresistors. An Arduino Uno reads in the values from the photoresistors and parses them to a nearby Raspberry Pi which then creates the sounds. The system even automatically calibrates itself when turned on, adjusting to the ambient light conditions. They made the project for the Hackathon and after a short scare of having to move it to another staircase for the demo, they took home 2nd place in the hardware category!

Stick around after the break to see it in action — this would make a great school project to get kids interested in hacking!

Continue reading “HackPrinceton: Piano Stairs!”

Use Your Smartphone As A Microscope For Less Than $10

FY4TBHSHMMFBB4V.LARGE[Yoshinok] recently posted an Instructable on doing a $10 smartphone-to-microscope conversion. The hack isn’t so much a conversion as just a handy jig, but it’s still interesting. The basic idea is to set up a platform for the slides, and to mount the smartphone directly above. The trick, and the reason this can be called a microscope, is that [Yoshinok] embeds the lens from a cheap laser pointer into the smartphone holder. He is able to get 40x optical magnification with the lens, and even though it sacrifices quality, he uses the built-in digital zoom to get up to 175x magnification.

By itself, you could use this with a light source to magnify 3D objects. [Yoshinok] demonstrates this with a dime. But since the slide holder is made of clear acrylic, he mounted a cheap LED flashlight in the base to serve as through-sample lighting. Using this setup, he was able to observe the process of plasmolysis.

If you have kids, this is certainly a project to do with them, but we can’t help but think it will be useful for non-parents alike. This sort of magnification is good enough for simple lab experiments, and given that most Hack-a-Day readers have these parts lying around, we figure the cost is closer to $0. If you give it a try, let us know your results in the comments!

Continue reading “Use Your Smartphone As A Microscope For Less Than $10”

An Absurdly Clever Thermal Imaging Camera

Thermal imaging cameras, cameras able to measure the temperature of an object while taking a picture, are amazingly expensive. For the price of a new car, you can pick up one of these infrared cameras and check out where the drafts are in your house. [Max Justicz] thought he could do better than even professional-level thermal imaging cameras and came up with an absurdly clever DIY infrared camera.

While thermal imaging cameras – even inexpensive homebrew ones – have an infrared sensor that works a lot like a camera CCD, there is a cheaper alternative. Non-contact infrared thermometers can be had for $20, the only downside being they measure a single point and not multiple areas like their more expensive brethren. [Max] had the idea of using one of these thermometers along with a few RGB LEDs to paint different colors of light around a scene in response to the temperature detected by an infrared thermometer sensor.

To turn his idea into a usable tool, [Max] picked up an LED flashlight and saved the existing LED array for another day. After stuffing the guts of the flashlight with a few RGB LEDs, he added the infrared thermometer sensor and an Arduino to change the color of the LED in response to the temperature given by the sensor.

After that, it’s a simple matter of light painting. [Max] took a camera, left the shutter open, and used his RGB thermometer flashlight to paint a scene with multicolor LEDs representing the temperature sensed by the infrared thermometer. It’s an amazingly clever hack, and an implementation so simple we’re surprised we haven’t seen before.

Musical Light Show Is Far Less Complex Than You Might Think

color-changing-light-tube

[Matt and Jason Tardy], who make up the musical performance duo known as AudioBody, were recently featured on Make: explaining how they put on one of their trademark segments. The most popular portion of their show features color changing tubes of light which the pair spin and fling around not unlike a higher-tech version of the Blue Man Group. While the visuals are pretty slick, the technique behind it is far simpler than most people initially imagine.

As you can see in video below, the tubes look to be nothing more than simple white lights. As the brothers work through their performance however, the tubes switch from white to blue and back again with a liquid-like transition between the colors.

The [Tardys] say that most people peg a microcontroller or other complex electronics as the source of their light wizardry, but the real answer is much simpler. Embedded in the end of each tube is a bright LED flashlight. A sliding blue filter positioned inside the tube provides the silky smooth transition between colors – no fancy electronics required.

If you would like to see how they were built, be sure to swing by the AudioBody web site for a how-to presentation by the [Tardys] themselves.

Continue reading “Musical Light Show Is Far Less Complex Than You Might Think”

Supercap Lights Your Way In Times Of Need

You won’t find [Antoine] stumbling around in the dark. He just finished working on this LED flashlight which draws power from a super-capacitor (translated). He realized that lighting a high-efficiency LED takes so little power that there are many benefits in play when deciding to move away from batteries. When compared to a super capacitor, batteries have a shorter life span, are heavier, and take up more space.

The biggest drawback of a super capacitor in this situation is the low voltage operation. The output will start at 2.7V and drop as the current is discharged. [Antoine] used one of our favorite simple circuits to overcome this issue, the Joule Thief. That circuit is commonly seen paired with an LED in order to boost input voltage to a usable level. That’s precisely what’s going on here.

The final hack in his circuit is the addition of that red LED which you can see in the middle of the board. This takes the place of a Zener diode and drops the charging voltage to a safe level. That indicator light will not come on until the cap is fully topped off. This way it tells you when the device is done charging.